Wondershare Filmora is an elegant solution that opens up the world of video editing to both novices and professionals.
Its intuitive interface, rich feature set, and powerful capabilities are all you need to create captivating videos.
Let's delve into the process of using Filmora to unlock your creative potential.
How to Buy Filmora Video Editor
Buying Filmora Video Editor using our links helps support this blog and the work we do here.
We only promote software we like & believe in, and we think Filmora Video Editor is ⭐⭐⭐⭐⭐
Using the link below gets you the best deal possible!
Learn More About Filmora Video Editor Today!Table of Contents

Downloading and Installing Filmora
Dive right into the world of video editing by downloading Filmora.
Navigate to the official Wondershare Filmora website, select the "Try It Free" option, and follow the instructions to download the software.
Once downloaded, launch the installer and follow the prompts to complete the installation.

Understanding the User Interface
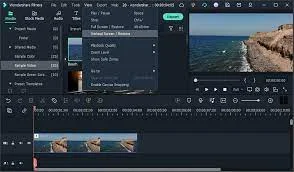
Opening Filmora presents a modern and intuitive interface.
It's split into several sections: the media library, timeline, and preview window.
The media library holds your video clips, audio files, and images.
The timeline is where you arrange these elements to create your video.
The preview window lets you watch your video as it develops.

Importing Media Files
To import media files into Filmora, click on the "Import" button in the media library.
Navigate to the location of your files, select them, and click "Open".
The files will appear in the media library, ready to be used in your project.

Editing Basics: Cutting, Trimming, and Splitting Clips
To begin editing, drag and drop your video clips onto the timeline.
You can cut a clip by positioning the playhead where you want the cut, right-clicking on the clip, and selecting "Cut".
To trim a clip, position your cursor at the beginning or end of the clip until it changes to a bracket.
Click and drag to trim.
To split a clip into two, position the playhead where you want the split, right-click on the clip, and select "Split".

Adding Transitions and Effects
Filmora provides a ton of transitions and effects to enhance your video.
To add a transition, click on the "Transitions" tab, select a transition, and drag it to the point between two clips on the timeline.
To add an effect, click on the "Effects" tab, select an effect, and drag it onto a clip.

Enhancing Audio
Good audio is crucial for a compelling video.
In Filmora, you can adjust the volume of a clip by right-clicking on it and selecting "Adjust Audio".
For more advanced audio editing, like removing background noise or adding echo, navigate to the "Audio" tab.
Adding Text and Titles
Adding text and titles is a breeze in Filmora.
Click on the "Titles" tab, select a template, and drag it onto the timeline.
Double-click on the title in the timeline to edit the text, font, color, and more.
Exporting Your Video
Once you're satisfied with your video, it's time to export it.
Click on the "Export" button, select your desired format, resolution, and location, and click "Export".
Filmora will render your video and save it to your chosen location.

Latest AI Features in Filmora
AI Audio Stretch: Automatically extends an audio track to match video duration. It seamlessly creates a loop, enhancing audio continuity.
AI Audio Denoise: This feature reduces background noise in recordings. It results in cleaner and clearer audio streams.
AI Smart Cutout: Enables quick removal of backgrounds, people, and objects. It eliminates the need for green screens for background isolation.
Speech-to-Text Conversion: Automatically generates subtitles from voice recordings. This tool simplifies adding accurate subtitles to videos.
Text-to-Speech Conversion: Converts text into voice narration. It's useful for adding commentary or narration without a voice actor.
Auto Sync: Ensures perfect synchronization of audio and video. This feature is crucial for polished and professional video outputs.
Silence Detection: Automatically detects and cuts sections without sound. It streamlines the editing process, especially for dialogue-heavy videos.
Using Filmora Frequently Asked Questions
What Formats Does Filmora Support?
Filmora supports a wide range of formats, including MP4, AVI, MOV, GIF, MP3, and many others. This makes it easy to work with a variety of media files.
Can I Use Filmora on Multiple Devices?
Yes, Filmora supports multi-device usage. You can install it on your computer at home and on your laptop for on-the-go editing.
Is There a Free Version of Filmora?
Filmora offers a free trial version with all the functionalities of the full version. However, exported videos in the free version will have a watermark.
Can I Remove the Watermark in Filmora?
To remove the watermark, you need to purchase the full version of Filmora.
How Can I Speed Up or Slow Down a Clip in Filmora?
To adjust the speed of a clip, right-click on it in the timeline and select "Speed and Duration". You can then adjust the speed as you wish.
Can I Use Green Screen in Filmora?
Yes, Filmora supports green screen (or chroma key) functionality. This feature lets you change the background of your video to anything you want.
What Types of Transitions Does Filmora Offer?
Filmora offers a wide variety of transitions, including wipes, fades, zooms, and more. These help smoothly connect different parts of your video.
How Do I Add Subtitles in Filmora?
To add subtitles, go to the "Titles" tab, select the "Subtitles" category, and drag your preferred subtitle style onto the timeline.
How Do I Remove Background Noise in Filmora?
To remove background noise, right-click on the audio clip in the timeline and select "Audio Detach". Then, click on the detached audio, go to the "Audio" tab, and adjust the noise reduction settings.
Can I Export Videos in 4K in Filmora?
Yes, Filmora supports exporting videos in 4K resolution, allowing you to produce high-quality content.

About the Author
Joseph Nilo has been working professionally in all aspects of audio and video production for over twenty years. His day-to-day work finds him working as a video editor, 2D and 3D motion graphics designer, voiceover artist and audio engineer, and colorist for corporate projects and feature films.
Video Editing Related Posts
Adobe Creative Cloud for Video Editing
Top 10 Video Editing Software for Mac
The Benefits of Dual-Monitor Setups for Video Editing
How to Choose the Right Video Editing Monitor for Your Needs
Best Monitors for Video Editing
Best Video Editing Software in 2023
Best Mac for Video Editing in 2023
(Almost) 50 Mistakes Every New Video Producer Makes
Breakthrough AI Tools: Elevate Your Video Production Game!
- How To Buy Filmora Video Editor
- Downloading And Installing Filmora
- Understanding The User Interface
- Importing Media Files
- Editing Basics: Cutting, Trimming, And Splitting Clips
- Adding Transitions And Effects
- Enhancing Audio
- Adding Text And Titles
- Exporting Your Video
- Latest AI Features In Filmora
Video Editing Related Posts
Adobe Creative Cloud for Video Editing
Top 10 Video Editing Software for Mac
The Benefits of Dual-Monitor Setups for Video Editing
How to Choose the Right Video Editing Monitor for Your Needs
Best Monitors for Video Editing
Best Video Editing Software in 2023
Best Mac for Video Editing in 2023
(Almost) 50 Mistakes Every New Video Producer Makes
Breakthrough AI Tools: Elevate Your Video Production Game!
