Introduction to Movavi Video Editor
Movavi Video Editor is a user-friendly video editing software designed for beginners and professionals alike.
This guide will walk you through the process of getting started with Movavi Video Editor, covering everything from installation to exporting your final video.
By the end of this guide, you’ll be able to create polished and captivating videos using Movavi Video Editor.
TL;DR Quick Review:
Movavi Video Editor stands out as a game-changer in the video editing realm.
I like its intuitive interface, paired with a plethora of innovative features, ensures a seamless learning curve even for beginners.
Coupled with its affordable price point of just $79.95 for a single license, it offers unmatched value for both amateur and professional creators alike.
Table of Contents
- Introduction To Movavi Video Editor
- Step 1: Download And Install Movavi Video Editor
- Step 2: Launch Movavi Video Editor
- Step 3: Import Media Files
- Step 4: Arrange And Edit Clips
- Step 5: Add Titles And Effects
- Step 6: Add Audio
- Step 7: Export Your Video
- How To Use The Latest Features In Movavi Video Editor
Step 1: Download and Install Movavi Video Editor
To get started, you’ll need to download and install Movavi Video Editor on your computer. Visit the official Movavi website and click on the ‘Download for Free’ button.
Follow the on-screen instructions to complete the installation process.
Step 2: Launch Movavi Video Editor
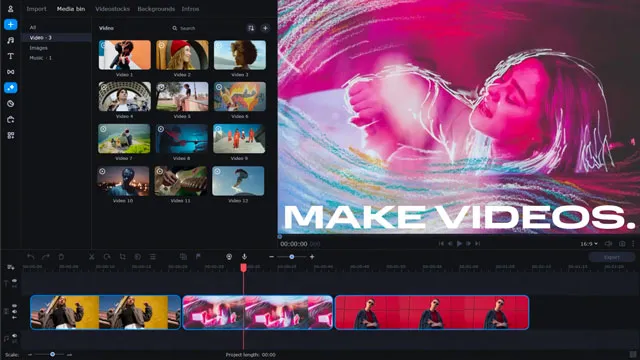
Once the installation is complete, launch Movavi Video Editor by double-clicking the program icon on your desktop or searching for it in your computer’s applications.
Step 3: Import Media Files
To begin editing, you’ll need to** import your media files** (video clips, images, and audio) into the program.
Click on the ‘Add Media Files’ button in the main window and select the files you want to import.
You can also drag and drop files directly into the timeline.
Step 4: Arrange and Edit Clips
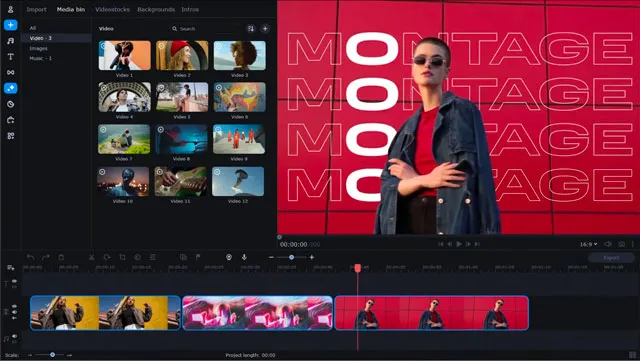
After importing your media files, you can arrange them on the timeline by clicking and dragging them into the desired order.
To edit a clip, click on it to select it and use the various editing tools available in the toolbar.
Some common editing tasks include:
- Splitting a clip: To split a clip, move the playhead to the desired position and click the ‘Split’ button.
- Trimming a clip: To trim a clip, click and drag the edges of the clip in the timeline.
- Adding transitions: To add a transition between two clips, click the ‘Transitions’ tab and drag a transition onto the timeline between the clips.

Step 5: Add Titles and Effects
Movavi Video Editor offers a variety of **titles and effects to enhance your video. **
To add a title, click the ‘Titles’ tab and drag a title template onto the timeline.
Double-click the title on the timeline to edit the text and customize the appearance.
To add an effect, click the ‘Effects’ tab and drag an effect onto a clip in the timeline.
Step 6: Add Audio
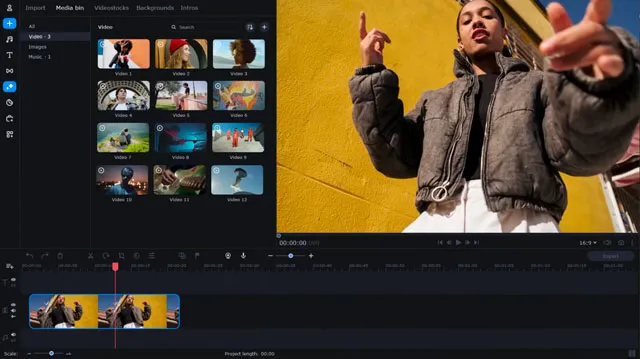
To add background music or a voiceover to your video, click the ‘Add Media Files’ button and import your audio files.
Drag the audio files onto the audio track in the timeline and adjust the volume as needed.
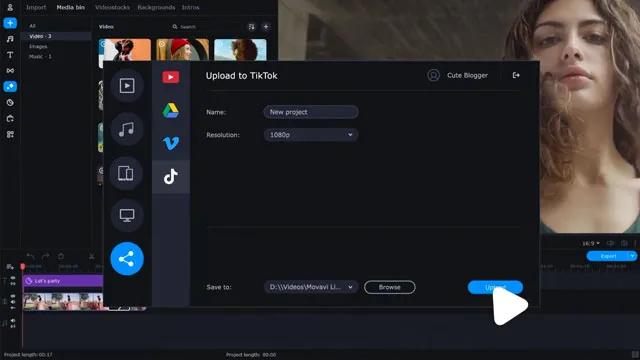
Step 7: Export Your Video
Once you’ve finished editing your video, it’s time to export it.
Click the ‘Export’ button in the top right corner of the program window.
Choose your desired video format, resolution, and quality settings, then click ‘Start’ to begin the export process.
Once the export is complete, you can share your video on social media, upload it to YouTube or TikTok, or save it to your computer.

How to Use the Latest Features in Movavi Video Editor
New Slideshow Wizard Design
- The updated design simplifies creating videos and slideshows.
- To use, open the wizard and follow the intuitive steps for quick creation.
DirectX 12 Hardware Acceleration
- This feature speeds up video exporting.
- Enable it in settings to enhance export performance, especially for large projects.
Revamped Timeline
- The clearer, streamlined timeline aids in faster editing.
- Utilize it by dragging and dropping elements for efficient project assembly.
Blade Tool for Frame-Precise Cuts
- This tool allows for sharp, exact cuts in videos.
- Click on the Blade icon, then click on your video at the desired cut point.
AI Motion Tracking
- Attach photos, videos, or graphics to moving objects in your footage.
- Select the object, then use the AI tool to track and attach your chosen element.
Perfect-Match Overlay Effects
- Each effect offers 13 blending modes.
- Experiment with different modes to find the best fit for your video.
AI Background Removal
- Instantly change backgrounds in your videos.
- Use the AI tool to select and replace the background without needing a green screen.
AI Noise Removal
- Remove unwanted background sounds like wind or traffic.
- Apply the AI denoiser to the audio track to clean up your audio.
Direct Upload to TikTok
- Easily share videos directly to TikTok from the app.
- Use the export option and select TikTok to upload your video quickly.
These features enhance the efficiency and quality of video editing in Movavi, making it suitable for a range of projects from casual to more professional work.

Getting Started with Movavi Video Editor Frequently Asked Questions
What are the system requirements for Movavi Video Editor?
Movavi Video Editor is compatible with Windows and macOS. The minimum system requirements are a 1.5 GHz processor, 512 MB of RAM, and 800 MB of available hard disk space. For optimal performance, a 2.8 GHz processor, 2 GB of RAM, and a dedicated graphics card are recommended.
Can I use Movavi Video Editor for free?
Movavi Video Editor offers a free trial version with limited functionality. To access all features and remove the watermark, you’ll need to purchase a license.
How do I remove the watermark from my video?
To remove the watermark, you’ll need to purchase a license for Movavi Video Editor. Once you’ve activated the program with your license key, the watermark will be removed from any new projects you create.
Can I edit 4K videos with Movavi Video Editor?
Yes, Movavi Video Editor supports editing 4K videos. However, editing 4K videos requires a more powerful computer and may result in slower performance on lower-end systems.
How do I add subtitles to my video?
To add subtitles, click the ‘Titles’ tab and select a subtitle template. Drag the template onto the timeline and double-click it to edit the text. Adjust the duration and position of the subtitle as needed.
Movavi Related Posts:
Discover the Magic of Movavi Video Editor: A Comprehensive Review
Getting Started with Movavi Video Editor: A Step-by-Step Guide for Beginners
Master Movavi: 10 Expert Techniques for Video Editing Success
Powerful Perspectives: Movavi Video Editor vs. Final Cut Pro Revealed
How to Edit 4K Videos Seamlessly with Movavi Video Editor
Elevate Your Videos with Remarkable Transitions in Movavi
The Ultimate Guide to Color Correction in Movavi Video Editor
Breakthrough Movavi Techniques: A New Horizon In Audio Editing
Unlocking Movavi Video Editor: Secrets Of Text & Title Mastery
Accelerate Your Editing Journey: Movavi Tips and Hacks
Discover The Unseen: 5 Rare Features Of Movavi Video Editor
Unlock Steady Footage: A Complete Movavi Video Stabilization Guide
How to Export Videos for Social Media Using Movavi Video Editor
Video Editing Related Posts
Adobe Creative Cloud for Video Editing
Top 10 Video Editing Software for Mac
The Benefits of Dual-Monitor Setups for Video Editing
How to Choose the Right Video Editing Monitor for Your Needs
Best Monitors for Video Editing
Best Video Editing Software in 2023
Best Mac for Video Editing in 2023
(Almost) 50 Mistakes Every New Video Producer Makes
Breakthrough AI Tools: Elevate Your Video Production Game!
- Introduction To Movavi Video Editor
- Step 1: Download And Install Movavi Video Editor
- Step 2: Launch Movavi Video Editor
- Step 3: Import Media Files
- Step 4: Arrange And Edit Clips
- Step 5: Add Titles And Effects
- Step 6: Add Audio
- Step 7: Export Your Video
- How To Use The Latest Features In Movavi Video Editor
Movavi Related Posts:
Discover the Magic of Movavi Video Editor: A Comprehensive Review
Getting Started with Movavi Video Editor: A Step-by-Step Guide for Beginners
Master Movavi: 10 Expert Techniques for Video Editing Success
Powerful Perspectives: Movavi Video Editor vs. Final Cut Pro Revealed
How to Edit 4K Videos Seamlessly with Movavi Video Editor
Elevate Your Videos with Remarkable Transitions in Movavi
The Ultimate Guide to Color Correction in Movavi Video Editor
Breakthrough Movavi Techniques: A New Horizon In Audio Editing
Unlocking Movavi Video Editor: Secrets Of Text & Title Mastery
Accelerate Your Editing Journey: Movavi Tips and Hacks
Discover The Unseen: 5 Rare Features Of Movavi Video Editor
Unlock Steady Footage: A Complete Movavi Video Stabilization Guide
How to Export Videos for Social Media Using Movavi Video Editor
Video Editing Related Posts
Adobe Creative Cloud for Video Editing
Top 10 Video Editing Software for Mac
The Benefits of Dual-Monitor Setups for Video Editing
How to Choose the Right Video Editing Monitor for Your Needs
Best Monitors for Video Editing
Best Video Editing Software in 2023
Best Mac for Video Editing in 2023
(Almost) 50 Mistakes Every New Video Producer Makes
Breakthrough AI Tools: Elevate Your Video Production Game!
