
| Quick answer | Movavi gets better when you stop treating it as a template machine and start using a simple repeatable workflow: organize media, rough cut first, clean audio, use effects lightly, then export for the platform. |
|---|---|
| Best for | Creators who want practical editing control without the full complexity of Premiere Pro, Final Cut Pro, or DaVinci Resolve. |
| Skip if | You need high-end color management, team collaboration, advanced finishing, or a professional post-production pipeline. |
| Main rule | Use Movavi's AI and effects to remove friction, not to hide weak editing decisions. |
Movavi Video Editor is strongest when you keep the edit clear, structured, and intentional.
The software gives you an approachable timeline, effects, transitions, chroma key, motion tracking, AI subtitles, noise removal, silence removal, and export tools.
The trick is knowing which tools actually improve the video and which ones just add clutter.
Quick take: Movavi Video Editor is best for creators who want a friendly timeline, built-in effects, AI-assisted cleanup, and simpler exports without jumping straight into a professional editing suite.
Pricing and promotions change often, so check the current Movavi offer before buying.
Best fit: beginner and intermediate YouTube, social, tutorial, family, and small-business videos.
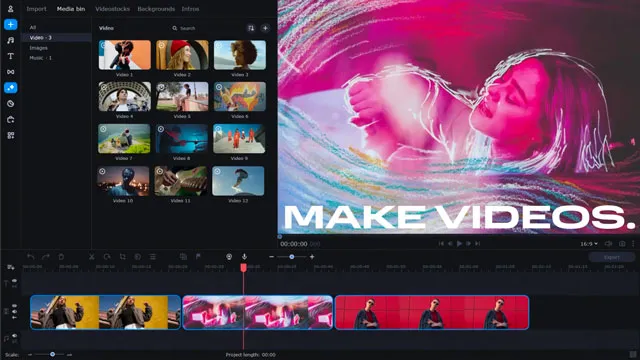
Start with Workflow, Not Effects
The fastest way to make better Movavi videos is to build a repeatable editing sequence.
Import everything, name the important clips, build a rough cut, and only then start adding style.
- Put footage, voiceover, music, graphics, and exports in separate folders.
- Drag your strongest clips onto the timeline before touching effects.
- Cut the story until it works with plain edits.
- Add titles, transitions, filters, and motion only where they clarify the video.
- Export a short test before rendering the full project.
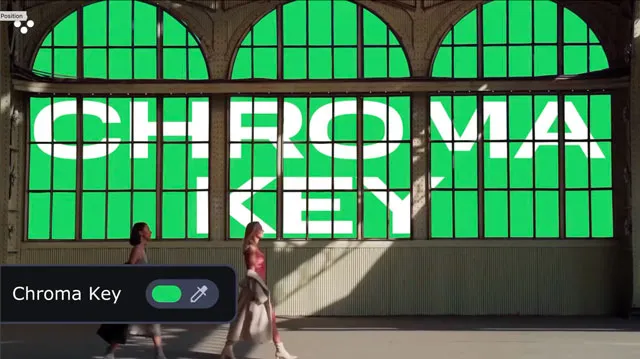
Use Chroma Key and Background Removal Carefully
Movavi's chroma key and background tools are useful for tutorials, product videos, talking-head content, and quick creator setups.
They work best when the source footage is clean: even lighting, separation from the background, and minimal motion blur.
If the edge looks noisy, reduce the ambition of the shot. A simple crop or cleaner background often looks better than a rough cutout.
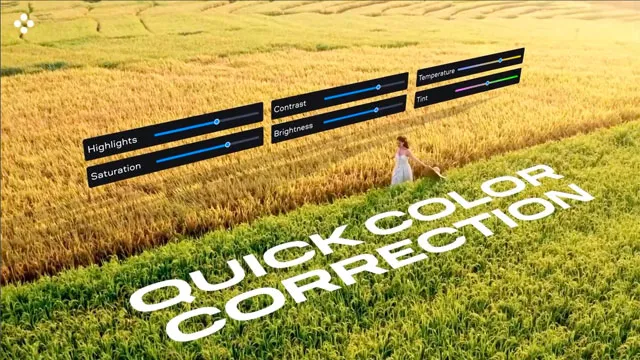
Improve Color Without Over-Grading
Movavi is not a high-end color grading suite, but it can still make footage look more consistent.
Start with exposure and white balance before applying a filter or LUT.
Match the shots in a sequence so they feel like one video, then use style lightly.
Cut Faster with Timeline Discipline
Timeline discipline matters more than most advanced features.
Use split, trim, ripple-style cleanup, and timeline markers to keep the edit moving.
When a section drags, do not reach for a transition first. Cut the slow sentence, the repeated visual, or the unnecessary pause.
Use AI for Audio, Captions, and Cleanup
Movavi's current product messaging emphasizes AI-assisted tools such as subtitles, noise removal, silence removal, motion tracking, and background cleanup.
These are genuinely useful when they save repetitive work.
They still need review. Auto captions need proofreading. Noise removal needs a before-and-after listen. Silence removal needs a pacing check so the video does not feel chopped up.
Use Sound Effects and Music Like an Editor
Music and sound effects should support the viewer, not compete with the message.
Lower music under speech, avoid effects on every transition, and keep audio levels consistent from section to section.
If the viewer notices every sound effect, you probably used too many.
Export for the Platform
A good edit can still fail if the export is wrong.
Before exporting, decide whether the final video is for YouTube, a vertical short, a client review, a website embed, or an archive file.
| Destination | Movavi export focus | Watch for |
|---|---|---|
| YouTube | Clean MP4, 1080p or 4K, readable titles. | Over-compressed detail and low dialogue volume. |
| Shorts/Reels/TikTok | Vertical framing and captions. | Text too close to app UI areas. |
| Client review | Smaller file, clear naming, visible draft version. | Sending a full-quality master too early. |
| Archive | Higher quality export and organized project files. | Losing source media after the project is done. |
When to Move Beyond Movavi
Movavi is a strong beginner and intermediate editor, but it should not be forced into every job.
If you need advanced color, deep audio repair, large multicam projects, team workflows, or complex finishing, compare it with Premiere Pro, Final Cut Pro, or DaVinci Resolve.
For official product details and current pricing, check Movavi's Video Editor page.
FAQ
Is Movavi good for advanced editing?
Movavi can handle many intermediate techniques, including chroma key, color adjustments, titles, effects, motion tracking, captions, and audio cleanup. It is not a replacement for a professional finishing suite.
What should I learn first in Movavi?
Learn import, timeline trimming, audio levels, basic color correction, titles, captions, and export before spending time on advanced effects.
Are Movavi AI tools enough to make a finished video?
No. They can speed up subtitles, noise cleanup, silence removal, and tracking, but you still need to make the edit work.
Can Movavi remove video backgrounds?
Movavi includes background and chroma key style tools, but the result depends heavily on lighting, source quality, and subject separation.
Is Movavi better than Premiere Pro?
Movavi is easier for quick edits. Premiere Pro is better for professional workflows, deeper control, and Adobe ecosystem integration.

About the Author
Joseph Nilo has been working professionally in all aspects of audio and video production for over twenty years. His day-to-day work finds him working as a video editor, 2D and 3D motion graphics designer, voiceover artist and audio engineer, and colorist for corporate projects and feature films.