
The realm of 4K video editing once seemed reserved for the pros, but with Movavi Video Editor, this has changed.
The software melds user-friendliness with high-grade editing capabilities, making 4K video editing a breeze for all.
In this comprehensive guide, we'll traverse through the essentials and advanced facets of editing 4K videos seamlessly using Movavi Video Editor.
Quick take: Movavi Video Editor is best for creators who want a friendly timeline, built-in effects, AI-assisted cleanup, and simpler exports without jumping straight into a professional editing suite.
Pricing and promotions change often, so check the current Movavi offer before buying.
Best fit: beginner and intermediate YouTube, social, tutorial, family, and small-business videos.

Understanding 4K Video Editing Challenges
4K video editing is a venture into higher resolution and quality, but it also brings along challenges.
The foremost challenge is the demanding hardware requirements due to the extensive file sizes and resolution.
Typical issues include lag during editing, extensive rendering times, and huge storage requirements.
When compared to standard or HD video editing, 4K editing necessitates a robust machine with a powerful processor, ample RAM, and a high-performance graphics card.
The software chosen for editing also plays a pivotal role in managing these challenges.
Movavi Video Editor stands out due to its optimization for 4K editing, ensuring a smoother workflow regardless of the hardware limitations.

Getting Started: Installing Movavi Video Editor
Embarking on your 4K editing journey begins with installing Movavi Video Editor. Here’s a step-by-step walkthrough:
Downloading the Software:
- Visit Movavi Video Editor's official website.
- Click on the download link to get the latest version of the software.
Installation:
- Once the download is complete, locate the installer and double-click to initiate the installation process.
- Follow the on-screen instructions, choosing your preferred installation directory.
Launching Movavi Video Editor:
- After successful installation, launch Movavi Video Editor.
- You’ll have the option to start a new project or open an existing one.
Importing Your 4K Footage:
- Navigate to the ‘Import’ option and select your 4K video files.
- Your videos will populate the media bin, ready for editing.
Now that the software is set up, and your files are imported, it’s time to explore the user interface of Movavi Video Editor.
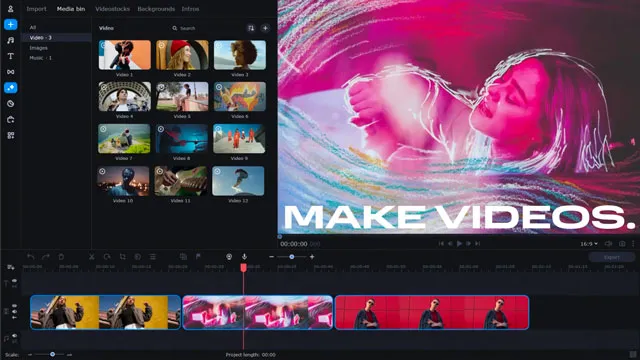
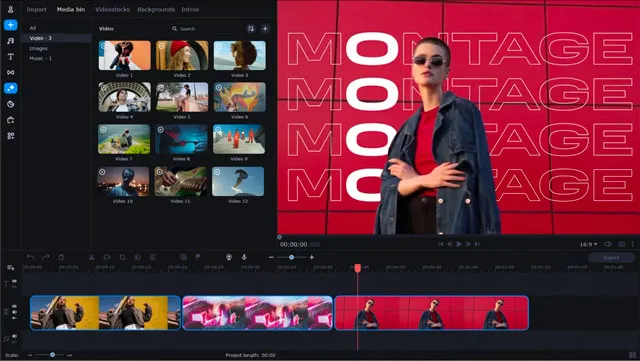
Navigating the Interface
Movavi Video Editor is revered for its intuitive and user-friendly interface. Here’s a deeper dive into the main components:
Timeline:
The timeline is where you’ll arrange and edit your video clips.
You can easily drag and drop files, trim videos, and add transitions here.
Toolbar:
The toolbar hosts a variety of editing tools like cut, trim, and text tools.
Hovering over each tool will provide a brief description of its function.
Preview Window:
The preview window allows you to review your edits in real-time.
You can play back your project, ensuring that all edits align with your vision.
Familiarity with these components will streamline your editing process, making it efficient and enjoyable.
Basic Editing Techniques
Editing is an art, and like any art form, mastering the basics is crucial.
Movavi provides all the essential tools required for basic editing.
Cutting and Trimming:
Select the video clip on the timeline, use the scissor tool to make precise cuts.
Trimming unwanted portions ensures a clean and professional look.
Adding Transitions:
Transitions provide a smooth flow between different clips.
Movavi offers a variety of transitions; explore them to find what suits your project.
Titles and Text:
Engage your audience with compelling titles and informative text.
Customize fonts, colors, and animations to match the aesthetic of your video.
The basics lay the foundation for a well-edited video, but to make your project stand out, enhancing your 4K video is the key.
Enhancing Your 4K Video
Enhancement goes beyond basic editing; it's about adding a touch of professionalism and aesthetic appeal to your project.
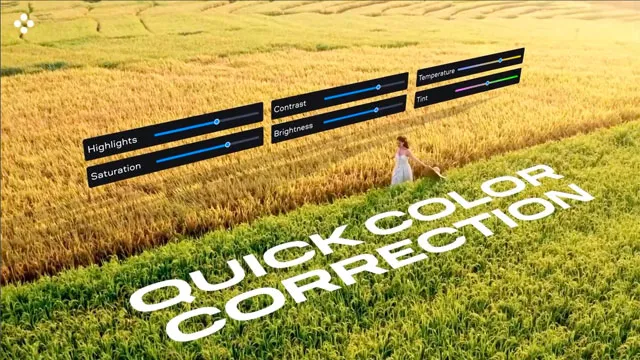
Color Correction:
Color Grading ensures your video has a balanced and natural look.
Movavi provides intuitive color correction tools to adjust exposure, white balance, and color grading.
Filters and Effects:
Filters can transform the mood and feel of your video.
Experiment with different filters to find a look that complements your video’s theme.
Advanced Editing Techniques
As you grow comfortable with the basics, exploring advanced editing techniques will further refine your video.
Keyframing:
Keyframing allows for smooth transitions in motion or color changes.
It's a powerful tool for creating dynamic, engaging content.
Motion Tracking:
Motion tracking enables you to follow an object’s movement within the video.
It's useful for adding text or effects that move with the object.
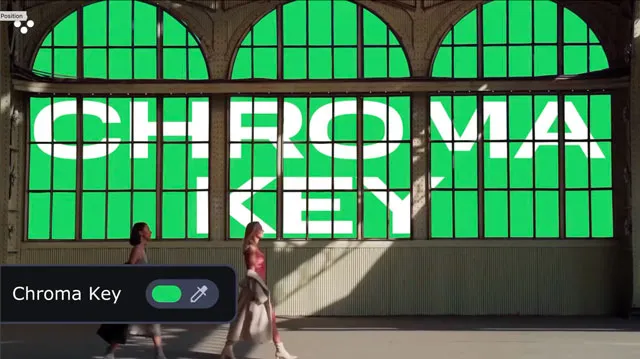
Green Screen Effects:
With green screen effects, you can replace the background with imagery or footage of your choice.
It’s a fantastic tool for creating unique, captivating scenes.
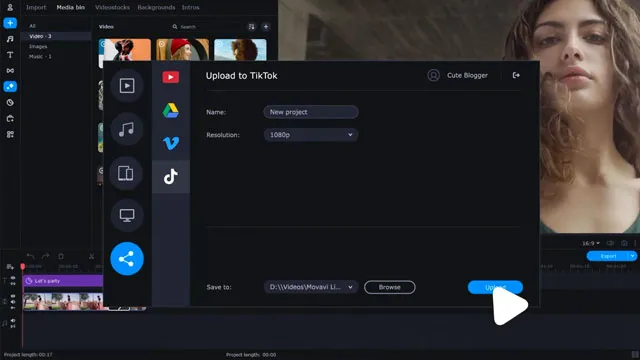
Exporting Your Edited Video
After investing time and effort in editing, exporting your video is the final step.
Choosing Export Settings:
Select the format, resolution, and bitrate that align with your project’s needs.
Optimal settings ensure your video maintains its quality.
Saving Your Project:
It's advisable to save your project frequently to avoid any loss of progress.
Movavi provides a simple save and export process for efficiency.
Conclusion
Movavi Video Editor is a powerful yet intuitive tool for anyone venturing into 4K video editing.
With a plethora of basic to advanced editing tools, it simplifies the editing process, making 4K video editing accessible and enjoyable.
Whether you are a novice or a seasoned editor, Movavi Video Editor is a reliable companion for your 4K video editing endeavors.
With this comprehensive guide, you are now well-equipped to explore the exciting realm of 4K video editing with Movavi Video Editor.
Your journey from installation, basic editing, enhancing your videos, to exporting your final project has been thoroughly covered, ensuring a smooth editing experience.
Editing 4K Footage in Movavi Video Editor FAQ
Can Movavi handle 4K videos smoothly on a low-spec PC?
Movavi is optimized for better performance, but a modern PC with a robust GPU and ample RAM is recommended for smooth 4K editing.
What are the export format options in Movavi?
Movavi supports various formats including MP4, AVI, MOV, and many more, catering to different user needs.
How does Movavi compare to other 4K video editing software?
Movavi stands out for its user-friendly interface, affordable pricing, and robust 4K editing capabilities compared to other editing software.
Can I edit HEVC (H.265) files with Movavi Video Editor?
No, Movavi Video Editor does not support HEVC (H.265) files. However, you can convert these files to a supported format like MP4 or MOV using a video converter before importing them into Movavi Video Editor for editing.
Movavi Related Posts:
Discover the Magic of Movavi Video Editor: A Comprehensive Review
Getting Started with Movavi Video Editor: A Step-by-Step Guide for Beginners
Master Movavi: 10 Expert Techniques for Video Editing Success
Powerful Perspectives: Movavi Video Editor vs. Final Cut Pro Revealed
How to Edit 4K Videos Seamlessly with Movavi Video Editor
Elevate Your Videos with Remarkable Transitions in Movavi
The Ultimate Guide to Color Correction in Movavi Video Editor
Breakthrough Movavi Techniques: A New Horizon In Audio Editing
Unlocking Movavi Video Editor: Secrets Of Text & Title Mastery
Accelerate Your Editing Journey: Movavi Tips and Hacks
Discover The Unseen: 5 Rare Features Of Movavi Video Editor
Unlock Steady Footage: A Complete Movavi Video Stabilization Guide
How to Export Videos for Social Media Using Movavi Video Editor
Video Editing Related Posts
Adobe Creative Cloud for Video Editing
Top 10 Video Editing Software for Mac
The Benefits of Dual-Monitor Setups for Video Editing
How to Choose the Right Video Editing Monitor for Your Needs
Best Monitors for Video Editing
(Almost) 50 Mistakes Every New Video Producer Makes
Breakthrough AI Tools: Elevate Your Video Production Game!
Find the Best Export Settings for YouTube Videos Now!
Your Guide on Where To Find Video Editor Remote Jobs
Adobe video workflow guides
- Understanding 4K Video Editing Challenges
- Getting Started: Installing Movavi Video Editor
- Navigating The Interface
- Basic Editing Techniques
- Enhancing Your 4K Video
- Advanced Editing Techniques
- Exporting Your Edited Video
- Conclusion
- Editing 4K Footage In Movavi Video Editor FAQ
Movavi Related Posts:
Discover the Magic of Movavi Video Editor: A Comprehensive Review
Getting Started with Movavi Video Editor: A Step-by-Step Guide for Beginners
Master Movavi: 10 Expert Techniques for Video Editing Success
Powerful Perspectives: Movavi Video Editor vs. Final Cut Pro Revealed
How to Edit 4K Videos Seamlessly with Movavi Video Editor
Elevate Your Videos with Remarkable Transitions in Movavi
The Ultimate Guide to Color Correction in Movavi Video Editor
Breakthrough Movavi Techniques: A New Horizon In Audio Editing
Unlocking Movavi Video Editor: Secrets Of Text & Title Mastery
Accelerate Your Editing Journey: Movavi Tips and Hacks
Discover The Unseen: 5 Rare Features Of Movavi Video Editor
Unlock Steady Footage: A Complete Movavi Video Stabilization Guide
How to Export Videos for Social Media Using Movavi Video Editor
Video Editing Related Posts
Adobe Creative Cloud for Video Editing
Top 10 Video Editing Software for Mac
The Benefits of Dual-Monitor Setups for Video Editing
How to Choose the Right Video Editing Monitor for Your Needs
Best Monitors for Video Editing
(Almost) 50 Mistakes Every New Video Producer Makes
Breakthrough AI Tools: Elevate Your Video Production Game!
Find the Best Export Settings for YouTube Videos Now!
Your Guide on Where To Find Video Editor Remote Jobs
Adobe video workflow guides