
Color correction is a pivotal step in video editing that transforms raw footage into a polished visual story.
By adjusting colors, contrast, and lighting, you ensure that each frame conveys the right mood and maintains consistency across scenes.
In this guide, we’ll explore how to use Movavi Video Editor to achieve professional‑grade color correction.
You’ll learn the fundamentals of color theory, discover the difference between color correction and color grading, and follow step‑by‑step instructions to fine‑tune your clips.
Movavi’s intuitive tools simplify complex tasks, so even beginners can enhance their videos like a pro.
Quick take: Movavi Video Editor is best for creators who want a friendly timeline, built-in effects, AI-assisted cleanup, and simpler exports without jumping straight into a professional editing suite.
Pricing and promotions change often, so check the current Movavi offer before buying.
Best fit: beginner and intermediate YouTube, social, tutorial, family, and small-business videos.
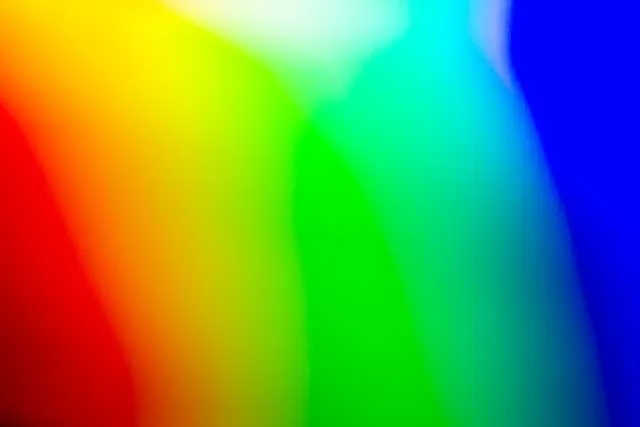
Grasping the Color Spectrum
A strong foundation in understanding color is imperative for effective color correction.
Colors are more than just visual elements; they evoke emotions and tell stories.
Reds often signify passion or danger, blues exude calmness, while greens resonate with nature.
Comprehending the psychology of color is your first step toward mastering color correction.

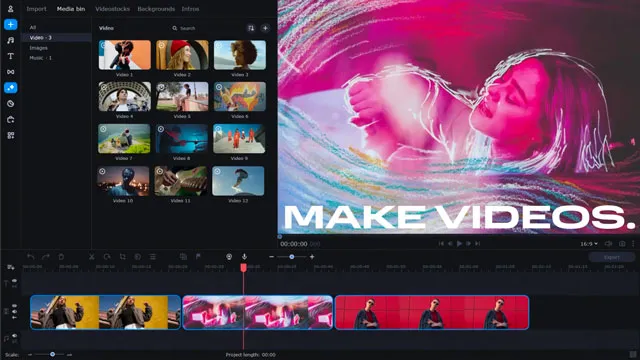
Getting Acquainted with Movavi Video Editor
To kickstart your color correction journey, download and install Movavi Video Editor.
As you launch the program, familiarize yourself with the user-friendly interface.
The simplicity of Movavi is its charm, effortlessly guiding you through complex video editing tasks.

Delving into Color Correction
Navigate to the 'Color adjustments' tab to begin the color correction process.
Movavi offers a myriad of options ranging from basic to advanced adjustments.
Basic Adjustments
- Brightness: Adjust to lighten or darken your footage.
- Contrast: Enhance to create distinction between light and dark areas.
- Saturation: Modify to add vibrancy or mute colors.
Advanced Adjustments
- White Balance: Utilize to neutralize unwanted color casts.
- Hue: Adjust to shift colors along the spectrum.
- Highlights and Shadows: Refine to independently control light and dark areas.
Implementing Color Grading
After correction, venture into color grading to further enhance your video.
Create a unique aesthetic or mood, giving your video a distinct identity.
It’s about adding a creative touch that aligns with your narrative.
Some Common Color Grading Looks
Color grading is akin to the final touch of magic that transforms your raw footage into a visual masterpiece.
It's where your video takes on a unique personality, setting the mood and tone for your narrative.
With Movavi Video Editor, you have a palette of color adjustment tools at your disposal to craft these distinct looks.
Here’s a sneak peek into some common color grading looks you can achieve with Movavi:
Blockbuster Look: Coveted by filmmakers, the blockbuster look is characterized by blue shadows juxtaposed with warm highlights. This look accentuates drama and creates a visually appealing contrast often seen in high-budget films.
Day for Night: The day for night look is a filmic alchemy that turns daytime footage into a night scene. By reducing the brightness and playing with color temperatures, you create the illusion of a night-time setting.
Black and White: Strip away the colors to transport your audience back in time or to focus on the narrative’s emotional core. Black and white grading is timeless, evoking a nostalgic or dramatic ambiance.
High Contrast: Uplift the drama by enhancing the contrast in your footage. High contrast grading amplifies the difference between light and dark, adding a level of intensity and focus to the scene.
Vintage Look: With a touch of desaturation and a hint of grain, transport your viewers to a bygone era. The vintage look is often paired with warm tones to evoke a sense of nostalgia.
Cinematic Look: The cinematic look encompasses a broad spectrum, often characterized by a shallow depth of field, soft colors, and a wide aspect ratio. It’s about crafting a visually compelling story with a professional touch.
Sepia Tone: Paint your footage with a brownish tone to create a mood of warmth, nostalgia, or age. Sepia grading is a classic technique to evoke a historical or sentimental feel.
Cold/Blue Tone: Imbue your video with a cold or blue tone to evoke feelings of melancholy, mystery, or calm. This grading look is effective in creating a somber or eerie atmosphere.
Warm Tone: On the flip side, warm tones can create feelings of happiness, coziness, or romance. It's excellent for enhancing golden hour footage or creating a comforting ambiance.
Cross-Processing: Cross-processing is a technique borrowed from the photography realm, where you use unconventional color grading to achieve surreal or visually striking effects. It’s a realm where creativity knows no bounds.
Each of these color grading looks can be crafted and fine-tuned using Movavi Video Editor’s color adjustment tools, breathing life and emotion into your narrative.
So, delve into the color grading world and let your imagination run wild!
Presets and LUTs in Movavi
Dive into the realm of LUTs (Lookup Tables), a treasure trove of color filters driven by mathematical algorithms to transform the hues in your footage, thereby streamlining the color grading process significantly.
Integrating LUTs in Movavi Video Editor is a straightforward procedure:
- Begin by adding your video to the timeline.
- Navigate to "Other Tools" followed by "Color Adjustments".
- Seek out the LUTs tab and click on it.
- Spot the plus icon located in the upper right corner and click to import a LUT.
- Choose the desired LUT and drag it onto the clip to apply.
Movavi extends a palette of LUTs available in the Movavi Effects Store.
For instance, delve into the Yummy LUTs Pack for a range of color presets encapsulating creamy, warm, intense, or gentle color shades.
Alternatively, the Movie Scene LUTs Pack is your gateway to rendering your videos with a cinematic aura, reminiscent of scenes from beloved movies.
Through LUTs, not only do you save time but you unlock a plethora of color grading avenues, elevating your video editing endeavor to a professional level.
Practical Tips
- Maintain Consistency: Ensure a consistent color scheme throughout your video for a professional look.
- Utilize Natural Light: Natural light is a beneficial ally, providing a neutral base for color correction.

Color Correction in Movavi Video Editor FAQ
How do I correct skin tones in Movavi?
Correcting skin tones is a common requirement in video editing. In Movavi, navigate to the color adjustments tab and experiment with the hue and saturation sliders until you achieve natural skin tones.
Can I import LUTs into Movavi?
Absolutely! Importing custom Look-Up Tables (LUTs) into Movavi is a straightforward process. LUTs are invaluable for saving time during the color grading process, allowing you to apply pre-defined color grades swiftly.
What’s the difference between color correction and color grading?
Color correction is about fixing color issues to achieve a natural, realistic look, while color grading adds a creative aesthetic to your video. Both are crucial for creating a visually appealing video.
How do I use presets in Movavi?
Presets are ready-made settings that expedite the color grading process. In Movavi, you can easily apply presets to achieve desired looks with just a few clicks.
How can I achieve a cinematic look in Movavi?
Achieving a cinematic look involves a blend of color grading, appropriate lighting, and the right camera movements. In Movavi, utilize the color grading features alongside presets or LUTs to get closer to a cinematic aesthetic.
What are the best practices for color correction in Movavi?
Best practices include maintaining a consistent color scheme, utilizing natural light, and making subtle adjustments to avoid over-correction. It's also advisable to familiarize yourself with Movavi’s features and tools for an efficient color correction process.
How does color correction impact storytelling?
Color correction significantly impacts storytelling by enhancing the visual appeal and evoking desired emotions. It sets the mood and tone, aiding in the conveyance of the narrative.
What tools does Movavi offer for color correction?
Movavi boasts a variety of tools including basic and advanced color adjustments, presets, LUTs, and automatic color correction options. These tools are designed to cater to both novice and experienced editors.
How can I enhance the color in dark footage in Movavi?
To enhance color in dark footage, adjust the brightness, contrast, and possibly the gamma settings. Experiment with these adjustments to achieve desired results.
Can I undo color adjustments in Movavi?
Yes, Movavi provides the flexibility to undo or redo your color adjustments, allowing for a non-destructive editing process.
Movavi Related Posts:
Discover the Magic of Movavi Video Editor: A Comprehensive Review
Getting Started with Movavi Video Editor: A Step-by-Step Guide for Beginners
Master Movavi: 10 Expert Techniques for Video Editing Success
Powerful Perspectives: Movavi Video Editor vs. Final Cut Pro Revealed
How to Edit 4K Videos Seamlessly with Movavi Video Editor
Elevate Your Videos with Remarkable Transitions in Movavi
The Ultimate Guide to Color Correction in Movavi Video Editor
Breakthrough Movavi Techniques: A New Horizon In Audio Editing
Unlocking Movavi Video Editor: Secrets Of Text & Title Mastery
Accelerate Your Editing Journey: Movavi Tips and Hacks
Discover The Unseen: 5 Rare Features Of Movavi Video Editor
Unlock Steady Footage: A Complete Movavi Video Stabilization Guide
How to Export Videos for Social Media Using Movavi Video Editor
Video Editing Related Posts
Adobe Creative Cloud for Video Editing
Top 10 Video Editing Software for Mac
The Benefits of Dual-Monitor Setups for Video Editing
How to Choose the Right Video Editing Monitor for Your Needs
Best Monitors for Video Editing
(Almost) 50 Mistakes Every New Video Producer Makes
Breakthrough AI Tools: Elevate Your Video Production Game!
Find the Best Export Settings for YouTube Videos Now!
Your Guide on Where To Find Video Editor Remote Jobs
Adobe video workflow guides
- Grasping The Color Spectrum
- Getting Acquainted With Movavi Video Editor
- Delving Into Color Correction
- Implementing Color Grading
- Some Common Color Grading Looks
- Presets And LUTss In Movavi
- Practical Tips
- Color Correction In Movavi Video Editor FAQ
Movavi Related Posts:
Discover the Magic of Movavi Video Editor: A Comprehensive Review
Getting Started with Movavi Video Editor: A Step-by-Step Guide for Beginners
Master Movavi: 10 Expert Techniques for Video Editing Success
Powerful Perspectives: Movavi Video Editor vs. Final Cut Pro Revealed
How to Edit 4K Videos Seamlessly with Movavi Video Editor
Elevate Your Videos with Remarkable Transitions in Movavi
The Ultimate Guide to Color Correction in Movavi Video Editor
Breakthrough Movavi Techniques: A New Horizon In Audio Editing
Unlocking Movavi Video Editor: Secrets Of Text & Title Mastery
Accelerate Your Editing Journey: Movavi Tips and Hacks
Discover The Unseen: 5 Rare Features Of Movavi Video Editor
Unlock Steady Footage: A Complete Movavi Video Stabilization Guide
How to Export Videos for Social Media Using Movavi Video Editor
Video Editing Related Posts
Adobe Creative Cloud for Video Editing
Top 10 Video Editing Software for Mac
The Benefits of Dual-Monitor Setups for Video Editing
How to Choose the Right Video Editing Monitor for Your Needs
Best Monitors for Video Editing
(Almost) 50 Mistakes Every New Video Producer Makes
Breakthrough AI Tools: Elevate Your Video Production Game!
Find the Best Export Settings for YouTube Videos Now!
Your Guide on Where To Find Video Editor Remote Jobs
Adobe video workflow guides