
Quick Answer
If Premiere Rush is already installed and you only need to finish an existing edit, you can still add music by importing an audio file, dragging it under the video in the timeline, trimming it to length, lowering the volume under dialogue, and exporting the project.
If you are starting a new workflow in 2026, do not build it around Rush. Adobe's own Premiere Rush discontinuation FAQ says Rush stopped being available for new downloads on September 30, 2025, and installed copies are only a temporary bridge until September 30, 2026.
| Use Rush if | It is already installed, the project is simple, and you need to finish something that is already in Rush. |
|---|---|
| Use Premiere on iPhone if | You want a mobile-first Adobe editor for short social videos and quick music-backed edits. |
| Use Premiere Pro if | You need a durable workflow for YouTube, client work, podcasts, color, captions, reusable templates, or better audio control. |
| Best next read | Use my Premiere Rush discontinuation guide if you are deciding whether to keep Rush, or my Premiere Pro beginner guide if you are moving forward. |
This page may include affiliate links.
I only recommend software I would seriously evaluate for real creator or production workflows.
⭐⭐⭐⭐⭐
I pay for Adobe Creative Cloud and have used it every day in my 20-year career as a video editor, producer, and colorist.
Use the Adobe link below to check the current Creative Cloud offer. It can support this site and helps me keep these guides updated. Check current Adobe Creative Cloud offer.
Get Adobe Creative Cloud Now!
Should You Still Add Music in Premiere Rush?
For an existing Rush project, yes. The audio workflow is still simple enough for a quick social cut, a talking-head clip, or a phone-shot edit that only needs one background track.
For a new repeatable workflow, no. Rush is now a transition product, not the Adobe video editor I would recommend building around.
The practical question is not whether Rush can add music. It can. The question is whether you want your music, captions, color, and export workflow living in an app that Adobe is retiring.
What to collect before you start
- Your video clips, already trimmed roughly enough that the music length makes sense.
- A licensed music track you are allowed to use on YouTube, Instagram, TikTok, or the client deliverable.
- Any dialogue or voiceover tracks that need to stay clear above the music.
- A target format, such as vertical Shorts/Reels or horizontal YouTube.
How to Add Music in Premiere Rush
- Open the Rush project and move to the timeline view.
- Use the Add Media button and choose the music file from your device, Creative Cloud, or local storage location.
- Add the music to the project, then place it on an audio track under the video clips.
- Drag the start and end of the audio clip so the track begins where the video needs energy and ends before the final frame or CTA.
- Lower the music volume if you have dialogue. Start around a subtle bed, then raise it only when nobody is speaking.
- Add fades at the start and end of the track so the music does not pop in or cut off abruptly.
- Play the full edit on headphones and speakers before exporting.
Common music mistakes in Rush
- Using a track that is too short and looping it without hiding the seam.
- Letting the beat fight against jump cuts or caption timing.
- Exporting without checking the mix on a phone speaker.
- Using music you do not have rights to use commercially.
Better Adobe Workflows for New Music-Backed Videos
Rush was attractive because it was fast. The better 2026 Adobe decision is to match the tool to the project instead of forcing every simple edit into the same app.
| Project type | Better Adobe path | Why |
|---|---|---|
| Quick phone video with music | Premiere on iPhone | It is Adobe's current mobile direction and is built for fast social edits. |
| YouTube video, client edit, podcast clip, or recurring template | Premiere Pro | You get better timeline control, audio tools, captions, color, exports, and a workflow that will continue. |
| Simple branded social graphic or lightweight video post | Adobe Express | It is easier for quick brand assets, simple graphics, and social variations. |
| Multi-app creator workflow | Creative Cloud for video editing | Premiere Pro, After Effects, Audition, Media Encoder, fonts, and libraries work better together. |
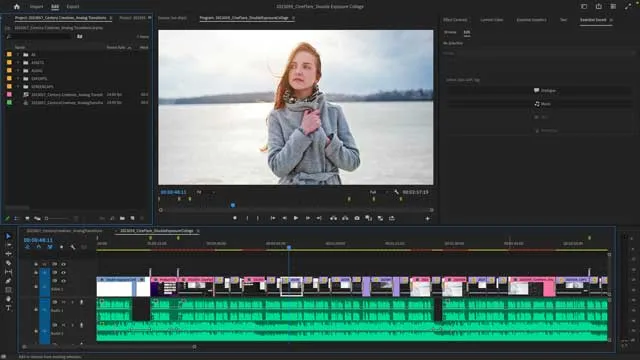
How to Add Music in Premiere Pro Instead
If you are moving from Rush to Premiere Pro, the basic idea is the same: import the music, place it on an audio track, trim it, mix it under voice, and export. The difference is that Premiere gives you more control when the project grows.
Start with the Premiere Pro starter workflow, then use the Essential Sound panel when you need cleaner dialogue and more intentional music levels.
Simple Premiere Pro music workflow
- Import the video and music into the Project panel.
- Create or open your sequence.
- Drag the music to an audio track below dialogue and natural sound.
- Use clip gain, keyframes, or Essential Sound controls to keep speech clear.
- Add short audio fades at cuts, intros, and outros.
- Export using a delivery preset that matches the platform. For YouTube, start with my Premiere Pro YouTube export settings.
FAQ
Can I still add music in Premiere Rush?
Yes, if Rush is already installed and still working on your device. Treat it as a way to finish existing projects, not as the safest place to start new work.
Can I download Premiere Rush in 2026?
For most new users, no. Adobe says Premiere Rush is no longer available for download from Adobe.com or mobile app stores after September 30, 2025. Existing entitled desktop users may still see limited Creative Cloud desktop access during the transition period.
What replaced Premiere Rush?
Adobe points Rush users toward Premiere on iPhone for mobile editing and Premiere on desktop for deeper work. Android availability has been in development, so Android users should verify Adobe's current mobile app status before planning a Rush replacement workflow.
Is Premiere Pro overkill for adding music?
For a one-off phone edit, it can be. For YouTube, client work, podcast clips, captions, templates, or repeatable exports, Premiere Pro is usually worth learning because the audio and export controls are much stronger.
What is the safest Adobe path for music-backed creator videos?
Use Premiere on iPhone for fast mobile videos and Premiere Pro for anything you need to reuse, archive, revise, or deliver professionally. Rush should be treated as a temporary bridge for existing projects.

About the Author
Joseph Nilo has been working professionally in all aspects of audio and video production for over twenty years. His day-to-day work finds him working as a video editor, 2D and 3D motion graphics designer, voiceover artist and audio engineer, and colorist for corporate projects and feature films.