
| Quick answer | To zoom in Premiere Pro, animate Scale and Position keyframes in Effect Controls for clean reframes, or use the Transform effect when you need motion blur and more stylized movement. |
|---|---|
| Best for | Punch-ins on talking heads, screen recordings, tutorial emphasis, product close-ups, reframing 4K footage in a 1080p timeline, and motion-style zoom transitions. |
| Skip if | You are only trying to see the timeline or Program Monitor more clearly. That is interface magnification, not an exported video zoom. |
| Main rule | Use Scale/Position for clean editorial zooms. Use Transform when the zoom itself needs motion blur or a more designed feel. |
Zooming in Premiere Pro can mean three different things: zooming the video, zooming the timeline, or zooming the Program Monitor view.
This guide focuses on the exported video effect first, because that is what most editors mean when they want a punch-in or animated zoom.
Once you separate those meanings, the tools become much easier to choose.
This page may include affiliate links.
I only recommend software I would seriously evaluate for real creator or production workflows.
⭐⭐⭐⭐⭐
I pay for Adobe Creative Cloud and have used it every day in my 20-year career as a video editor, producer, and colorist.
Use the Adobe link below to check the current Creative Cloud offer. It can support this site and helps me keep these guides updated. Check current Adobe Creative Cloud offer.
Get Adobe Creative Cloud Now!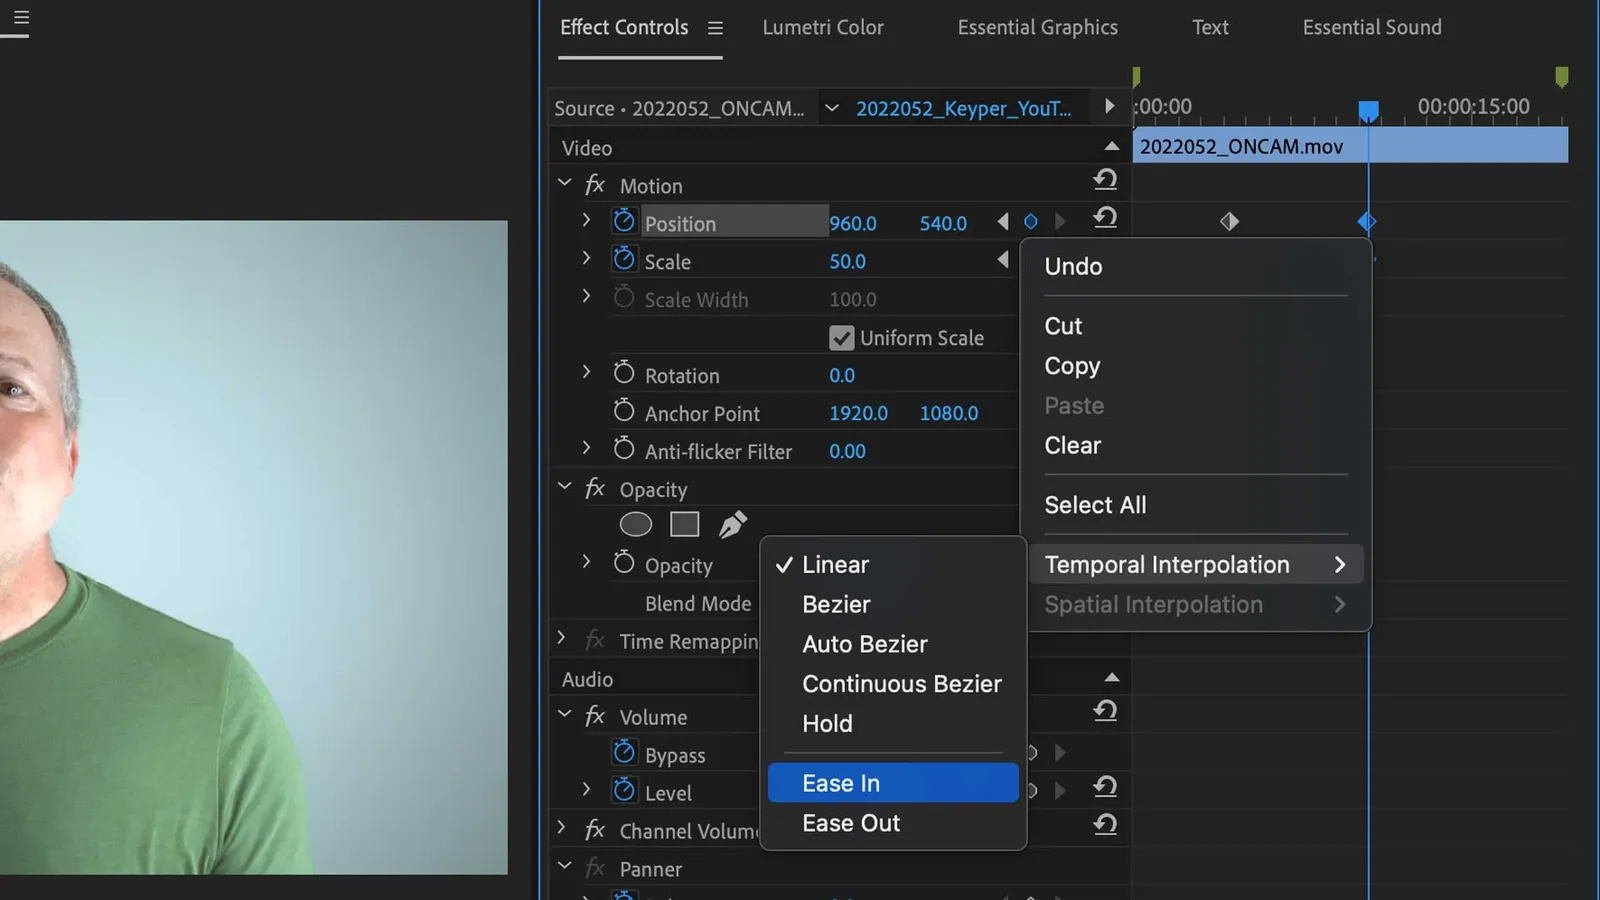
Method 1: Scale and Position Keyframes
The cleanest Premiere Pro zoom is a Motion effect animation. Every clip has Motion controls, including Scale and Position, in the Effect Controls panel.
Set one keyframe before the zoom, move forward in time, increase Scale, and adjust Position so the frame lands where you want the viewer to look.
- Select the clip in the timeline.
- Open Effect Controls.
- Under Motion, turn on keyframes for Scale and Position.
- Set your starting frame.
- Move forward and increase Scale.
- Adjust Position to keep the subject framed.
- Ease the keyframes so the movement feels natural.
Make the Zoom Smooth
A mechanical zoom usually means the keyframes are linear. Select the keyframes and use easing so the move accelerates and settles more naturally.
For most talking-head punch-ins, subtle movement works better than a dramatic push. The viewer should feel emphasis, not notice an effect fighting for attention.
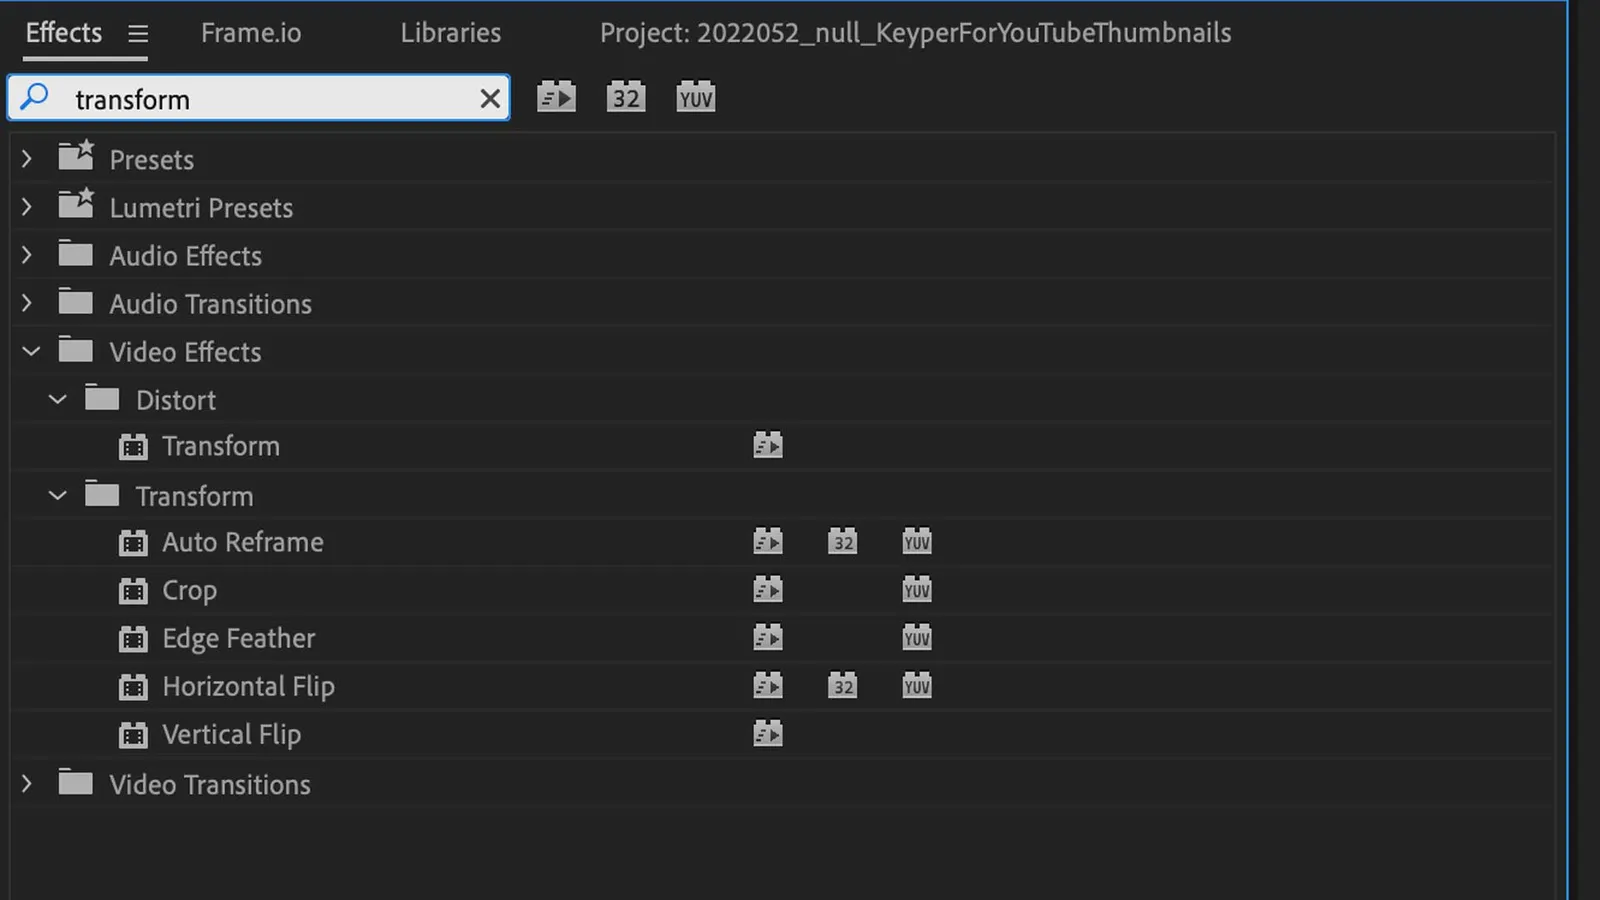
Method 2: Transform Effect Zooms
The Transform effect gives you another way to animate Scale and Position, with more control over motion blur. This is useful for stylized zooms, fast transitions, and social video energy.
Add Transform to the clip, animate its Scale and Position controls, and adjust Shutter Angle if you want motion blur. Keep the movement intentional; too much blur can make footage feel cheap.
| Zoom type | Best tool | Why |
|---|---|---|
| Clean talking-head punch-in | Motion Scale/Position | Simple, precise, and easy to adjust. |
| Fast transition zoom | Transform | Motion blur can make the movement feel more natural. |
| Screen recording emphasis | Motion Scale/Position | Clarity matters more than style. |
| Music-video style zoom | Transform | More expressive movement and blur control. |
| Timeline view magnification | Timeline zoom controls | This changes your editing view, not the exported video. |
Timeline and Program Monitor Zoom
Premiere also lets you zoom the interface. Timeline zoom helps you see edits more clearly. Program Monitor magnification helps you inspect the frame.
These controls do not create an exported zoom effect. They only change what you see while editing.

Common Premiere Pro Zoom Mistakes
- Zooming too far: footage gets soft when you exceed the usable source resolution.
- Forgetting Position: Scale alone pushes into the center, which may not be your subject.
- Linear keyframes: add easing so the move does not feel robotic.
- Too many punch-ins: use zooms to clarify or emphasize, not to cover weak pacing.
- Wrong zoom type: do not confuse interface zoom with an exported video zoom.
Where to Go Next
If you are still learning Premiere Pro, read what Premiere Pro is for and my Premiere Pro beginner guide.
If your zoom-heavy edit is ready to deliver, read my Adobe Media Encoder workflow guide and what Media Encoder does.
Adobe's official help pages for adjusting clip position, scale, and rotation and Effect Controls are the best references for current interface details.
FAQ
How do I zoom into a clip in Premiere Pro?
Select the clip, open Effect Controls, animate Scale and Position under Motion, and ease the keyframes for a smoother move.
What is the difference between Scale and Transform?
Scale under Motion is the standard clean zoom. The Transform effect gives additional motion controls and can add motion blur for stylized zooms.
Why does my Premiere Pro zoom look blurry?
You may be scaling beyond the usable resolution of the source footage. A 4K clip has more room for a clean punch-in than a 1080p clip in a 1080p sequence.
Does timeline zoom export in the video?
No. Timeline zoom only changes your editing view. It does not affect the exported video.
Should I use zoom transitions in professional edits?
Use them sparingly. They can work for social, music, tutorial, or high-energy edits, but clean reframing is usually better for interviews and client work.

About the Author
Joseph Nilo has been working professionally in all aspects of audio and video production for over twenty years. His day-to-day work finds him working as a video editor, 2D and 3D motion graphics designer, voiceover artist and audio engineer, and colorist for corporate projects and feature films.
Video Editing Related Posts
Adobe Creative Cloud for Video Editing
Top 10 Video Editing Software for Mac
The Benefits of Dual-Monitor Setups for Video Editing
How to Choose the Right Video Editing Monitor for Your Needs
Best Monitors for Video Editing
(Almost) 50 Mistakes Every New Video Producer Makes
Breakthrough AI Tools: Elevate Your Video Production Game!
Find the Best Export Settings for YouTube Videos Now!
Your Guide on Where To Find Video Editor Remote Jobs
Adobe video workflow guides
Related Posts:
Adobe Creative Cloud What Is Series
Adobe Creative Cloud Pricing Explained
Adobe Creative Cloud Pricing and Plans - The Ultimate Resource
Best Adobe Creative Cloud Apps for Graphic Design
How to Install Adobe Creative Cloud on Mac
Adobe Creative Cloud for Photographers
Adobe Creative Cloud for Video Editing
How to Use Adobe Creative Cloud Libraries
Adobe Creative Cloud Subscription Discount
Adobe Creative Cloud Student Discount
Adobe creator and buying paths
Adobe Creative Cloud for Video Creators
Adobe Photography Plan vs Photoshop Single App
Best Adobe Creative Cloud Apps for YouTubers
Adobe Express for YouTube Thumbnails
Adobe Stock Licensing for YouTube and Client Work
Adobe app explainers and storage
What Is Adobe Photoshop Elements?
What Is Adobe Premiere Elements?
What Is Adobe Character Animator?
Adobe Rush migration paths
Premiere Rush Discontinuation FAQ