
Updated August 5, 2026
Adobe Character Animator turns a face-and-voice performance into a responsive 2D character animation. A webcam and microphone can drive a ready-made puppet, record a short scene, add expressions or triggers, and produce a shareable video without hand-animating every mouth shape.
The most useful 2026 distinction is between Starter mode and Pro mode. Starter is a free, simplified path for choosing a puppet, performing, recording, and exporting. Pro is the deeper production environment for layered Photoshop or Illustrator artwork, multiple characters, a multitrack timeline, reusable triggers, and more complex behaviors.
Quick answer
Use Character Animator when a character should respond to a real performance. It is especially effective for creator explainers, recurring social characters, education, live streams, and animated cutaways where face, voice, head movement, or triggered expressions should drive the result.
Start with free Starter mode when you need a fast character video and do not want to rig artwork. Move to Pro for a custom brand character, layered Photoshop or Illustrator art, several characters in one scene, reusable triggers, or a more controlled edit.
This page may include affiliate links.
I only recommend software I would seriously evaluate for real creator or production workflows.
⭐⭐⭐⭐⭐
I pay for Adobe Creative Cloud and have used it every day in my 20-year career as a video editor, producer, and colorist.
Use the Adobe link below to check the current Creative Cloud offer. It can support this site and helps me keep these guides updated. Check current Adobe Creative Cloud offer.
Get Adobe Creative Cloud Now!What Adobe Character Animator does
Character Animator is built around a puppet: a 2D character whose layers and behaviors respond to a performance. Adobe describes the app as a way to create expressive, performance-based animation quickly enough for live use. A first project can begin with an example puppet; a recurring production can use custom layered Photoshop or Illustrator artwork.
The speed comes from separating the performance from the drawing. Instead of keyframing every blink and mouth shape, you perform in front of a camera and record the result. Face tracking, lip sync, body tracking, keyboard triggers, and timeline controls can work together, depending on the puppet and mode.
Automation does not remove creative judgment. A useful character still needs readable artwork, a deliberate voice, clean audio, appropriate expressions, and editing that supports the message. Character Animator accelerates the mechanical part of performance animation; it does not decide what the character should say or why viewers should care.
It is not the best first choice for frame-by-frame drawing, complex motion graphics, feature-film character animation, or 3D work. Adobe Animate and After Effects solve different problems. Character Animator is strongest when a live human performance is the animation engine.
Starter mode versus Pro mode
Starter mode: the practical free on-ramp
Adobe says Starter mode is available with a free Adobe account and does not require a Creative Cloud subscription. Its focused workflow covers choosing or importing a puppet, calibrating the camera, recording face and voice, adding controls to a timeline, and exporting an H.264 video with Quick Export.
Starter is intentionally narrow. That is helpful when the goal is to prove a format rather than learn an entire rigging system. You can choose a sample puppet, test camera and microphone input, perform a short script, add trigger moments, and export a review file in one session.
Pro mode: a reusable production system
Pro is the right step when the character becomes part of a real production workflow. Adobe documents layered Photoshop and Illustrator puppet artwork, multiple characters, a multitrack timeline, richer behaviors, and Auto Swap for trigger-driven changes. A Starter project can move into Pro; a Pro project cannot move back into Starter.
That one-way boundary matters. Keep a clean Starter test if teammates may need the simple workflow, and duplicate the project before converting it to Pro. Also note that Adobe's January 2026 release notes describe version 26.0 as a stability release with no new features. The value proposition is the established workflow, not a large new 2026 feature set.
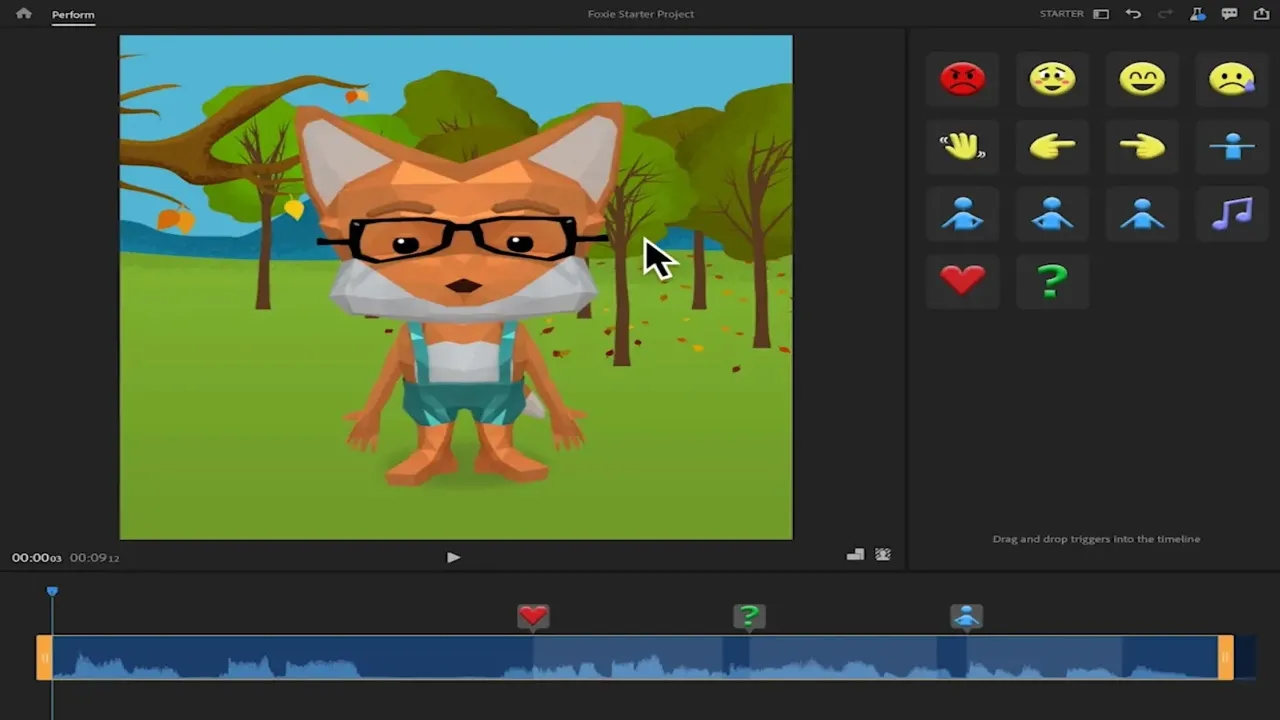
Starter mode keeps the free workflow focused on choosing a puppet, performing, recording, adding triggers, and exporting. Source: Adobe. Interface shown as documented by Adobe and may change.
How webcam performance becomes animation
The simplest workflow is: choose a puppet, set a rest pose, confirm the webcam and microphone, perform, and record. Calibration gives face and body tracking a reference position. Even lighting, a visible face, a quiet room, and an intelligible microphone usually matter more than buying an elaborate camera.
Record a short test first. Say a sentence with an obvious emotional change, turn your head gently, blink, and trigger a pose. Watch the result before recording the full script. If the performance feels stiff, adjust the character, framing, calibration, and delivery—not only the tracking controls.
For dialogue-heavy work, record clean voice audio separately when practical. Character performance and strong narration are related but different jobs. The character can react to a live or imported performance while the final edit still needs pacing, sound cleanup, music, captions, and a delivery format that fits the audience.
Body tracking can add useful movement, but more data is not automatically better. A talking-head character may become distracting when every shoulder and wrist movement transfers literally. Test which behaviors support the message, disable noisy inputs, and save a calibrated starting point for repeat episodes.
Build a custom puppet from Photoshop or Illustrator
Custom puppets are where Character Animator becomes valuable for a brand or recurring series. Prepare the character as layered artwork instead of a flattened image. Head, eyes, eyebrows, mouth shapes, hair, hands, and independent props should be separable. Name and organize those layers before import so rigging remains understandable.
Use Photoshop when the character is painted, textured, or photo-led. Use Illustrator when the artwork is vector-based and needs scalable, editable shapes. Either route works best when the source file is built for animation rather than adapted at the last minute from a flat illustration.
Do not begin by building every possible expression. Make a clean neutral puppet, test a real performance, then add the few triggers and swaps the recurring format needs. A small, dependable set of expressions will usually outperform a complicated rig that nobody can operate consistently.
This is where Pro mode earns its complexity. A custom puppet is a production asset. Store the layered source artwork, Character Animator project, audio, trigger map, and export preset together so the next episode does not require rebuilding the system.
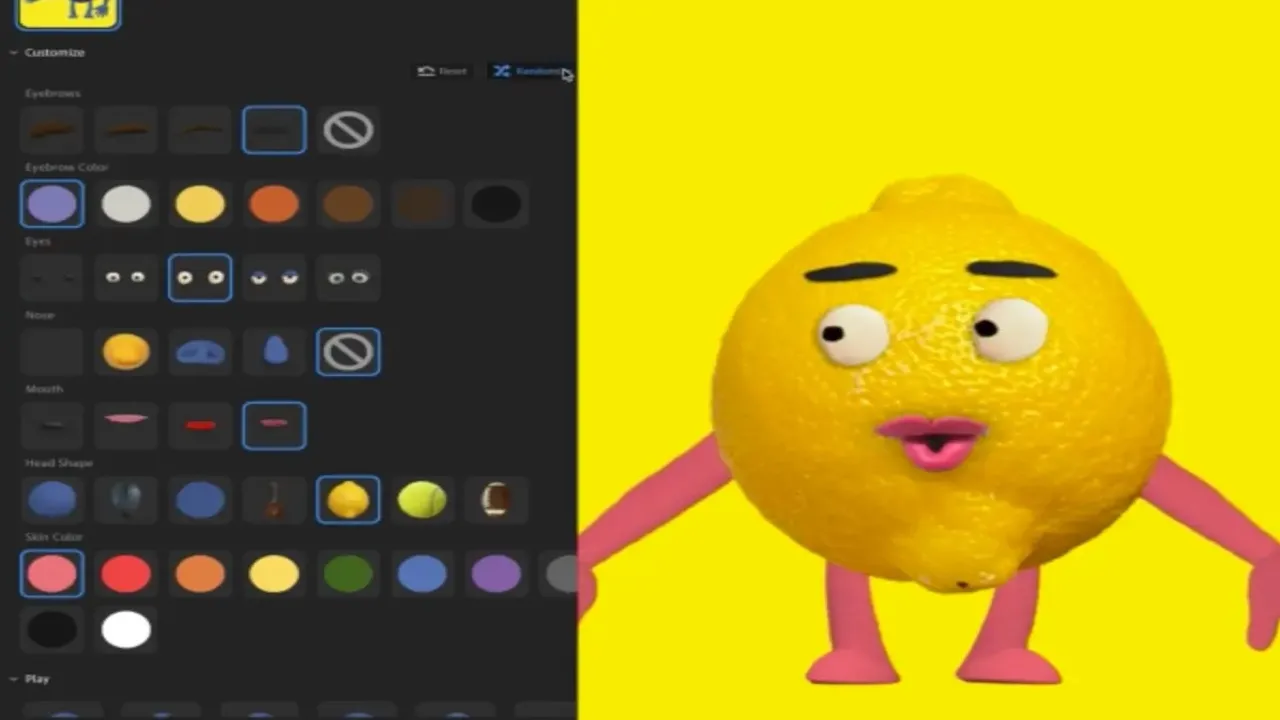
Puppet Maker offers a quick route to a customized character; original layered artwork and deeper rigging remain Pro-mode jobs. Source: Adobe. Interface shown as documented by Adobe and may change.
A practical first-project workflow
- Define one job for the character. Choose a 30-second explainer, recurring introduction, tutorial cutaway, or live audience interaction.
- Start with a sample puppet. Use Starter mode to test the complete recording and export loop before investing in original artwork.
- Write for performance. Keep the script short and leave breathing room for expressions, pauses, and poses.
- Calibrate and test. Record ten seconds, then inspect lip sync, eye direction, head movement, audio, and triggers.
- Edit for clarity. Trim the performance and add only the controls that improve the message.
- Export a review file. Check it on the destination platform before building a complex rig.
- Upgrade only after validation. If the format works, decide whether custom Photoshop or Illustrator artwork and Pro-mode control justify the setup.
This sequence protects time. A character is a format, not a feature checklist. Validate that viewers respond to the idea before investing days in rigging details that may never appear on screen.
Exports, live streaming, and delivery
Adobe documents Quick Export as the fast H.264 route for a standard video deliverable, with common resolution presets and a Match Source option. For a larger production pipeline, Character Animator can also work with Adobe Media Encoder or export image and audio components for more specialized finishing.
Treat Character Animator as the performance stage, then finish where the job needs it. Premiere is the natural home for edited episodes, captions, music, graphics, and final social or YouTube delivery. After Effects is more useful when the character needs compositing, tracked graphics, visual effects, or a broader motion-design system.
Live streaming is a legitimate use case, but it deserves rehearsal. Test camera and microphone selection, latency, scene framing, puppet triggers, the streaming software handoff, and a recovery plan before using a character in front of an audience. Keep a static fallback scene available if tracking or the connection fails.
Archive more than the final MP4. Keep the editable project, puppet artwork, audio, fonts, trigger notes, and an export master. A recurring character only saves time when the production system survives beyond one machine and one operator.
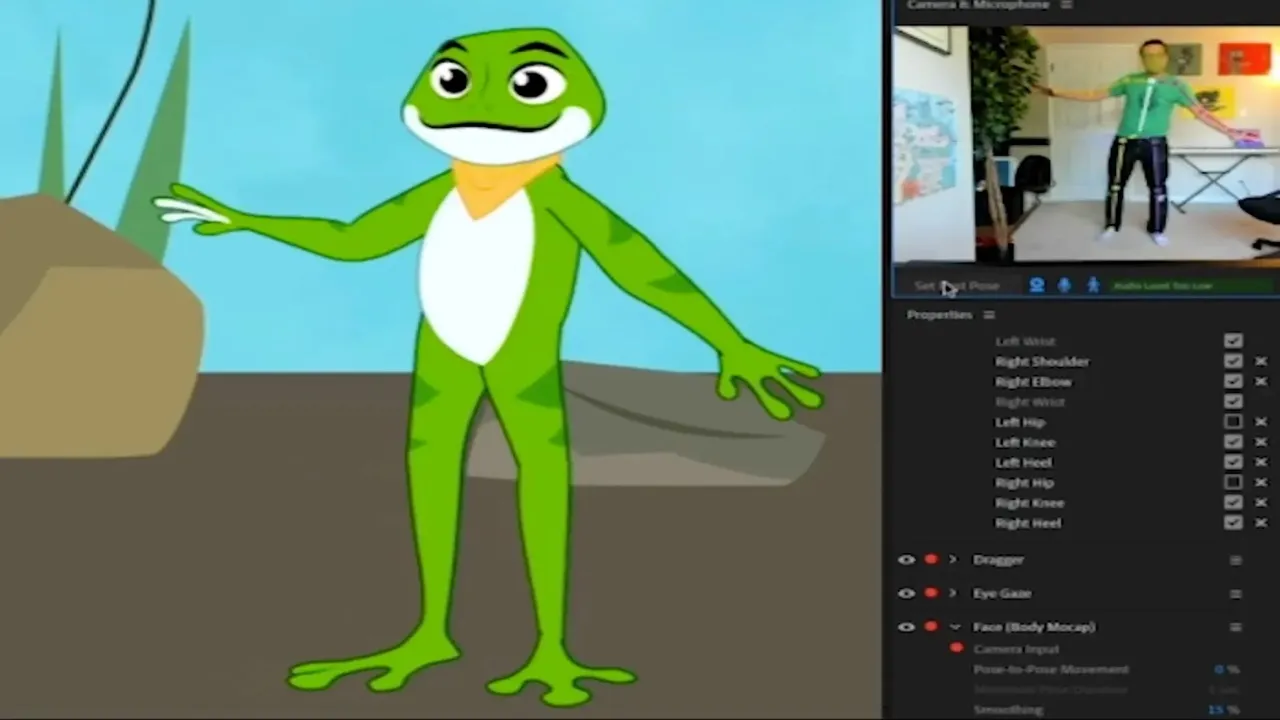
Character Animator can map a camera performance onto a puppet in real time, including body tracking in supported Pro workflows. Source: Adobe. Interface shown as documented by Adobe and may change.
Character Animator versus Adobe Animate and After Effects
| App | Best use | Primary animation model |
|---|---|---|
| Character Animator | Talking characters, face tracking, live reactions, creator formats | A puppet responds to a performer and triggers |
| Adobe Animate | Timeline-based vector animation, drawn movement, interactive formats | Artwork moves through frames, tweens, and keyframes |
| After Effects | Motion graphics, titles, compositing, visual effects, finishing | Layers and properties animate inside a composition |
There is overlap, but the ownership model is different. Character Animator makes a puppet respond to a performer. Animate makes artwork move through a timeline. After Effects composites and animates elements inside a larger motion-design or finishing workflow.
A small creator project may use only Character Animator. A polished series might design vector parts in Illustrator, perform the puppet in Character Animator, composite scenes in After Effects, and edit the episode in Premiere. Choose the smallest stack that produces the required result.
Who should use Character Animator?
Character Animator is a good fit for educators who want a repeatable presenter, creators who want a character-led short-form format, streamers who need a responsive on-screen personality, and brands that can justify a reusable mascot. It is especially useful when the same character appears often enough for setup work to compound.
It is less compelling when every project needs a completely different visual style or when the animation must be hand-drawn, highly cinematic, physically simulated, or 3D. It also will not rescue a weak script or poor audio. Performance capture should serve communication, not become the entire idea.
My recommendation: begin with Starter mode and a 30-second test. If the character makes the message clearer or more memorable, refine the format and then consider Pro. If the result needs exact drawn motion or elaborate compositing, move that work to Animate or After Effects rather than forcing Character Animator to own every stage.
Official Adobe sources
Frequently Asked Questions
What is Adobe Character Animator used for?
It is used for performance-driven 2D animation: talking characters, creator explainers, educational presenters, live reactions, streams, and recurring branded characters controlled by face, voice, body movement, or triggers.
Is Adobe Character Animator free?
Starter mode is available with a free Adobe account and covers choosing or importing a puppet, recording a performance, adding controls, and Quick Export. The deeper Pro workflow requires an eligible Creative Cloud plan.
What is the difference between Starter mode and Pro mode?
Starter simplifies performance, recording, and export with ready-made or imported puppets. Pro adds layered Photoshop and Illustrator workflows, richer rigging, multiple characters, a multitrack timeline, and more advanced behaviors and triggers.
Can Character Animator use a webcam and microphone?
Yes. A webcam can drive face and supported body movement, while a microphone supports lip sync and voice recording. Good calibration, lighting, framing, and clear audio improve the result.
Can I make a custom puppet in Photoshop or Illustrator?
Yes, in the Pro workflow. Organize the character as clearly named layers so Character Animator can identify facial features, mouth shapes, limbs, hair, hands, props, and other independently moving parts.
Is Character Animator better than Adobe Animate?
Neither is universally better. Character Animator is faster for performance-controlled puppets and live interaction. Animate is better when the movement is built primarily through drawing, frames, tweens, and timeline animation.
Can Character Animator export an MP4 video?
Adobe's Quick Export produces H.264 video for common delivery needs. Media Encoder and image-plus-audio workflows are available when the project needs more specialized finishing.
Can I use Character Animator for a live stream?
Yes. Adobe supports live performance workflows, but test camera and microphone routing, latency, scene framing, triggers, streaming software, and a fallback before going live.

About the Author
Joseph Nilo has been working professionally in all aspects of audio and video production for over twenty years. His day-to-day work finds him working as a video editor, 2D and 3D motion graphics designer, voiceover artist and audio engineer, and colorist for corporate projects and feature films.