
Waves CLA-2A is an optical-compressor model built around two main adjustments: Peak Reduction changes the amount of compression, and Gain sets the level through the modeled output stage. Unlike a compressor with separate timing knobs, its response depends on the signal and the modeled optical behavior. The current version also provides Auto Makeup, Mix and final Trim. [1][2]
The compact layout makes it approachable. It does not make every setting interchangeable.
This guide explains the public documentation and practical choices. It does not claim a new comparison with hardware, CLA-76 or another plugin.
About the imagery: the cover is an AI-generated editorial illustration. The plugin interface is official Waves product artwork, not a capture of a listening test.
My Short Version
CLA-2A is worth considering when you want a leveling-compressor approach without adjusting attack and release independently.
Use Peak Reduction to decide how much processing is appropriate. Compare levels before judging the change, and notice whether Auto Makeup is enabled.
HiFreq changes what the detector pays attention to. It is not a treble control. And the Limiter setting is not a substitute for checking your final export's true peaks.
What the optical model means in practice
Waves models an electro-optical leveling amplifier, including a program-dependent response. The manual describes a multi-stage release rather than a single user-selected release time. Mono and linked-stereo components are provided. [1, pp.3–6]
The practical consequence is that the same knob position can respond differently to a sustained phrase, a short peak or a dense series of notes. You do not set its recovery by typing a release time.
That can suit a track whose broad level needs controlling. A different compressor may be more useful when you need to shape the first few milliseconds of a transient very precisely.
Read the current interface
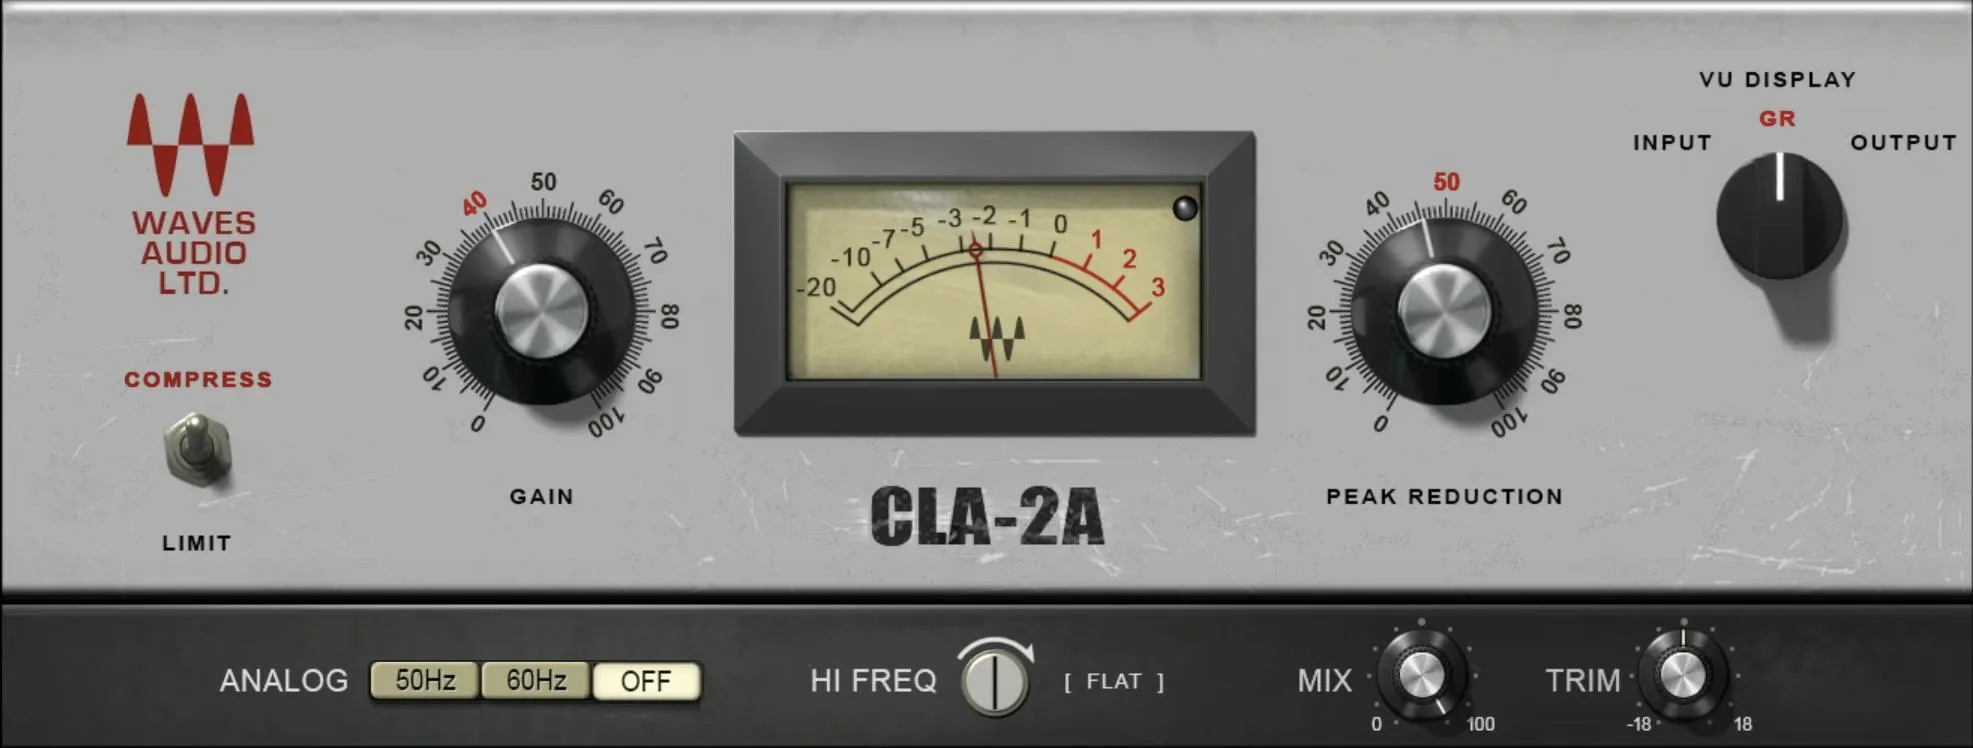
The main faceplate contains Gain, Peak Reduction, Compress/Limit and the VU selector. The lower controls include HiFreq, Analog, Mix and Trim; the updated manual also documents Auto Makeup. [1]
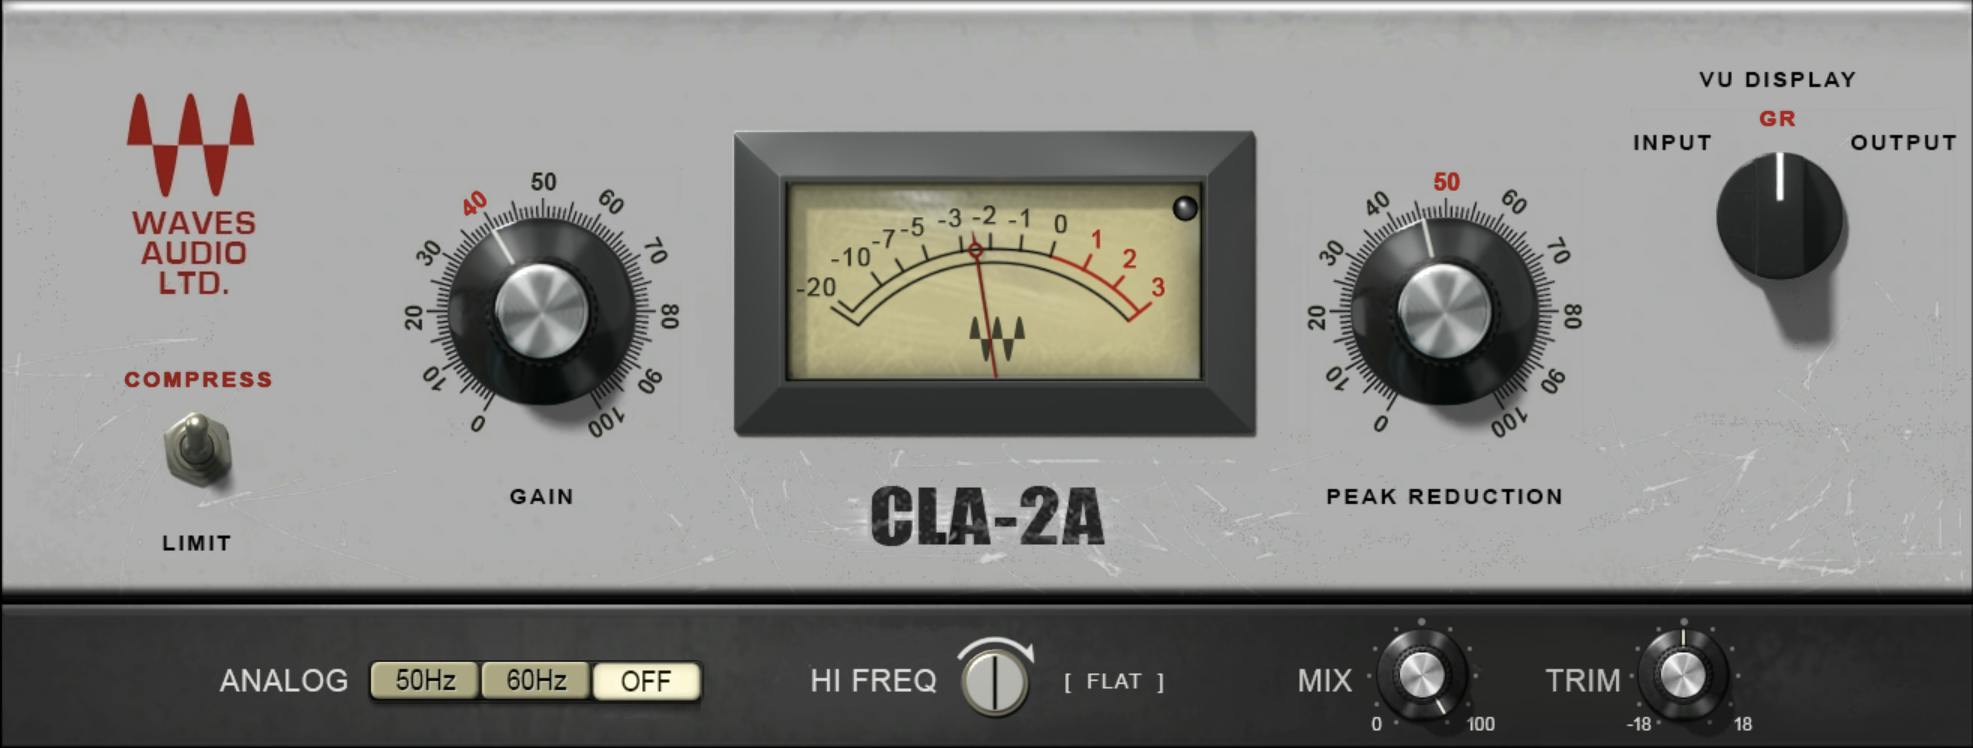
Official artwork and older manuals do not always show the same revision of the lower strip. The image caption identifies the artwork being used. Follow the actual labels in your version rather than assuming a missing item is an undocumented sonic mode.
Every control
Peak Reduction
Peak Reduction sets how strongly the compressor works. Its scale runs from 0 to 100; the number is a control setting, not a direct dB reading of gain reduction. The manual lists initial value 46 and reset value 0. [1, p.7]
Increase it while listening to representative material and reading the meter in GR mode. Do not aim for a fixed amount of reduction on every voice or instrument.
If a stronger setting makes the track easier to hear only because the level relationship changed, correct that comparison before deciding it sounds better.
Documentation note: the control description gives a 0.04 step size, while the appendix gives 0.01. Both agree on the 0–100 range. This guide does not choose a supposedly precise increment from conflicting instructions. [1, pp.7,10]
Gain
Gain controls the modeled output-stage level. Its documented scale is 0 to 100, with initial value 40 and reset value 32.28, described as unity gain. The same 0.04-versus-0.01 step conflict appears in its description and appendix. [1, pp.7,10]
Think of it separately from Peak Reduction. One controls the compression decision; the other helps establish the resulting level. With Auto Makeup enabled, their relationship also includes the automatic adjustment described below.
Do not interpret a Gain value of 50 as +50 dB. Use the output and your actual level relationship, not a familiar-looking number without its units.
Auto Makeup
Auto Makeup is documented in the updated official manual, page 7, but is absent from the library artwork above.
Auto Makeup links changes in Peak Reduction to an adjustment of Gain. Moving Gain does not drive Peak Reduction in the opposite direction. To alter the offset, the manual describes disabling Auto Makeup, adjusting the relationship, and enabling it again. [1, p.7]
It can make compression comparisons less awkward, but it does not certify matched loudness for every source. Recheck the level after a large change.
The manual does not provide a dependable initial/reset state for this newer control. Check the visible state rather than assume it from an old preset or screenshot.
Compress / Limit
The switch selects Compress or Limiter behavior. Waves describes approximate ratios around 3:1 and 100:1 respectively, with Compress as the initial/reset choice. The modeled response remains program-dependent rather than a new set of exposed timing controls. [1, pp.3,8,10]
Use the switch to choose a behavior, not to guarantee a delivery ceiling. A mode labeled Limiter does not establish what an encoded file's true-peak meter will show.
For spoken-word leveling, compare what happens to the natural level contrast within a phrase. If the stronger mode removes that contrast, reconsider whether the track needs that degree of restraint.
HiFreq
HiFreq changes the frequency emphasis of the compressor's detector. At Flat, the detector has the documented flat response. Moving away from that setting reduces low-frequency influence relative to higher-frequency material. The control operates above approximately 1 kHz. [1, p.8]
This is not an EQ boost in the audible signal path. It changes what drives the compressor, which can change the gain applied to the whole signal.
That distinction matters when dealing with a bright consonant. Making the detector more sensitive to it is not the same operation as processing only a narrow sibilance band with a dedicated de-esser.
The documented control range is 0–100, in 0.1 steps, with initial value 50 and reset value 100/Flat. Do not infer a frequency in hertz directly from the control number. [1, pp.8,10]
Analog
Analog offers Off, 50 Hz and 60 Hz modeled noise/hum options. The manual lists 60 Hz initially and Off on reset. This switch is described in terms of modeled noise; it is not a universal removal switch for the rest of the analog model. [1, pp.8,10]
A clean narration chain usually deserves a deliberate decision about added noise. An effect-oriented music mix may make a different choice. Neither choice should be accidental.
Mix
Mix blends uncompressed and compressed audio over 0–100%, in 0.1% steps. Its documented default is 100%. [1, p.9]
Learn the compressor fully wet first, then decide whether a parallel blend is useful. If the blend becomes louder, match the comparison rather than attributing every change to a better envelope.
Mix does not turn one timing response into another. It combines the processed and unprocessed results.
Trim
Trim sets the final output after the blend. It runs from -18 to +18 dB, in 0.1 dB steps, with initial/reset value 0 dB. [1, p.9]
Use it for the final level relationship without confusing it with the modeled Gain control or Peak Reduction. It is not a true-peak ceiling.
VU display and readings
The selector switches the VU meter among Input, Gain Reduction and Output, with GR as the documented default. The manual describes its modeled 0 VU reference using a -18 dBFS digital calibration. [1]
In GR mode, use the needle to understand the amount and recovery of reduction. In Input or Output, read it as that selected level view.
Do not equate 0 VU with digital clipping, and do not treat this display as integrated LUFS. If the job has a delivery specification, measure the finished programme with the correct meter.
The current manual does not define a CLA-2A-specific held-peak reset gesture for the VU face. Do not borrow one from a different plugin merely because the meters look similar.
Timing and components: what is not a knob
There is no separate user-facing Attack, Release, Knee or adjustable-ratio control in the documented CLA-2A interface. The optical response and selected Compress/Limit behavior provide those relationships. [1]
Choose Mono or Stereo in the host's component menu to match the source. Stereo linking is part of that component's operation, not a reason to duplicate the guide for a second product. [1, p.6]
When you need independently selected timing or a specific ratio, Renaissance Compressor is a useful control-layout comparison. That is a feature distinction, not a listening verdict.
Presets and the toolbar
About shows plugin information. Undo/Redo step through recent edits. The preset menu, Previous/Next and Save load and manage settings. Setup A/B compares two setups; Copy A/B gives them a common starting point. The menu at the right includes sizing and help. [3]
A/B is not a complete-plugin bypass. Both setups may still contain compression and modeled noise.
The newer preset browser adds search and Factory/User/Favorite views, plus favorites, Copy/Paste, Reset to Default and Detach. Those are preset and window functions, not new optical-compression parameters. Menu appearance can differ from the product manual's older toolbar illustration. [4]
Before using a saved setting on a new vocal, inspect Analog, Mix and Auto Makeup. A preset can carry choices beyond the two large knobs.
A practical starting workflow
First decide whether the problem is a few level jumps or the overall dynamic behavior. Clip gain is often the more targeted tool for the former.
Choose a representative passage. Set the mode deliberately, bring up Peak Reduction gradually, and compare at a sensible level. Listen across quiet endings as well as strong words.
Evaluate HiFreq only when the detector's frequency balance is part of the problem. Change it with a clear question, then check whether the whole voice now moves in an unwanted way.
Use Mix or Trim to establish the final relationship. Recheck with the rest of the mix and preserve a version without the plugin.
These are suggested evaluation steps, not a universal vocal preset or a report of a newly completed test.
Related plugins
RComp exposes timing and ratio choices for a more explicitly adjustable dynamics workflow.
Vocal Rider addresses gain riding rather than recreating this optical compression response.
CLA-76 provides a FET model with attack, release and ratio selections. Comparing the manuals helps decide which controls your task needs; an audio winner requires an actual comparison.
For the larger toolkit, visit the Waves audio-post hub and the Waves plan comparison. Plan inclusion is a separate purchasing check, not a conclusion drawn from the control count.
Bottom line
CLA-2A gives you a compact way to work with program-dependent compression. Understand Peak Reduction and Gain first, then account for the detector, modeled noise, parallel blend and final trim.
Choose it because that approach fits the track—not because two large knobs promise that every decision has already been made for you.
Sources
Checked September 19, 2026. No fresh product test or compatibility certification.
- Updated Waves CLA-2A User Guide, pp.3–10.
- Waves CLA-2A product page.
- WaveSystem guide.
- Current Waves preset instructions.
- Waves Graphic Library.
Frequently Asked Questions
Can you set attack and release times in Waves CLA-2A?
No separate attack or release controls are documented. The modeled optical response is program-dependent, so its recovery can change with the signal rather than following one user-entered release time.
What is the difference between Peak Reduction and Gain in CLA-2A?
Peak Reduction controls how much compression is applied, while Gain adjusts the makeup level after compression. The manual conflicts on their increments—0.04 in the control descriptions and 0.01 in the appendix—so do not treat either precise step as settled.
Why is Auto Makeup missing from some CLA-2A images?
The updated manual documents Auto Makeup, but older official product artwork may not show that newer control. Follow the labels in your installed version and do not infer an Auto Makeup default from older artwork.
Is the CLA-2A HiFreq control an equalizer?
No. HiFreq changes the frequency emphasis in the compressor's detector above about 1 kHz, which changes what drives gain reduction. It does not directly boost treble in the audible signal path.
What changes when CLA-2A switches from Compress to Limiter?
Compress and Limiter select behaviors that Waves describes as approximately 3:1 and 100:1. Limiter mode is not a true-peak delivery ceiling, so measure the completed export separately.
What are CLA-2A Mix and Trim used for?
Mix blends the compressed and uncompressed paths for parallel processing. Trim adjusts the plugin's final output level after that blend, so it is separate from the modeled Gain control and is not a true-peak ceiling.

About the Author
Joseph Nilo has been working professionally in all aspects of audio and video production for over twenty years. His day-to-day work finds him working as a video editor, 2D and 3D motion graphics designer, voiceover artist and audio engineer, and colorist for corporate projects and feature films.