
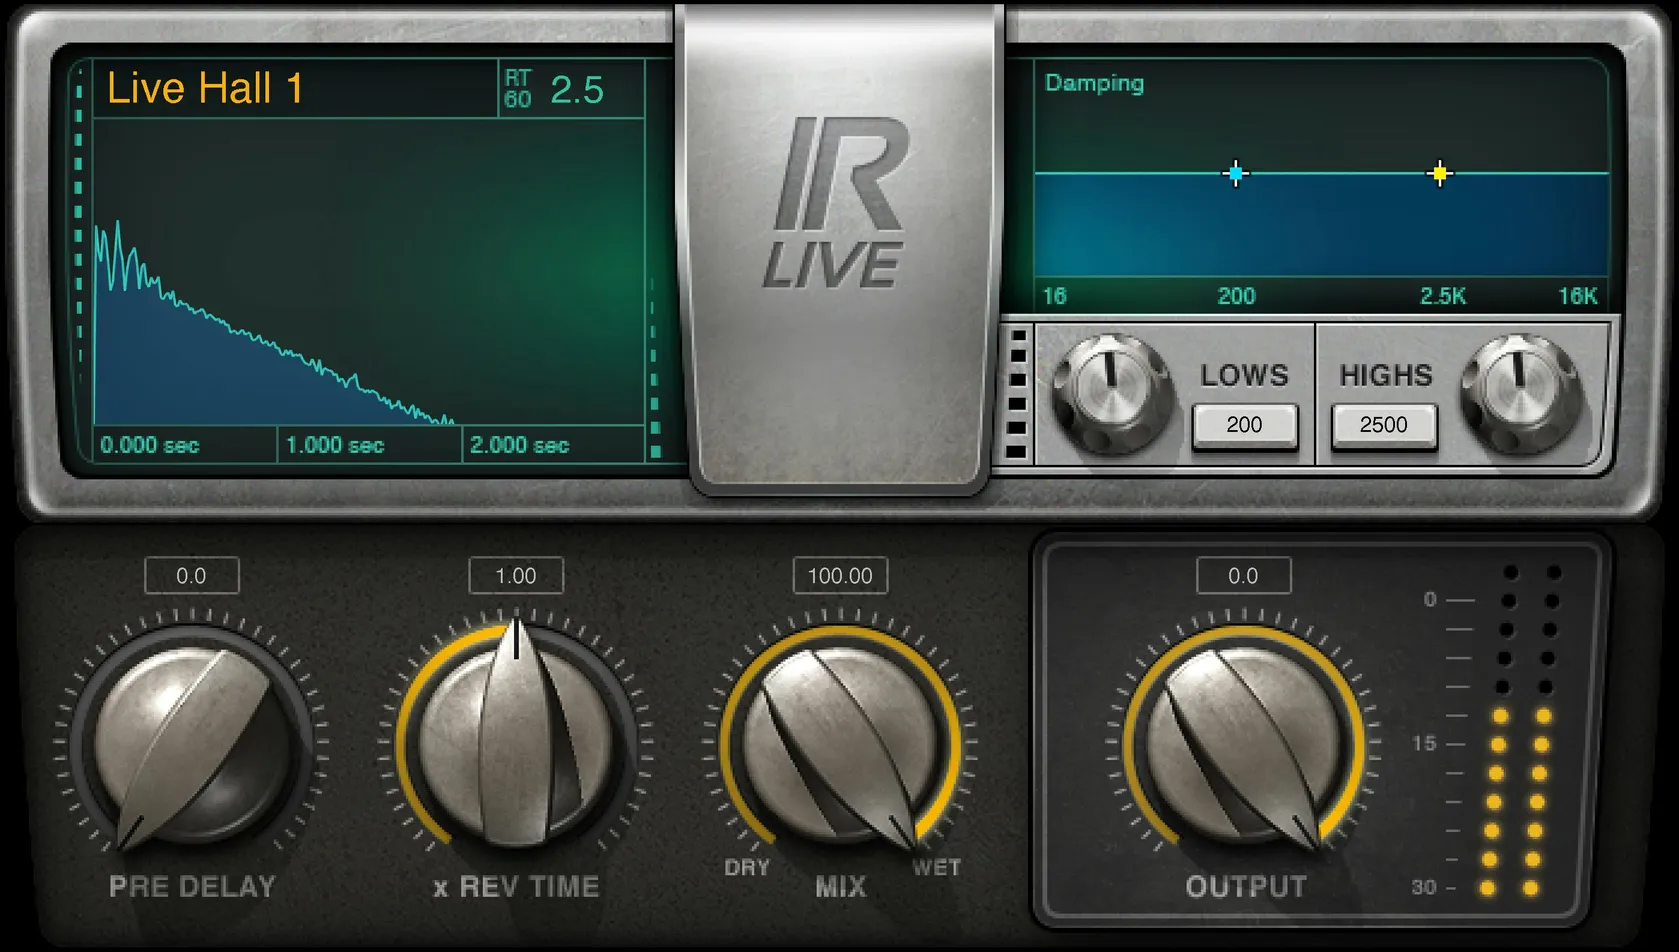
Waves IR-Live is a streamlined convolution reverb built around impulse responses: sampled acoustic responses that the plugin uses to filter your audio into the character of a room, hall, plate, spring or other captured space. Its interface is intentionally small. You choose or load an impulse response, then shape its timing and frequency-dependent decay with Pre Delay, Rev Time, low/high Damping, Mix and Output. [1][2]
That simplicity hides one important live-use detail. Changing Pre Delay, Rev Time or either damping setup makes IR-Live recalculate the convolution response and causes a short transition fade. Waves explicitly recommends setting those parameters before showtime. Mix and Output do not require that recalculation and are the safer performance-time controls. [1, p.4]
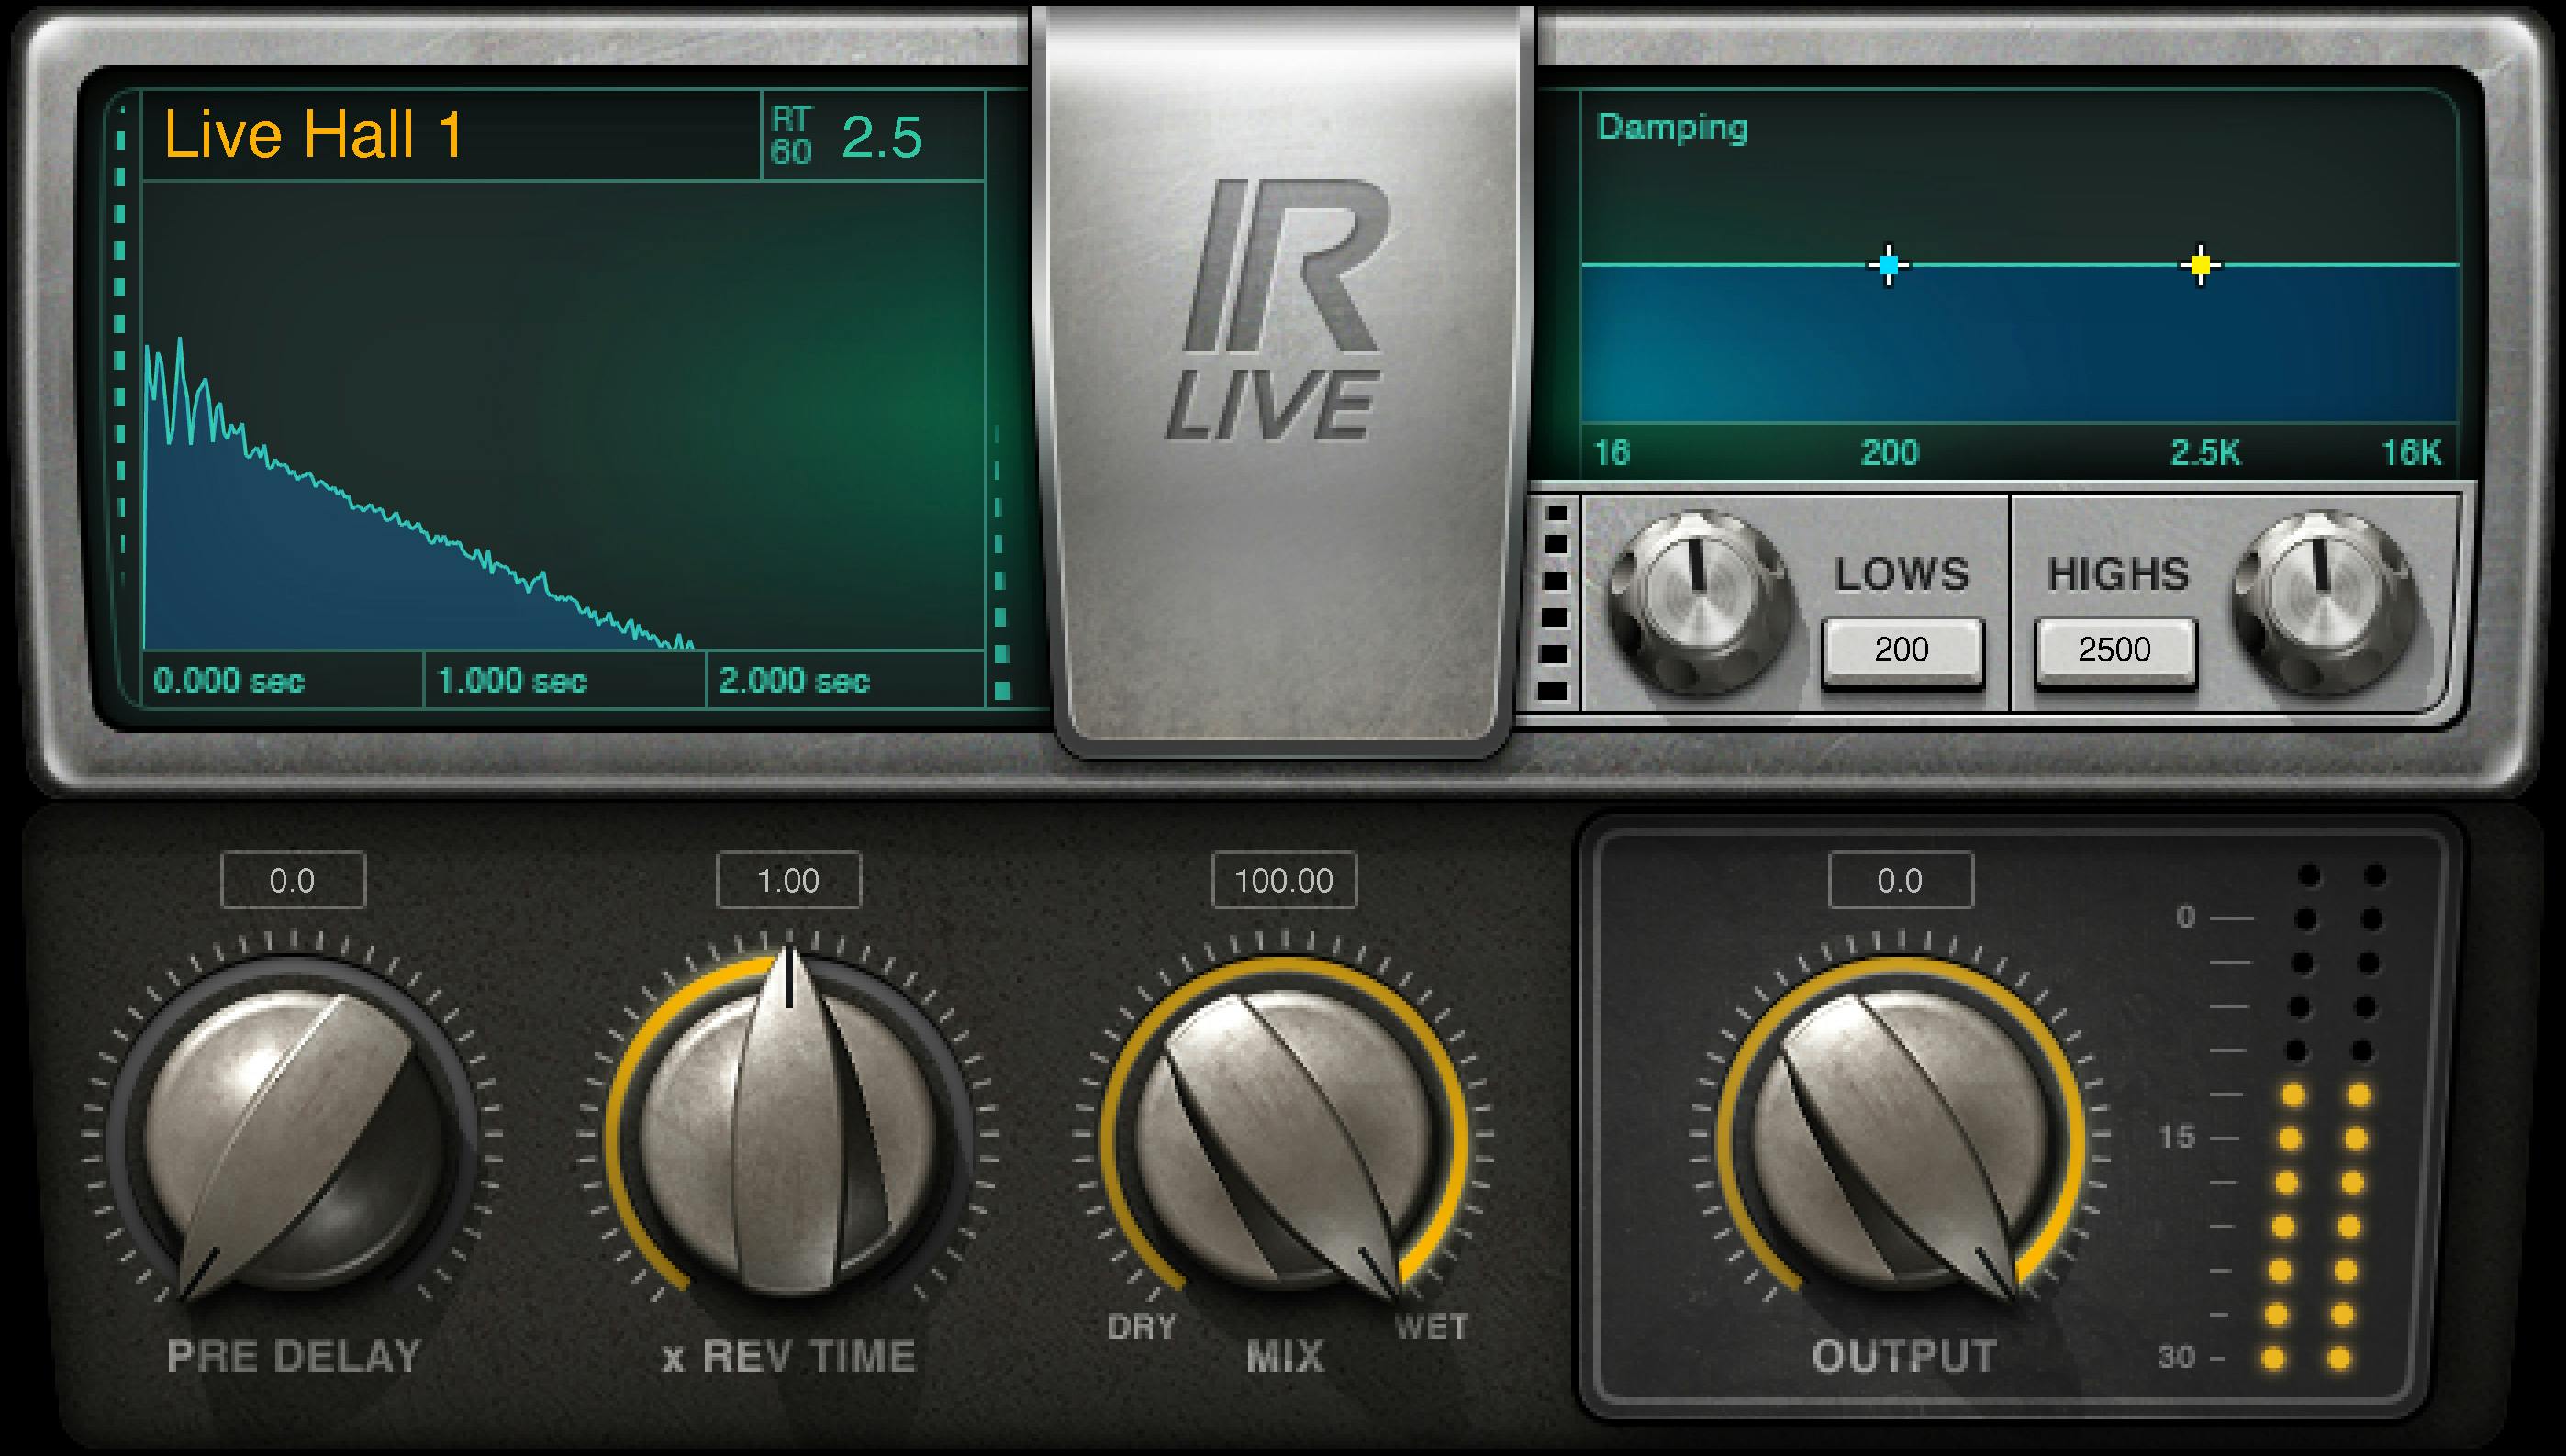
About the imagery: the cover is an editorial illustration. The official Waves interface image below shows an earlier IR-Live design, not the current V2 appearance. It is not a capture of a listening or compliance test.
My Short Version
Start by choosing an impulse response that already has the basic space you want. Treat IR-Live as a captured-space processor first and a tone-shaping tool second.
Set Rev Time, Pre Delay and the low/high damping before a live performance because those controls trigger a short recalculation fade. Use Mix and Output for routine balance changes while the show is running. [1]
On an aux send, Waves recommends 100% wet Mix. On an insert, use Mix to blend dry and reverberated signal. If you load a custom impulse response, carry that IR file with the session or system transfer: the IR itself is not stored inside a Waves preset file. [1]
What an impulse response changes
IR-Live uses an impulse response, or IR, as the basis of its reverb. Waves describes an IR as an audio signal containing the sampled characteristics of a space or device. The plugin convolves the incoming audio with that response, effectively using thousands of captured reflections as a filter. [1, pp.3–4]
That means the selected IR is not just another preset label. It establishes the underlying reflection pattern and time response that the controls then modify.
The basic factory library documented in the manual includes five halls, three chambers, three rooms, three short plates, three long plates and two spring reverbs. Waves also maintains an extended IR Reverb Library for IR-L, IR1, IR-Live and IR360. [1, p.5][3]
For a practical workflow, choose a room family and perspective that is already close before stretching the response with Rev Time or damping. That is an editorial recommendation, not a claim that one library category sounds more realistic than another.
Pre Delay
Pre Delay sets the time between the dry sound and the start of the wet reverb. Its documented range is 0–500 ms. [1, p.6]
A short setting keeps the reverb close to the source. A longer setting separates the initial dry event from the reverberant field. That separation can make a vocal or instrument feel more distinct before the room response arrives, but the appropriate amount depends on the material and tempo.
For live operation, this is one of the controls Waves says triggers a convolution recalculation and short transition fade when changed. Set it before showtime when uninterrupted output matters. [1, p.4]
Rev Time
Rev Time shortens or lengthens the duration of the loaded impulse response. The range is 0.25–4.00 times the original IR time. [1, p.6]
This is a multiplier, not a direct seconds display. A value of 1.00 leaves the source IR at its original duration; lower values shorten it and higher values extend it. The actual audible duration therefore depends on the impulse response you loaded.
Do not convert a multiplier into a fixed decay time unless you know the original IR duration. IR-Live's documentation does not define one universal second value for a given Rev Time setting.
Rev Time also triggers the recalculation/transition behavior described above, so it belongs in pre-show setup rather than routine live riding. [1]
Mix
Mix balances the direct input against the reverberated signal from 0–100%. [1, p.6]
Waves' documented routing guidance is straightforward: on an aux send/return, set Mix to 100% wet because the dry signal is already present on the source channel. On an insert, set Mix for the amount of reverb you want blended with the original signal. [1]
Unlike Pre Delay, Rev Time and damping, Mix does not require the convolution recalculation and can be adjusted safely during performance according to the manual. [1, p.4]
This makes Mix the obvious balance control when the underlying reverb shape is already correct and you only need more or less effect.
Low-frequency damping
IR-Live gives the low end two linked controls: a Damping Ratio and Damping Frequency. Together they change how long the reverb persists below a chosen frequency. [1, pp.6–7]
Lows Damping Ratio
The low-frequency ratio ranges from 0.1–2.00 times the original impulse-response reverb time. [1]
Values below 1.00 shorten low-frequency decay relative to the original IR. Values above 1.00 extend it. This is a time relationship, not an EQ gain control: it changes how long that part of the reverb lasts rather than simply cutting or boosting bass amplitude.
Lows Damping Frequency
The low-frequency cutoff spans 16–1600 Hz. Damping applies below that boundary. [1, p.7]
Use the frequency control to define how much of the low spectrum participates, then use the ratio to decide whether that region decays faster or slower than the source IR.
A practical reason to shorten low-frequency decay is to reduce prolonged low-end buildup from a long room. Extending it can make a captured space linger more heavily. Those are workflow suggestions; this article does not claim a tested preferred setting.
Both low-damping controls belong to the recalculation group. Changing them can cause the documented short transition fade. [1]
High-frequency damping
The high side mirrors the same concept with its own ratio and frequency boundary. [1]
Highs Damping Ratio
The documented ratio is 0.1–2.00 times the original IR reverb time. [1, p.7]
Below 1.00, the high-frequency reverb is shortened relative to the loaded response. Above 1.00, it is extended.
This is useful for separating the duration of high-frequency reverberation from the overall Rev Time. A long room does not have to keep its high-frequency energy alive for the same proportion of time as its lower spectrum.
Highs Damping Frequency
The high-frequency boundary spans 1000–21000 Hz, with damping applied above the selected frequency. [1, p.7]
A lower boundary brings more of the upper spectrum into the damping treatment. A higher boundary confines the altered decay to the top end.
Again, this is decay shaping rather than a conventional high-shelf EQ. The effect is about how long the selected frequencies reverberate.
Output
Output controls final plugin gain. The manual specifies a range of -50 to 0 dBFS. [1, p.7]
The manual uses dBFS for this control, so this guide preserves that wording rather than silently substituting a different gain-unit label.
Output does not trigger the convolution recalculation and is documented as safe to adjust during a performance. [1, p.4]
Use it to manage the effect return or insert level after the reverb shape is established. On an aux, this is separate from the source channel's send amount and from the plugin's wet-only Mix recommendation.
The three components
IR-Live includes three documented channel configurations: IR-Live Mono, IR-Live Mono to Stereo, and IR-Live Stereo. [1, p.4]
Use the component that matches the routing you actually need. Mono processes a mono path; Mono to Stereo lets a mono source feed a stereo reverb output; Stereo is for a stereo input path.
The manual does not document a separate surround IR-Live component. Waves has other IR-family products for broader channel formats, but those are distinct products rather than hidden modes inside IR-Live.
Presets, custom IRs and the toolbar
The WaveSystem toolbar provides the documented common actions: load and save presets, compare settings, undo/redo, and resize the plugin. [1, p.4]
The manual's Quick Start specifically points to the previous/next preset arrows for moving through the factory library. [1, p.5]
A preset and an impulse-response file are not the same thing. If you import a custom IR, the IR audio is not saved inside the Waves preset file. Waves explicitly tells users to take the custom IR with them when moving between systems. [1, p.4]
That distinction matters for session portability. A preset can remember plugin settings while still depending on an external custom IR file.
Waves' current support page also documents installation of its extended IR Reverb Library for IR-L, IR1, IR-Live and IR360. [3]
The control you should not ride live
The most important operational limitation in IR-Live is not a range or a hidden switch. It is the recalculation behavior.
When you change Pre Delay, Rev Time or damping, the plugin performs mathematical calculations and produces a short transition fade. Waves' own instruction is to establish those settings before showtime. [1]
So for live use, build the room first: choose the IR, set timing and damping, then leave those structural parameters alone when continuity matters. Use Mix and Output for changes that the manual explicitly says do not require those calculations.
This is a documentation-based workflow, not a new latency or dropout measurement from this article.
A practical setup order
Choose the impulse response first. Decide whether you want a hall, room, chamber, plate, spring or a custom captured space.
Set Rev Time next. If the original IR is too short or too long for the source, use the multiplier while remembering that it scales the IR rather than entering an absolute decay in seconds.
Set Pre Delay for the amount of separation you want between direct sound and reverberation. Then use low and high damping to decide whether either end of the spectrum should decay faster or slower than the original response.
Choose routing-aware Mix: 100% wet on a normal aux return, or a dry/wet blend on an insert. Finish with Output.
For a live show, stop changing the recalculation controls once the setup is established. These are editorial steps derived from the documented signal behavior, not a one-size-fits-all preset.
Limitations and documentation boundaries
IR-Live is intentionally narrower than Waves' deeper IR-family editors. This guide does not assign controls that are not present in the IR-Live manual, and it does not borrow IR1 or IR360 parameters and pretend they exist here.
The current product page confirms IR-Live remains a public Waves product, but prices, promotion banners and subscription terms can change and are not part of this evergreen control reference. [2]
The manual's installation-era references to older live systems are historical product documentation, not a current compatibility certification by this article. Check Waves' current system requirements for the host and version you actually plan to run.
No new listening, CPU, latency or show-reliability test was performed for this manuscript.
Related plugins
IR-L Convolution Reverb is another streamlined member of the same Waves IR family. IR1 Convolution Reverb exposes a deeper IR-editing workflow. These are official product links, not links to unpublished Joseph Nilo articles.
For a different kind of finished-level control, the live L2 Ultramaximizer guide explains a limiter rather than a reverb. Do not substitute limiting for reverb-output balance; the link is useful only when the broader chain needs peak control.
The Waves Audio Post Resources hub collects the site's already-live Waves workflow and licensing references.
Bottom line
IR-Live is easiest to understand as an impulse-response chooser with eight shaping controls around it. Pre Delay and Rev Time shape timing, the two damping pairs shape frequency-dependent decay, Mix sets dry/wet balance, and Output sets final level.
For live use, remember the operational distinction: Pre Delay, Rev Time and damping recalculate the response and can create a short transition fade; Mix and Output do not. Set the reverb's structure before showtime, then ride the controls Waves documents as safe. [1]
Sources
Checked September 20, 2026. No new sonic, CPU, latency or compatibility test.
- Waves IR-Live User Guide, concepts/components pp.3–4, quick start p.5, controls pp.6–7.
- Waves IR-Live Convolution Reverb product page.
- Waves: How to Install the IR Reverb Preset Library, current support article.
- Waves Graphic Library, attribution/backlink condition and exact
IR-Live Convolution Reverbproduct-art entry.
Frequently Asked Questions
What is an impulse response in Waves IR-Live?
An impulse response is a sampled response of a space or device. IR-Live uses it as the basis of its convolution reverb, so the selected IR establishes the underlying reflections that its controls then reshape.
Which IR-Live controls should I avoid changing during a live show?
Waves says changes to Pre Delay, Rev Time and damping recalculate the convolution response and cause a short transition fade. Set those before showtime when continuity matters; Mix and Output do not require that recalculation.
Is IR-Live Rev Time a duration in seconds?
No. Rev Time multiplies the loaded impulse response's original duration from 0.25 to 4.00 times. The resulting time in seconds depends on the IR you loaded.
Should IR-Live Mix be 100% wet on an aux return?
Yes. Waves recommends 100% wet Mix for an aux send/return, where the source channel already supplies the dry signal. On an insert, use Mix to blend dry and reverberated sound.
Does an IR-Live preset store an imported custom IR file?
No. Waves says a custom impulse-response audio file is not saved inside its preset file. Carry the custom IR separately when moving the preset or session to another system.
What channel components does IR-Live provide?
The manual lists IR-Live Mono, IR-Live Mono to Stereo, and IR-Live Stereo. It does not list a separate IR-Live surround component.
About the Author
Joseph Nilo has been working professionally in all aspects of audio and video production for over twenty years. His day-to-day work finds him working as a video editor, 2D and 3D motion graphics designer, voiceover artist and audio engineer, and colorist for corporate projects and feature films.