
Waves Space Rider combines chorus, delay and reverb in one plugin, then adds a dynamic Rider that can move multiple selected controls together. Each effect can receive the plugin's dry input, while Chorus can feed Delay and Delay can feed Reverb. That makes the plugin capable of parallel effects, serial chains, or a mixture of both without building separate DAW buses. [1][2]
The Rider is the other half of the design. It is not a crossfade between two complete presets. Instead, you define a range and direction for individual knobs, then move all assigned controls between an α (alpha) and β (beta) state manually, with DAW automation, or from the input envelope. [1]
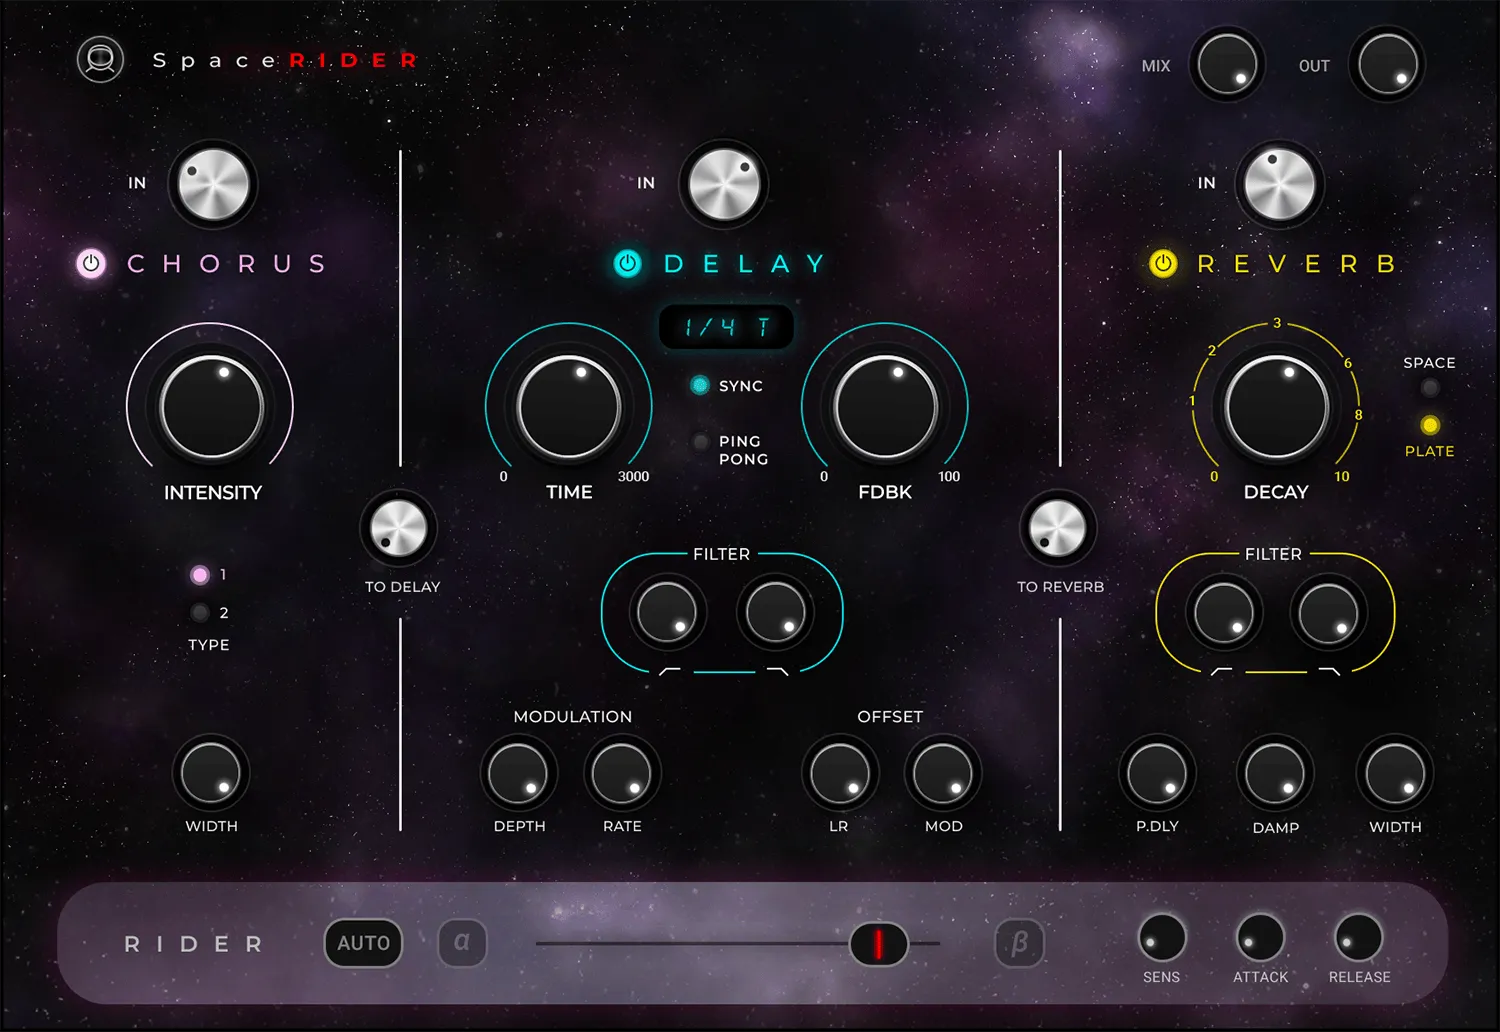
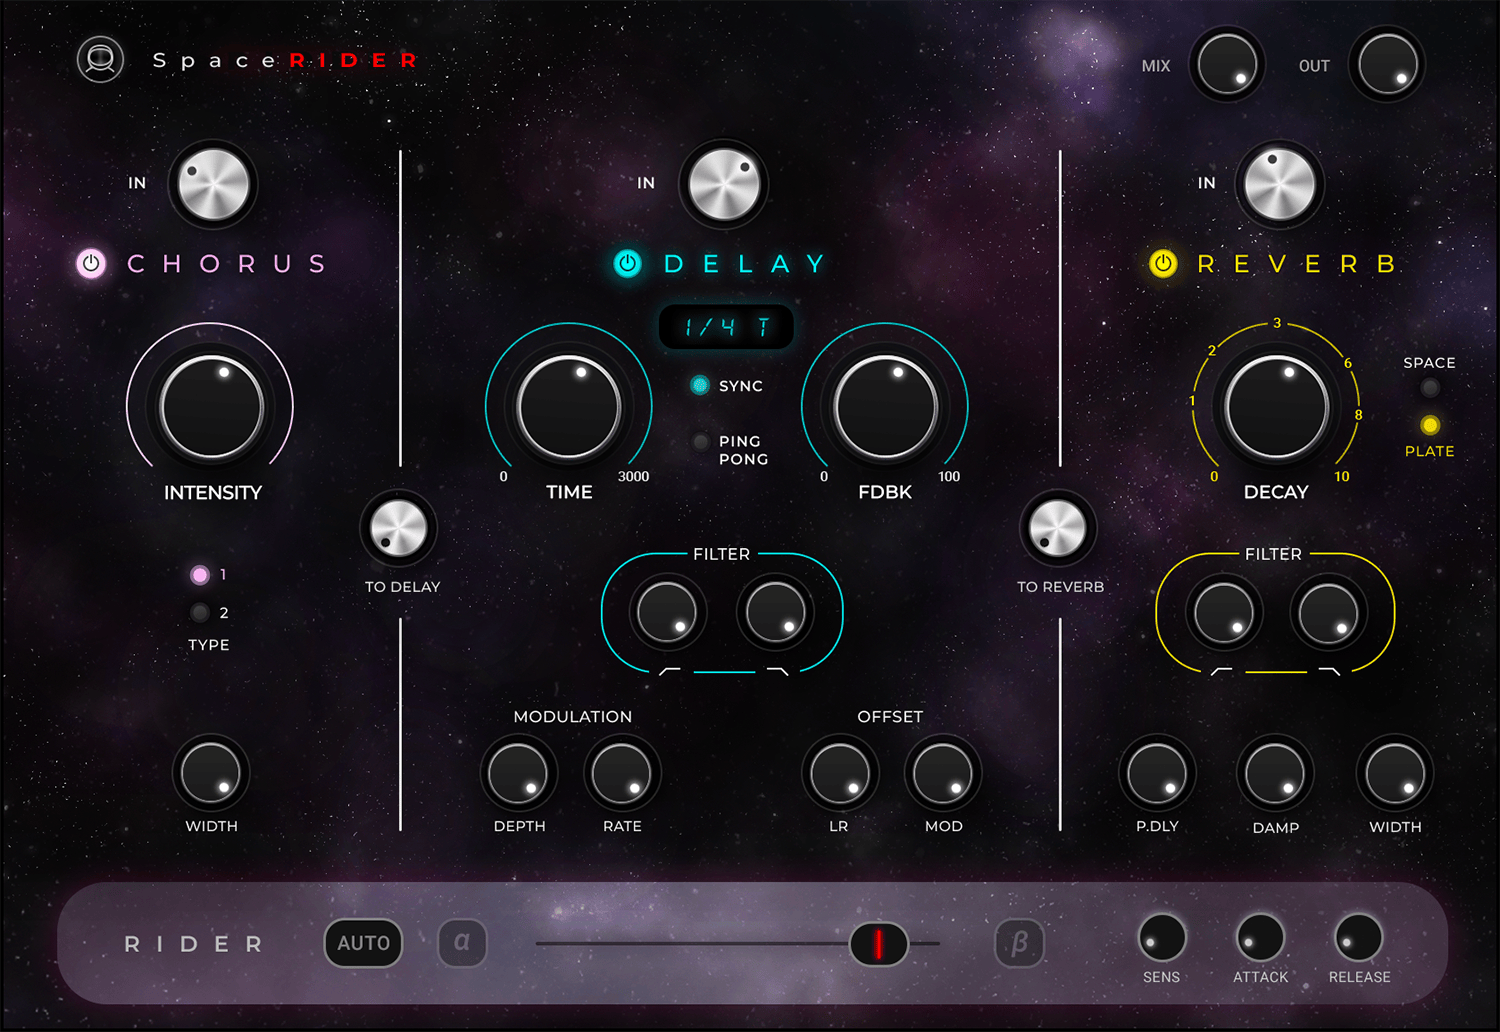
About the imagery: the cover is an editorial illustration. The plugin interface is official Waves product artwork, not a capture of a listening or compliance test.
My Short Version
Think about Space Rider in two layers.
First, build the effects: set Chorus, Delay and Reverb, then decide how much dry input each section receives and how much Chorus feeds Delay or Delay feeds Reverb.
Second, decide whether the Rider should move any of those controls. Set an α/β range around each assigned knob, reverse individual directions where useful, then either automate the Rider or enable Auto so the input envelope drives it.
Do not assume the send knobs are conventional DAW aux sends. Inside Space Rider, To Delay and To Reverb determine how much of the previous effect feeds the next section, while the three section Gain controls bring the plugin input directly into each section. [1]
Signal flow first
Space Rider's three sections all receive the plugin input directly. The Gain knob at the top of each section sets how much of that dry input enters Chorus, Delay or Reverb. [1, p.6]
The sections can also be chained. To Delay sends Chorus output into Delay. To Reverb sends Delay output into Reverb. The manual describes these controls as effectively setting the balance between a section's direct input and the output arriving from the previous section. [1]
All three wet section outputs then feed the plugin's final wet/dry Mix, followed by the plugin Output. The signal-flow diagram explicitly shows those global controls even though the guide does not publish separate numeric range/default tables for them. [1, p.6]
This routing explains why the same three effects can behave very differently depending on the Gain and send settings. A reverb can receive the dry source directly, delayed signal, or both.
Chorus section
Chorus Gain
Gain controls the Chorus section's direct input level. [1, p.3]
It does not set the final chorus level by itself. The wet chorus output joins the plugin's wet path, and the To Delay control separately determines how much of that chorus output is passed into Delay.
Intensity
Intensity is the main modulation control for Chorus. Waves says it influences several internal factors, including the number of voices plus the amount and speed of modulation. Its result depends strongly on the selected Chorus Type. [1]
Treat it as a macro rather than a single depth knob. Turning it changes more than one underlying behavior.
Chorus Type 1 and Type 2
Type 1 is the tighter mode. At low Intensity it behaves like a doubler with two voices, left and right, and little modulation. As Intensity rises, Waves documents more voices, more delay and more density, with possible notable phasing at high settings. [1]
Type 2 is the looser vintage-chorus mode. Waves describes it as having more air and being suited to slower transients. [1]
Those source suggestions are descriptions from the manufacturer, not a ranking from a new listening test here.
Chorus Width
Width controls stereo width of the chorus effect. [1]
The manual does not publish a separate numeric range or default, so this guide does not invent one.
To Delay
To Delay sets the amount of Chorus output that feeds the Delay section. Used alongside Delay's direct input Gain, it determines how much delayed processing begins with dry source versus chorus-processed source. [1]
The manual also states that if the Chorus direct input and To Delay path are both off, no signal passes through the Chorus section. [1]
That is a routing condition, not a requirement to keep the effects in a fixed serial order.
Delay section
Delay Gain and incoming Chorus send
Delay Gain controls the direct plugin input into the Delay section. To Delay brings in the Chorus output. [1, p.4]
Use them independently to create a clean delay, a chorus-fed delay, or a mixture.
Time and its readout
Time sets the delay time, and its value appears in the adjacent display. You can also drag vertically over the display itself to adjust the value. [1]
With Sync enabled, the time display uses musical notation and follows the host's BPM and transport position. With Sync off, the guide says the delay is set to its internal timing and the display is in milliseconds. [1]
The manual does not publish one complete numeric Time range table in the retrieved guide, so no unsupported minimum, maximum or default is supplied here.
Sync
Sync locks the delay to the host DAW tempo and transport position. [1]
Use it when rhythmic divisions should follow the session. Turn it off when you want an independently timed delay in milliseconds.
Ping Pong
Ping Pong toggles feedback that alternates between the left and right channels. [1]
This changes the spatial pattern of repeats; it is separate from the modulation offsets below.
Feedback
Feedback controls how much delayed signal is fed back into the delay. [1]
Higher feedback generally produces more repeated energy. This article does not state a feedback percentage range because the guide does not publish one in its control prose.
Delay filters
The Delay Filter section contains low-pass and high-pass filters after processing. [1]
This is useful for shaping the repeats rather than the direct signal entering the plugin. The guide does not provide numerical cutoff ranges in its Space Rider control chapter, so none are invented here.
Modulation Depth and Rate
Depth controls how much delay modulation is applied. Rate sets the modulation LFO cycle rate. [1]
Use Depth for the amount of time variation and Rate for how quickly that variation cycles. The resulting audible movement also depends on the delay time and feedback structure.
L/R Offset and Mod Offset
L/R Offset increases the right-side delay. Mod Offset shifts the phase relationship between left and right modulation. [1]
These are two different stereo tools: one offsets delay timing between channels, while the other offsets the modulation phase.
To Reverb
To Reverb controls how much Delay output is sent into the Reverb section. [1]
As with To Delay, it is an internal routing control. Reverb can still receive dry input through its own Gain control, so a nonzero To Reverb does not imply that all reverb must come through Delay.
Reverb section
Reverb Gain and incoming Delay send
Reverb Gain controls its direct input from the plugin. To Reverb supplies the Delay section's output. [1, p.5]
That combination lets the reverb act in parallel with the other effects or sit later in a serial chain.
Decay
Decay sets the length of the reverb tail. [1]
The manual prose calls this value milliseconds, while the official interface screenshot shows a simple 0–10 scale around the Decay knob. Because those source presentations do not establish a clean, single numeric time-range mapping, this guide explains the function without inventing milliseconds for each displayed knob value.
That documentation inconsistency is a source limitation, not evidence of a hidden control.
Space and Plate
The Space/Plate switch selects between two reverb algorithms. [1]
Space is described as a sonic space generally based on a hall. Plate is described as a high-density plate reverb with a smooth tail. [1]
Choose the mode for the kind of envelope and texture the effect needs; those manufacturer descriptions are not a new comparative listening result.
Reverb filters
The Reverb Filter section provides low-pass and high-pass filters after processing. [1]
They shape the reverberated output rather than changing the Delay filter settings.
PreDelay
PreDelay (P DLY) sets the time before the reverb begins. Waves explains that this allows direct sound and early reflections to arrive before the reverberant tail. [1]
The guide warns that too much can sound artificial and distracting. That is the manufacturer's qualitative guidance, not an independently measured limit.
Damp
Damp controls absorption of high frequencies in the reverb tail. [1]
Use it to change how the high end persists through the decay rather than treating it as another copy of the post-reverb low-pass filter.
Reverb Width
Width controls the apparent size of the reverb within the stereo field. [1]
It is independent of the Chorus Width control. Changing one section's width does not document any automatic change to the other.
Global Mix and Output
The manual's signal-flow diagram places Mix after the three wet section outputs and Output after Mix. [1, p.6]
Mix therefore controls the plugin's final dry/wet balance, while Output controls the level leaving the plugin. The guide does not publish a separate numeric range/default table for either control in the retrieved text, so the article does not fabricate one from knob artwork.
These global controls are different from the three section Gain controls. Gain determines how much direct input enters a section; final Mix determines how much combined wet processing reaches the output relative to dry signal.
What the Rider actually does
The Rider changes several assigned controls together. It can morph from one setup to another, but Waves explicitly says this is not the same as fading between two presets. Each selected knob moves through its own defined range and direction as the Rider moves. [1, p.7]
You can move the Rider manually, automate it from the DAW, or let it follow the input envelope. [1]
α and β endpoints
The ends of the Rider path are α and β. These represent the two endpoint states for the assigned controls. [1]
Click α and selected controls move to their α positions. Click β and they move to their β positions. The amount each knob travels depends on the range arc you created around that knob, not necessarily its full parameter range. [1]
Range arcs
To define a control's Rider range, activate α or β and adjust the arc around the control. A full-width arc allows the Rider to cover that knob's full range; a smaller arc limits movement to only that part. [1, pp.7–8]
You can change the lower limit without changing the upper limit, change the upper limit without changing the lower, or drag the middle of the arc to move the allowed zone while keeping its width. [1]
This per-control range is what makes the Rider more useful than simply linking several knobs at one fixed scale.
Reversing one control or all controls
Ctrl-click an individual control's arc to reverse that control's direction relative to the Rider. You can also reverse it manually by dragging one range handle beyond the other. [1, p.9]
Ctrl-click α or β to reverse modulation direction for all assigned controls. [1]
That lets one parameter increase while another decreases through the same Rider movement.
Resetting a control's Rider markers
To reset one control's Rider markers, Option-click the arc on macOS or Alt-click the arc on Windows. [1, p.9]
This is a documented Rider-range reset gesture, not a factory reset of the entire plugin or preset.
Envelope-driven Rider controls
When Auto is enabled, the input signal modulates the Rider. All controls assigned to the Rider move together according to the Rider position and their individual range/direction rules. [1]
Auto
Auto locks the Rider-assigned controls to the modulator. Their range arcs can still be edited, but the underlying control values and the Rider slider itself are locked while Auto is active. [1]
You can disengage Auto by clicking Auto again or selecting α or β. [1]
Sensitivity
Sensitivity sets the threshold at which envelope-driven Rider modulation begins. [1]
This determines what incoming level behavior starts moving the Rider; it does not replace the per-knob range arcs.
Attack
Attack sets how quickly modulation begins. [1]
A slower response makes the Rider take longer to move after the input crosses its modulation threshold.
Release
Release sets how quickly modulation recedes. [1]
Attack and Release shape the Rider's response to the envelope, while the assigned control arcs determine what that Rider motion actually changes.
Section enable buttons and source boundary
The official interface screenshots show a power-style enable button at the top of each Chorus, Delay and Reverb section. The retrieved manual prose does not separately provide a control entry, numeric state table or documented default for those buttons. [1]
This guide therefore treats them only as section enable/on-off controls apparent in the official interface and does not invent default states, automation behavior or signal-tail behavior when switching them. That limitation should remain visible during assembly rather than being expanded from assumption.
A practical order of decisions
Build the static routing first. Decide which sections need direct input, and whether Chorus should feed Delay or Delay should feed Reverb.
Set the effect controls next: Chorus Type/Intensity/Width, Delay timing/feedback/filter/modulation, and Reverb type/decay/filter/predelay/damping/width.
Set global Mix and Output before adding Rider motion so you know what the nonmoving setup actually does.
Then assign only the controls that need to change. Give each one a bounded α/β arc, reverse directions where useful, and choose manual/DAW automation or Auto envelope following.
These are editorial workflow suggestions derived from the documented signal flow. No new Space Rider listening test was performed for this manuscript.
Limitations and documentation boundaries
The retrieved Space Rider guide explains function and routing well but does not publish full numeric range/default tables for most effect controls. This article therefore avoids converting graphical knob marks into undocumented specifications.
The Reverb Decay prose says milliseconds while the official interface screenshot presents a 0–10 control scale. The article reports the function and records the inconsistency rather than inventing a scale-to-milliseconds conversion. [1]
The current product page confirms Space Rider remains a public Waves product. Current promotions, subscription prices and host compatibility can change; they are not used as evergreen control claims here. [2]
No audio, CPU, latency or automation-host test was performed. The product page's current latency/platform tables were not converted into broad compatibility claims.
Related plugins
H-Delay is a focused Waves delay option, while H-Reverb is a deeper dedicated reverb. These are ordinary official product links, not links to the unpublished Joseph Nilo continuation packages.
For frequency-selective dynamics elsewhere in a chain, the live F6 guide explains a different task. The Waves Audio Post Resources hub collects the site's existing Waves workflow and licensing references.
If access model is the question rather than effect routing, the live Waves Subscription vs Perpetual guide covers that separately.
Bottom line
Space Rider makes sense once you separate routing from modulation. The three Gain controls decide how much dry input reaches Chorus, Delay and Reverb. To Delay and To Reverb pass wet output forward. Global Mix and Output finish the chain.
The Rider then moves selected controls between custom α/β ranges. Set each range deliberately, reverse directions where needed, and use Auto only when you want the source envelope to drive those changes.
Sources
Checked September 20, 2026. No new listening, CPU, latency or host-automation test.
- Waves Space Rider User Guide, overview/components pp.2–3, Chorus p.3, Delay p.4, Reverb p.5, signal flow p.6, Rider pp.7–9. Official screenshots on pp.5–9 were visually inspected in this run.
- Waves Space Rider product page.
- Waves Graphic Library, attribution/backlink condition and exact
Space Riderproduct-art entry.
Frequently Asked Questions
Can Space Rider run its chorus, delay and reverb in parallel?
Yes. Each section can receive the plugin's direct input through its own Gain control. To Delay and To Reverb can also send the preceding effect forward, allowing parallel, serial or mixed routing.
What do To Delay and To Reverb actually send?
To Delay sends Chorus output into Delay, while To Reverb sends Delay output into Reverb. They are internal effect-routing controls, distinct from the direct-input Gain at the top of each section.
Is the Space Rider Rider a crossfade between two presets?
No. The Rider moves each assigned control through its own defined alpha-to-beta range and direction. Waves explicitly distinguishes that from fading between two complete presets.
How does Space Rider Auto move the Rider?
With Auto enabled, the input signal's envelope modulates the Rider. Sensitivity sets when modulation begins, while Attack and Release set how quickly it starts and recedes; each assigned knob still follows its own range arc.
How do I reverse or reset a Space Rider control's range?
Ctrl-click an individual control arc to reverse its direction. Option-click that arc on macOS, or Alt-click it on Windows, to reset that control's Rider markers.
Does the Space Rider manual establish a milliseconds value for each Reverb Decay mark?
No clear mapping is documented. The manual prose calls Decay milliseconds, while its interface image shows a 0–10 knob scale. This guide does not assign an unsupported time value to each mark.

About the Author
Joseph Nilo has been working professionally in all aspects of audio and video production for over twenty years. His day-to-day work finds him working as a video editor, 2D and 3D motion graphics designer, voiceover artist and audio engineer, and colorist for corporate projects and feature films.