
Waves Feedback Hunter is a setup analyzer that plays white noise through a loudspeaker path, measures the response and calculates a filter intended to increase headroom before feedback. It is designed for monitor and PA setup, with its own Setup, Detection and Show states. It is not a replacement for an engineer judging the room, microphone placement or signal routing.
The most important setup detail is the split microphone path: the manual directs you to place the filter only on the monitor-feed channel, so the calculated filter does not alter the PA mix. Setup also produces loud, continuous white noise. Treat that warning as a real stage-safety step: make the signal path and environment ready before starting detection.
My Short Version
Feedback Hunter does its analysis during setup, not as an ordinary sound you leave running through the show. The plugin creates white noise, measures the loudspeaker response and draws a calculated filter. When detection completes, it switches to Show mode, where the filter is ready for use.
I would check the routing before touching Setup: split the mic to two independent channels and put a mono instance only on the channel feeding the monitor. Then confirm the mic and signal path, keep the venue quiet enough for detection, and warn anyone near the system before enabling the noise. The manual's documented default target is −4 dB headroom; that is a plugin setting, not a measured promise about a particular room.
In Show, Frequency Range Modifiers limit where the filter acts and Depth reduces its amount. If the test was interrupted or 4 dB is not enough for the intended setup, run a fresh detection cycle. Always test from the desired listening position with the same microphone intended for performance.
What Feedback Hunter measures
The official Feedback Hunter product page and user guide describe a setup tool for front-of-house and monitor engineers. During detection, the plugin generates white noise as a reference, analyzes a measurement signal from a loudspeaker and calculates a filter curve.
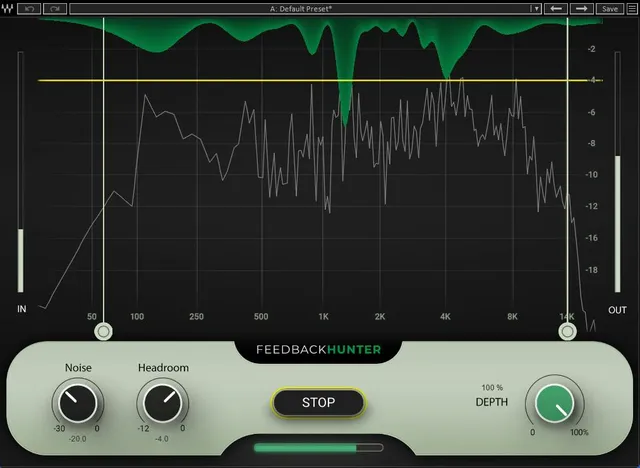
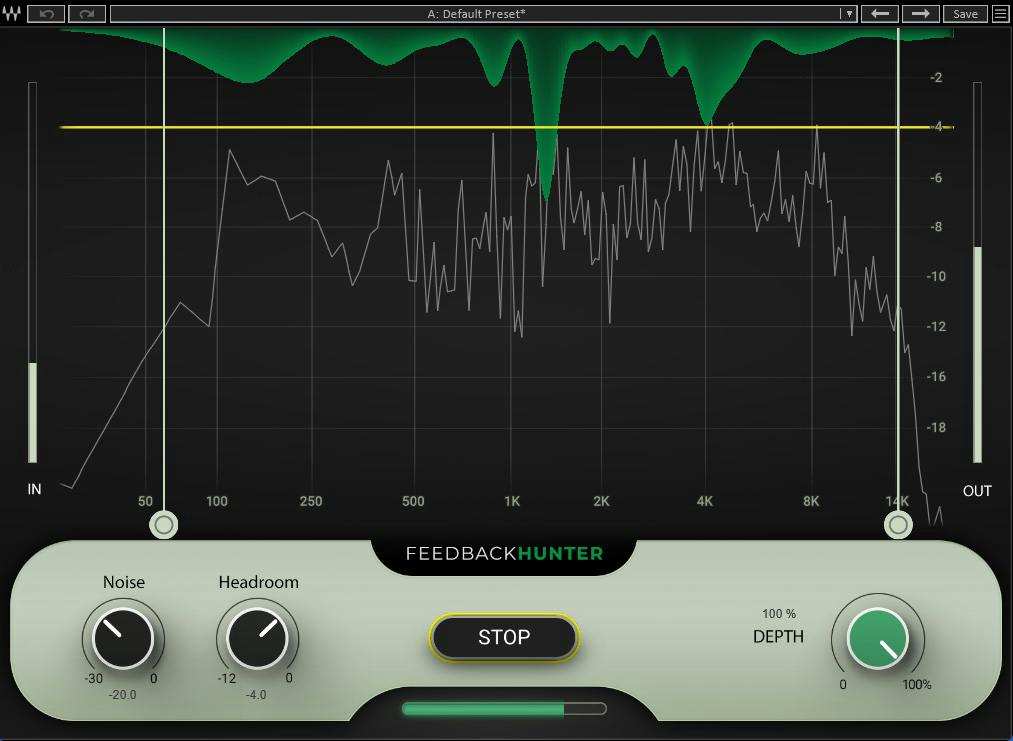
In practical terms, it is measuring the acoustic path that can lead a microphone and loudspeaker to feed back. The green curve is the calculated filter; the white curve is the measurement curve and appears only during detection. The curve is a setup result, not a room-independent preset or guarantee that feedback cannot occur.
Waves describes the goal as headroom before feedback. The manual does not provide a universal maximum-gain result or promise the same outcome for every venue. Mic position, loudspeaker position, room conditions, system gain and interference all matter. The operator remains responsible for evaluating the actual system.
Routing the microphone safely
The manual's setup is deliberately specific:
- Place the primary microphone in front of the stage monitors.
- Split the microphone to two independent channels.
- Insert a mono Feedback Hunter instance on the channel that feeds the monitor.
- Send the mic signal to the monitors and set preamp gain as loud as possible just before feedback, as the guide instructs.
The split is the key distinction. The filtered channel goes to the monitors; the other independent path remains available to the PA mix. The manual explicitly says the resulting filter should be sent only to the stage monitors, not the PA mix. Do not insert it on a shared path that also feeds the PA if that would put the calculated monitor filter into the audience mix.
Before detection, confirm the channel routing, mic placement and gain structure with the system operator. The manual says Feedback Hunter does not require changing the PA or monitor setup. That does not mean routing checks are optional; the split-and-filter path is part of the documented setup.
Setup, Detection and Show
The Setup/Show button moves through three states:
- Setup: the system is ready. Clicking the button starts the detection cycle.
- Detection: Feedback Hunter produces its continuous white noise and analyzes the measurement signal. The progress bar shows activity, and the button becomes Stop so you can halt the process.
- Show: the completed filter is ready. The plugin enters Show automatically when detection finishes. During detection, clicking the progress bar can switch to Show manually.
Manual Show mode is not the same as a completed detection. If you leave detection early, evaluate the result carefully; if interference occurred or the headroom target needs to change, the guide says to click Show and repeat Setup.
White noise and room readiness
The plugin displays a warning before Setup because it produces loud, continuous white noise. Waves says to proceed only after the microphones are set, the signal path is correct and the venue is not too noisy. Those are minimum operating conditions, not a complete safety checklist for every show.
Make sure performers and crew know when the noise is about to start, and set up so they are not surprised by it. Stop detection if the room or routing is not ready. No detection-duration guarantee is stated in the manual; the progress display ends when the plugin is confident in the resulting filter.
Controls and graph
| Control or display | Documented role | Practical reading |
|---|---|---|
| Input meter | Shows plugin input level. | Confirm the measurement signal is reaching the instance; it does not by itself prove the mic/speaker routing is correct. |
| Output meter | Shows plugin output level. | Watch output while preparing and evaluating the system. The manual does not specify a numeric meter scale here. |
| White measurement curve | Appears only during Detection. | It represents the measured response during the detection process. It is not the filter itself. |
| Green filter curve | Calculated during setup. | This is the filter Feedback Hunter derives from its analysis. |
| Progress bar | Shows detection progress. | During detection it indicates activity; clicking it can switch to Show manually. |
| Setup / Stop / Show | Starts detection, stops it, or indicates the ready state. | Automatic Show means detection completed; manually entering Show during Detection does not establish that it completed. |
| Noise Level | Adjusts the level of white noise generated by the plugin during setup. | The manual specifies no range or default. The setup warning says detection produces loud, continuous white noise. |
| Headroom | Sets the target headroom before feedback. | The documented default is −4 dB. The guide does not give a supported range. |
| Frequency Range Modifiers | Limit the frequency range of the filter. | Use them to constrain where filtering occurs. The guide does not document exact range values, bands or defaults. |
| Depth | Proportionally reduces the resulting filter in Show mode; described as a dry/wet mix. | Lowering Depth reduces the filter's effect. No numeric range or default is specified in the manual. |
| Reset Filter | Appears in Show mode and resets the filter. | It does not reset Frequency Range, Depth, Headroom or Noise Level. |
The interface's Full Reset is a separate command in the Waves System Toolbar preset menu. The manual says loading Full Reset restores all plugin parameters to their default state. That distinction matters: Reset Filter clears the calculated filter, while Full Reset restores plugin parameters.
A cautious setup and evaluation sequence
- Prepare the mic placement and independent monitor/PA paths before loading or starting detection.
- Insert a mono instance on the monitor-feed channel only; verify the PA path does not receive the calculated filter.
- Confirm the room is ready and warn nearby people about the loud continuous white noise.
- Start Setup and let Detection complete unless you have a reason to stop. Watch the progress bar and the measurement/filter curves in their documented states.
- In Show, test from the intended position with the same microphone planned for the performance.
- If needed, constrain the filter with Frequency Range Modifiers or reduce its effect with Depth. Reset Filter clears only the calculated filter; use Full Reset for all parameters.
- If detection was interrupted, interference occurred or the target headroom needs adjustment, repeat Setup and evaluate the new result.
This sequence restates the vendor-documented workflow and makes the routing and noise warning explicit. It is not a claim that a test was performed or that any given filter is safe for a specific room.
Limits and evidence boundary
The manual documents the workflow and control purposes, but does not state numeric ranges/defaults for Noise Level, Depth or Frequency Range Modifiers, nor does it provide a universal detection time, frequency-by-frequency filter specification or measured feedback margin for a given venue. I have not tested the plugin in a live system or measured headroom. The only explicit numeric default carried here is Headroom at −4 dB.
The product page uses promotional language about results. This guide relies on the manual's functional description and does not repeat a guaranteed outcome. The filter is a calculated aid; the engineer must listen and verify under the actual system conditions.
Related Waves references
The official Feedback Hunter product page is the product reference. Use the product reference for the vendor's description of the processor. No system measurement is claimed in this guide.
Sources
Primary sources rechecked October 18, 2026.
- Waves Feedback Hunter User Guide, official guide, especially printed pp. 2–6; official manual.
- Waves Feedback Hunter product page, official product identity and interface-image source.
No hands-on session or measurement is claimed. Product-page marketing language is not treated as evidence of a guaranteed result. Unspecified control ranges/defaults remain unspecified.
FAQ
What does Waves Feedback Hunter do?
It generates white noise during setup, analyzes a loudspeaker measurement signal and calculates a filter intended to provide headroom before feedback. The engineer still needs to evaluate the actual room and system.
Why does the manual call for splitting the microphone?
The guide directs you to split the mic into two independent channels and insert a mono instance only on the monitor-feed channel. That sends the resulting filter to the monitors without putting it on the PA mix.
Is Feedback Hunter's setup noise loud?
Yes. The manual warns that Setup produces loud, continuous white noise. Prepare the room and signal path and warn nearby people before starting detection.
What is the default Headroom setting?
The manual states a default target of −4 dB. It does not document a supported Headroom range or promise that this setting produces the same measured margin in every venue.
What do the white and green curves show?
The white measurement curve is visible only during Detection. The green curve is the filter calculated during setup. They represent different parts of the analysis and resulting filter.
What is the difference between Reset Filter and Full Reset?
Reset Filter clears the calculated filter but leaves Frequency Range, Depth, Headroom and Noise Level unchanged. Full Reset in the Waves System Toolbar preset menu restores all plugin parameters to defaults.
Can I limit where the filter acts?
Yes. Frequency Range Modifiers constrain the filter's frequency range, and Depth proportionally reduces its effect in Show mode. The user guide does not specify their numeric ranges or defaults.
Does Feedback Hunter guarantee there will be no feedback?
No such universal guarantee is established by the user guide. It describes a calculated setup filter and recommends testing from the intended position with the performance microphone; room and system conditions still require an engineer's judgment.

About the Author
Joseph Nilo has been working professionally in all aspects of audio and video production for over twenty years. His day-to-day work finds him working as a video editor, 2D and 3D motion graphics designer, voiceover artist and audio engineer, and colorist for corporate projects and feature films.