
JJP Cymbals & Percussion combines basic dynamics and EQ with parallel processed returns for percussion sources. Its Main fader controls the direct branch, while Master controls that branch and the returns together.
That routing distinction is more useful than treating every fader as another stage in a serial effect chain. The panel works like a compact mixing console around a common Main Section.
This guide follows the complete official manual and authentic interface. I have not auditioned the processor or tested an installation; artist descriptions and suggested uses are source descriptions, not listening results.
My Short Version
Choose a Type for the source first. HH, OH, Room, Tambourine, Shaker and Loops select source-oriented starting settings, not different channel components.
Sensitivity comes before the tonal balance. The manual recommends setting it with the highest peaks and using the LED's qualitative guidance.
Main is not Master. The additional returns are fed before Main's fader, so lowering Main does not turn down their feeds.
The return names are not technical specifications. AMB, ATTITUDE, PUNCH and TONE do not supply an undocumented reverb time, threshold or transient timing.
Best for and when to choose another tool
Best for: a compact source-oriented panel when you want to balance a common dynamics/EQ treatment with additional processed returns on hi-hats, overheads, room recordings or percussion.
The guide distinguishes this task from JJP Drums, which it identifies for kicks, snares and toms. That distinction does not prohibit creative use on other material, but it explains the supplied Type choices.
Choose another tool when: you need a specified EQ frequency/Q, separate compressor threshold and timing, or a fully described reverb/delay algorithm. These controls are not exposed or defined here.
The product's artist-oriented design is not evidence that a pictured setting will produce a particular result on your recording.
Components and conditional Pan
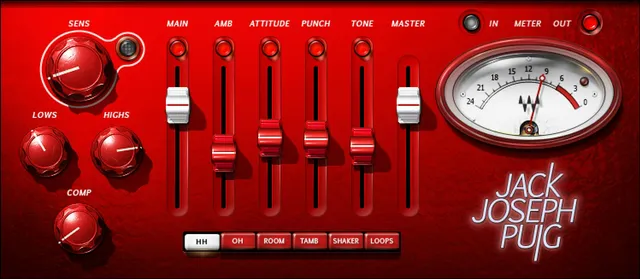
The two components are JJP Cym & Perc m>s, with mono input and stereo output, and JJP Cym & Perc Stereo, with stereo input and stereo output.
Here m>s means mono-to-stereo, not Mid/Side.
Pan appears in the mono-to-stereo component. The guide does not publish a numeric Pan range, pan law or default. It does not describe an additional stereo-width control.
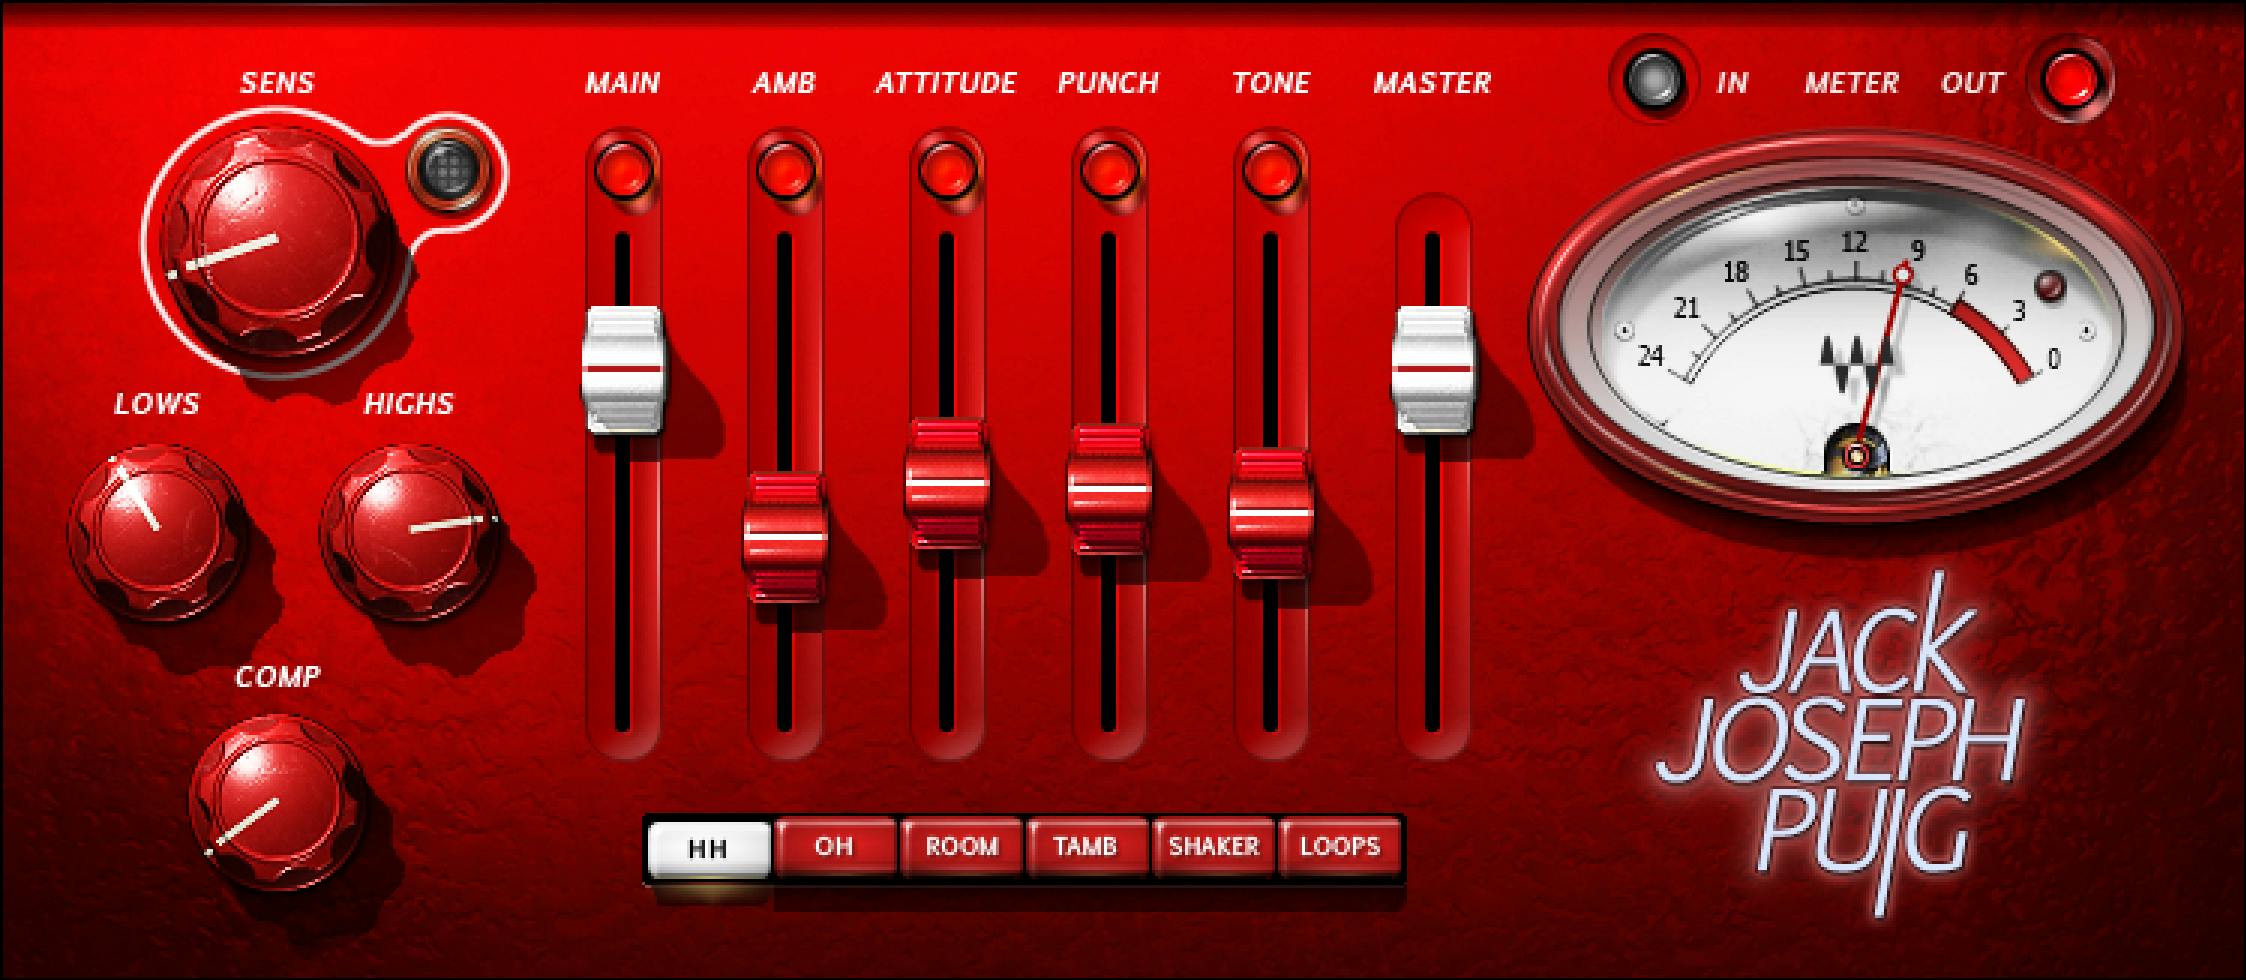
The official Library original shows the Stereo panel without Pan. The guide's component illustration includes it where applicable; these views do not establish a feature removal.
Six Types, not six components
Choose among:
- HH: hi-hats.
- OH: overheads.
- Room.
- Tambourine, labeled TAMB on the panel.
- Shaker.
- Loops.
Waves says JJP optimized the defaults for each Type, with further adjustment potentially needed after setting Sensitivity.
The manual also says certain faders can change with Type. It does not provide a complete label-by-Type map, numeric initialization table or a promise that every parameter resets on selection.
Treat Type as the source-oriented starting decision. Do not assume that a fader name or pictured position describes every Type.
Sensitivity and its LED
SENS sets the Sensitivity used to establish how the signal reaches the processing. The manual recommends adjusting it using the section with the highest peaks.
Its LED states are Off: too low; green: good; yellow: optimal; red: very hot. The quickstart targets yellow before further Main and Center adjustments.
No numeric Sensitivity range, LED thresholds or calibrated headroom value is supplied. An unlit Sensitivity LED is not a documented whole-plug-in bypass state.
Sensitivity is also separate from the meter's Clip light. Input guidance does not prove the combined output cannot clip.
Lows, Highs and Comp: the common Main Section
LOWS and HIGHS are the panel's low- and high-frequency shaping controls. COMP belongs to its basic dynamics treatment.
The guide says the Main Section influences all processing. Changes here therefore matter to the material feeding the direct branch and the additional returns, not just one isolated return.
It does not specify EQ filter shapes, frequencies, Q values or gain ranges. Nor does Comp expose a documented threshold, ratio, attack or release scale.
Use these as the named broad controls the panel provides. Do not interpret a knob position as an undocumented decibel, hertz, percentage or timing value.
Main versus Master: understand the split
After the common Main Section, the signal splits into a direct branch through Main and processed auxiliary-return branches.
The auxiliary feeds are pre-fader: they are taken before the Main fader. Their returns are added to the direct branch, and Master sets the level of that combined result.
This makes Main a balance control for the direct contribution, not an overall output control. Master is the appropriate distinction when you want to change the combined level.
A round button is visible above Main in the authentic panel. The guide does not separately define its complete switching behavior or color-state convention; it should not be presented as a documented global bypass or reset.
No numerical range or default for Main or Master is published in this guide.
The four illustrated Center returns
The authentic panel labels the Center faders AMB, ATTITUDE, PUNCH and TONE. Each controls its own additional processed return.
| Return label | Supported way to understand it |
|---|---|
| AMB | Blend the return carrying this label; the guide does not define a fixed room type or decay time. |
| ATTITUDE | A separate processed contribution, not a published distortion percentage or clipping threshold. |
| PUNCH | A named return, not an exposed compressor attack or transient timing parameter. |
| TONE | Its own return balance, distinct from the common Main Section's Lows and Highs knobs. |
Each Center fader has a dedicated mute button above it. Muting a return lets you isolate its contribution conceptually without treating it as the entire output path.
The guide describes these as auxiliary returns fed from the Main Section. It does not document an AMB→ATTITUDE→PUNCH→TONE serial order or their internal algorithms.
Since some faders can change with Type, the illustrated labels are a panel inventory, not an exhaustive alternate-label matrix.
IN/OUT meter and Clip reset
The Meter switch selects input or output monitoring, shown by IN/OUT on the panel.
The guide says Clip lights when levels reach 0 dBFS. Click the Clip indicator to reset it.
Its quickstart advises lowering the output level when Clip repeatedly lights or stays lit. Read that alongside Master, the documented combined-output level fader.
The meter does not analyze acoustic speaker level or establish a safe monitoring volume. No automatic limiter, gain reduction protection or detailed meter ballistics are specified.
Toolbar and a deliberate workflow
The WaveSystem toolbar provides preset save/load, setting comparison, undo/redo, resizing and guide access.
The full-size Library crop omits that toolbar, while the manual illustrates and describes it. The crop is not evidence that shared utilities were removed.
For a deliberate evaluation, choose the appropriate component and Type, then follow the manual's highest-peak Sensitivity method.
Shape the common Main Section before balancing the direct Main contribution and individual returns. Keep return mutes, the Main/direct balance and Master/combined level as separate decisions.
Check output metering after changing the balance. This is a conceptual workflow, not a tested preset or a guaranteed sonic improvement.
Related Waves guides
The Renaissance Compressor guide covers independently adjustable dynamics controls. The F6 guide explains frequency-selective processing when broad Lows/Highs controls are not enough.
The WLM Plus guide covers independent level and loudness metering, not a substitute specification for this panel's LED thresholds.
Find other live articles in the Waves Audio Post Resources hub. Subscription versus perpetual licensing is a separate topic from the control explanation.
Sources and documentation limits
Checked October 19, 2026, America/New_York. The official JJP Cymbals & Percussion product page links the complete eight-page guide, read in full.
Page 4 defines components; pages 5–6 cover Types and the panel; pages 7–8 establish controls, routing, meters and utilities. The authentic Graphic Library original corresponds to the Stereo panel.
The source does not publish numeric knob/fader defaults or ranges, full Type-dependent return mappings, detailed algorithms or a tested compatibility result. Pictured settings are not defaults.
FAQ
What does JJP Cymbals & Percussion do?
It combines a common dynamics/EQ section with a direct Main path and parallel processed returns for cymbals and percussion. The illustrated returns are AMB, ATTITUDE, PUNCH and TONE. Their faders blend those returns into the result; the guide does not define them as a serial four-effect chain or publish each return's internal algorithm.
What are its six Types?
The Types are HH for hi-hats, OH for overheads, Room, Tambourine, Shaker and Loops. The panel abbreviates Tambourine as TAMB. Waves describes optimized settings for each Type and says certain faders can change with the selection. These are six source-oriented Types, not six separate plug-in components or a published table of numeric defaults.
Does m>s mean Mid/Side, and where is Pan?
No. The guide defines m>s as mono input to stereo output. The other component is stereo input to stereo output. Pan is documented in the mono-to-stereo component only. Its absence from the official stereo-panel image is consistent with that condition, not evidence that Pan was removed from the product.
How does the Sensitivity LED work?
The guide describes Off as too low, green as good, yellow as optimal and red as very hot. It recommends using the part of the track with the highest peaks when adjusting Sensitivity. No numeric color thresholds or gain range are supplied. The LED is input guidance, not the separate output Clip indicator or a clipping-protection guarantee.
What is the difference between Main and Master?
Main controls the Main Section's direct branch. The additional processed returns are fed before the Main fader, then join that branch before Master. Master controls the combined output level. Lowering Main therefore does not reduce the pre-fader feeds in the same way as lowering Master; it changes the balance of the direct branch against those returns.
What do the Center faders and mute buttons control?
Each Center fader controls an auxiliary return with additional processing, and each has a dedicated mute button above it. The illustrated labels are AMB, ATTITUDE, PUNCH and TONE. They are parallel contributions fed from the common Main Section. Their names do not establish a reverb time, compressor attack or other calibrated parameter that the manual does not specify.
Are numeric ranges and startup settings documented?
The guide does not publish numeric ranges or defaults for Sensitivity, Lows, Highs, Comp, Pan or the level faders. It says the Types have optimized defaults, without an initialization table or a rule that every control resets when Type changes. Static knob and fader positions in the official images should not be turned into specifications.
What does the Clip light mean, and how do I reset it?
The manual says Clip lights when levels reach 0 dBFS; click it to reset. Its quickstart recommends lowering the output level when the light repeatedly appears or stays lit. IN/OUT selects the meter's input or output view. None of these controls is documented as an automatic limiter, a safe monitoring-level setting or a guarantee against clipping elsewhere.

About the Author
Joseph Nilo has been working professionally in all aspects of audio and video production for over twenty years. His day-to-day work finds him working as a video editor, 2D and 3D motion graphics designer, voiceover artist and audio engineer, and colorist for corporate projects and feature films.