
Waves Sync Vx aligns the timing and pitch of recorded vocal tracks to a chosen reference. It can organize up to 16 tracks into groups using as many as four references, so doubles can follow a lead while a different harmony group follows its own guide.
The important distinction is alignment, not composition. You supply the performances and decide what should follow what. Sync Vx gives you global, track and region controls to tighten that relationship—or leave a passage alone.
This is a guide to Waves' documented workflow and controls, not a listening test. No audio examples, processing measurements or hands-on results are claimed here.
My Short Version
I would start by choosing the right reference, not by maximizing tightness. A well-chosen lead can guide matching doubles; a different harmony may need its own reference group.
Time and pitch are separate decisions. A take can need tighter consonants without needing its melody pulled toward another part. Keep the processing you need, relax the rest, and use local bypass when a phrase should retain its original delivery.
Also choose the correct workflow before editing. Insert, AudioSuite and ARA operate independently. Capturing audio into one is not a way to populate another.
What Sync Vx does—and what it does not
The official Sync Vx page describes alignment for doubles, harmonies, layered vocals, dialogue and ADR. Its controls match a sync track to a reference performance, rather than giving you a conventional piano-roll pitch editor.
That makes reference choice central. A guide with the wrong words, phrasing or melodic role can be the wrong target even if it is the loudest vocal in the session.
My practical recommendation is to separate two questions: “Do these words land together?” and “Should these notes follow the same pitch?” Use the controls to answer each one deliberately. That is editorial guidance, not a claim that one setting works for every singer.
Insert, AudioSuite and ARA: choose the workflow first
Waves supplies separate Insert/AudioSuite and ARA guides. Their alignment tools overlap, but getting audio into them is different.
| Workflow | Documented starting point | Important distinction |
|---|---|---|
| Insert | Insert Sync Vx on the tracks involved, enable Capture, then play the relevant DAW audio into it. | Capture can be enabled across the session or per track. The workspace needs captured audio. |
| AudioSuite | In Pro Tools, select the relevant tracks and audio area, open Sync Vx from AudioSuite, then Capture. | This is the documented Pro Tools AudioSuite workflow, not a general workflow for every host. |
| ARA | Load the ARA extension on the relevant tracks or regions using the host's ARA procedure. | A normal insert loads the real-time component instead. Follow the DAW's instructions for ARA instantiation. |
The formats do not share audio or information. Instances show tracks using their own format. Choose one workflow for the alignment task rather than expecting an Insert capture to appear inside ARA.
Current host support changes. Check the product's current supported-host information for your exact DAW and version; the presence of an ARA feature in a DAW is not proof that every version supports this particular plugin.
Reference groups and track assignment
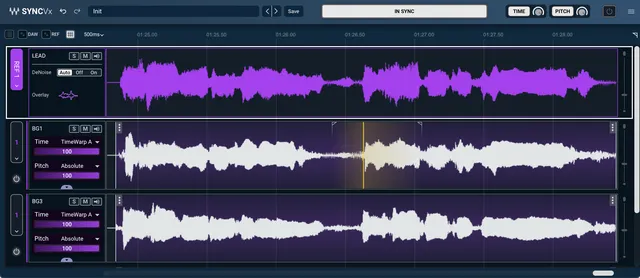
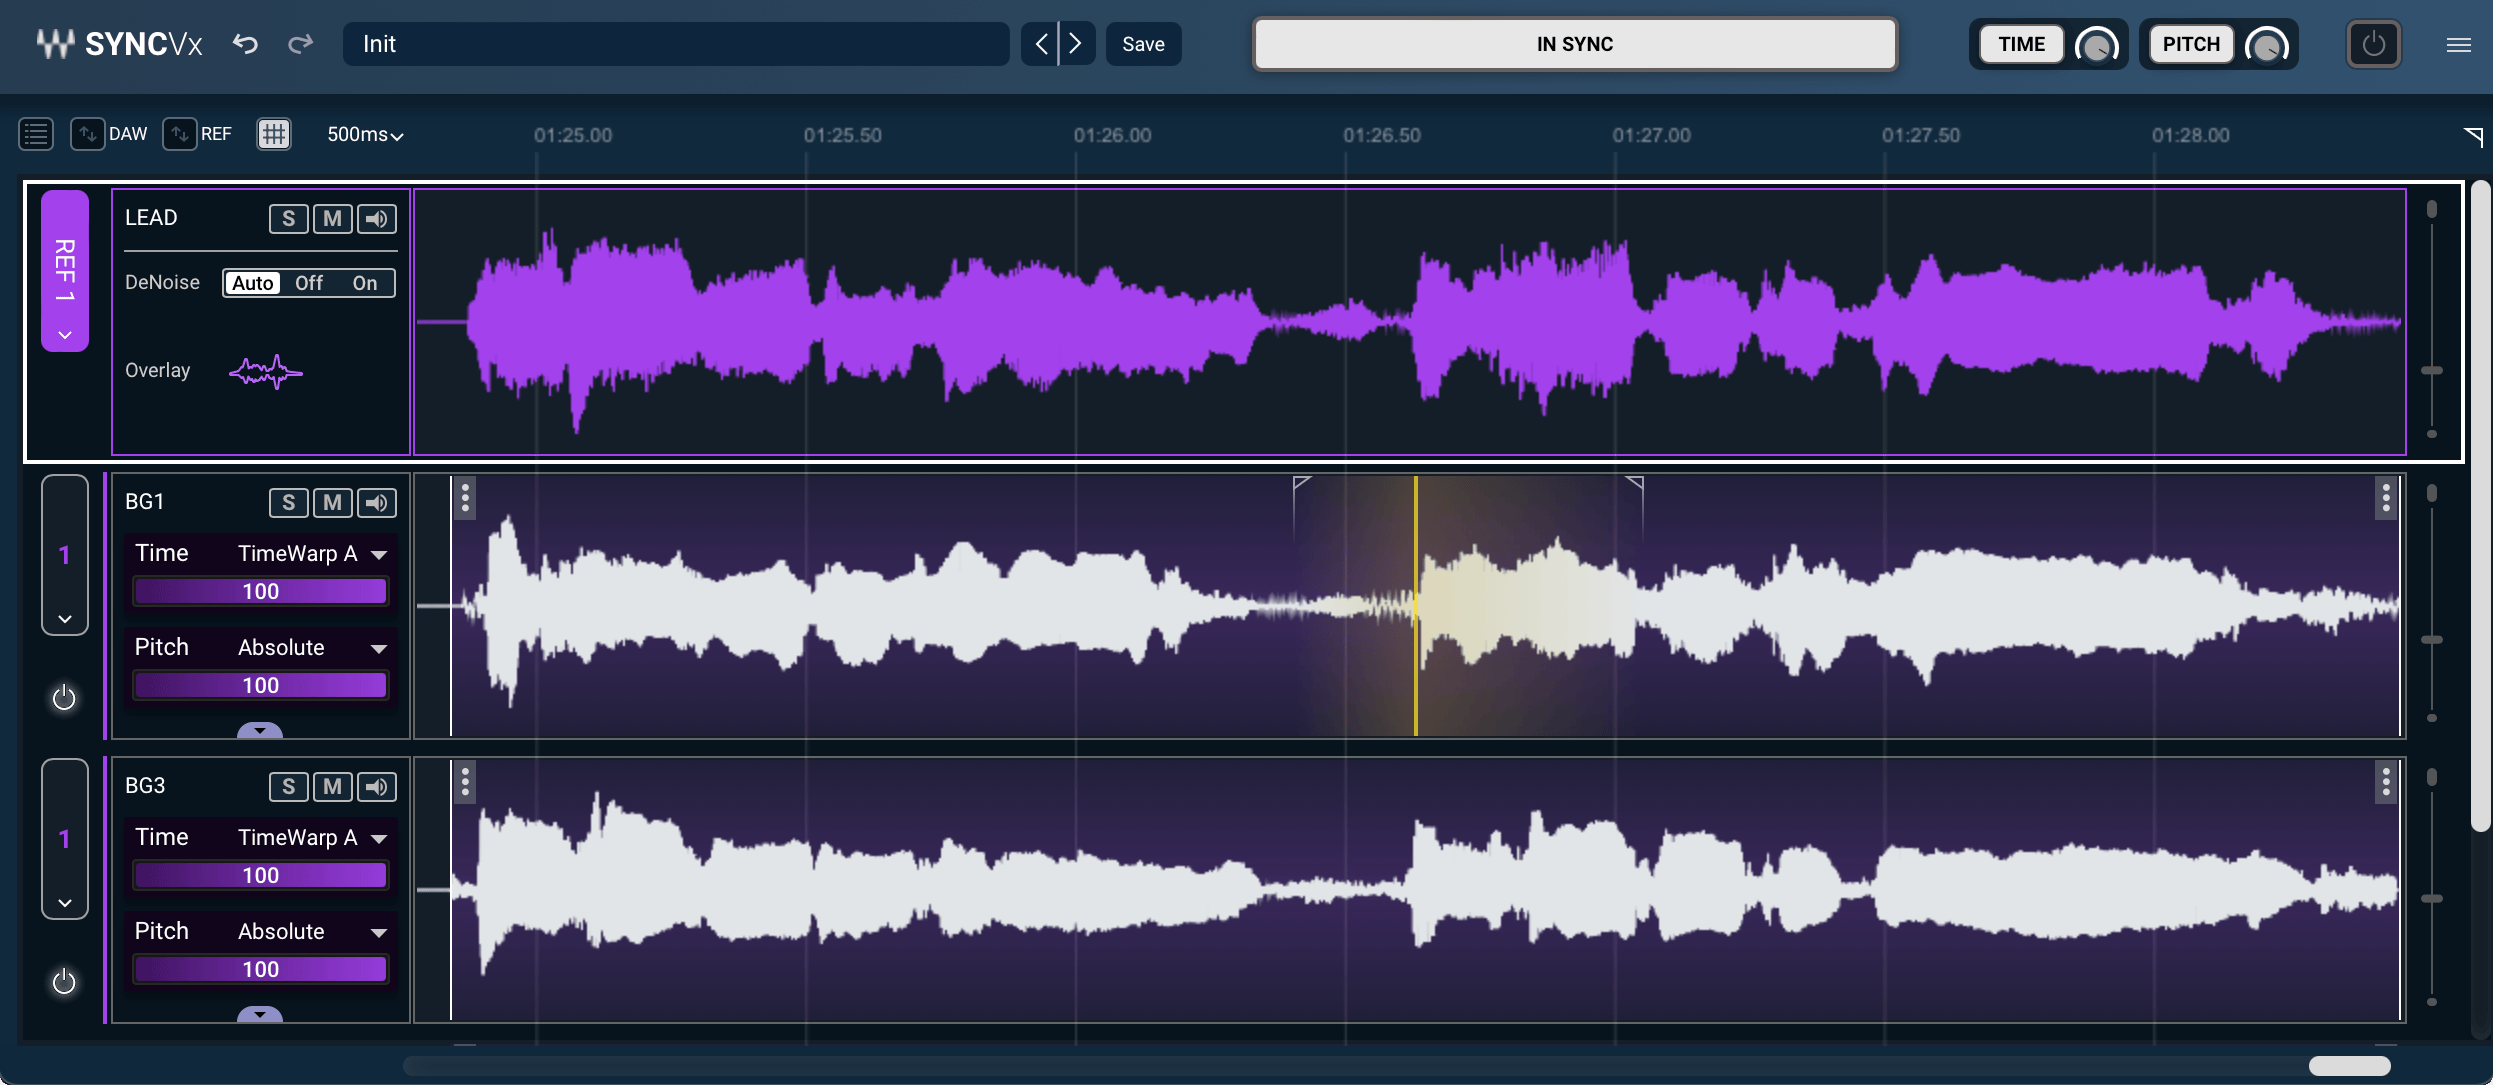
Each session needs at least one REF track and one SYNC track. Use the Reference/Sync selector beside a track to choose its role and, for a sync track, its reference group.
The documented limit is 16 tracks in total, including references, with up to four reference tracks. One reference plus 15 doubles uses the same total as four references plus 12 sync tracks. Those are examples of allocation, not extra capacity on top of the limit.
A sync track set to None is not synchronized. Group colors help identify which reference a track follows.
For matching doubles, one reference may be enough. For a harmony stack, a separate reference for each melodic role can be more appropriate than forcing every part toward the lead. That is a workflow recommendation; it is not a requirement to use all four groups.
Track controls: time, pitch and listening
| Control | What it does | What to watch |
|---|---|---|
| Time | Enables or disables timing alignment for that track. | Turning off Time is different from turning off pitch alignment. |
| Time Tightness | Scales how closely timing follows the calculated alignment. At zero, there is no timing adjustment. | A lower setting can preserve more of the recorded delivery. No universal “natural” value is documented. |
| TimeWarp | Selects the time-alignment algorithm for the track. | A region can override this with its own TimeWarp choice. |
| Pitch | Enables or disables pitch alignment for the track. | Timing can remain active while pitch alignment is off. |
| Pitch Tightness | Scales pitch matching. At zero, there is no pitch adjustment. | Its response is weighted, not a simple linear percentage of the pitch distance. |
| Solo, Mute and listening volume | Let you compare tracks and references while editing. | Solo and Mute can latch across tracks; Alt/Opt-click applies the action to all tracks as documented. |
| Capture / Capture All | Enables capture on one track or across tracks in the Insert workflow. | These are not ARA import controls. |
| Track Name | Identifies the track. | Name mirroring depends on the host; the Insert guide also allows editing the displayed name. |
The guides describe tracks initially syncing at 100% tightness. Treat that as a documented starting behavior, not a recommendation to keep every performance there.
TimeWarp A and B
TimeWarp A is the documented default and general starting algorithm. Waves identifies TimeWarp B as an alternative for regions where A produces artifacts, particularly around extreme time changes or difficult vocal material.
Choose the algorithm for a track from its menu. A region's left-side three-dot menu allows a local TimeWarp choice. Neither description guarantees artifact-free output.
Absolute and Absolute Ignore Vibrato
The pitch algorithm is chosen for the track, not independently per region.
Absolute is the general pitch-syncing mode. Absolute Ignore Vibrato avoids processing during detected vibrato periods. That can avoid a kind of processing problem described by Waves, but it can also leave pitch differences between reference and sync tracks during those periods.
Do not read “Ignore Vibrato” as a promise that every vibrato performance will sound better. It changes which material the algorithm processes.
Transpose, Formant and Fine
The panel beneath the track controls opens Transpose and Formant adjustments. Transpose changes pitch; Formant adjusts the formant characteristic separately.
The guides specify ±12 semitones. Fine displays the adjustment in cents, with ±1200 cents covering the same total interval. Fine is finer resolution, not an extra octave of range.
Pitch Tightness has a non-linear response. The guides describe the 100%–50% portion as gradual changes over a quarter-tone span, or 50 cents. From 50% toward zero, it transitions back toward the original pitch. It should not be treated as a straight-line blend percentage.
Region Transpose and Formant controls use the same documented semitone/cents distinction. Make a local change when the issue belongs to one passage rather than shifting the entire track.
Local edits: Ignore, Bypass, regions and Sync Markers
These tools solve different problems. Ignore changes what the reference contributes to the calculation. Bypass leaves selected sync audio unprocessed. A Sync Marker changes a local alignment.
| Tool | Where it works | Documented action |
|---|---|---|
| Ignore, shortcut I | A selection on a REF track | Excludes that area from sync and pitch calculations. It does not delete the recording. Drag its borders or move the selection to adjust it. |
| Bypass Selection, shortcut B | A selection on a SYNC track | Leaves both timing and pitch unprocessed in the selected area. Its borders and position are adjustable. |
| Split Region, shortcut E in Insert/AudioSuite | At the cursor in a sync track | Creates a region for local control. In ARA, create the corresponding region in the DAW. |
| Sync Marker, shortcut M | An already aligned SYNC track | Moves a local sync position relative to the reference. It cannot be placed on a reference track. |
Waves recommends Ignore for relatively short unwanted reference events. For longer passages that should remain untouched, use Bypass on the sync tracks instead.
Sync Markers require the status to be In Sync. Drag the marker to change alignment, and adjust the small border flags to set the transition area. Moving the marker resets its borders, so set those borders after positioning it.
Alt/Opt-click returns a marker to its initial position. Remove it with its contextual command or by selecting it and pressing Delete.
Each region has three-dot panels: the left contains Time/Pitch Tightness and TimeWarp controls; the right contains Transpose, Formant and Fine. The pitch algorithm remains a track-level choice.
How global and local Time Tightness combine
The guides explicitly describe Global × Track × Region multiplication for Time Tightness.
If global timing is 80% and the track is 50%, the effective track timing is 40%. If a region on that track is also 50%, that region's effective timing is 20%.
This is why a local control can look high while the actual result remains relaxed. Check the layers above it before treating one slider as the whole setting. Do not extend this timing example into an undocumented formula for pitch processing.
Reference DeNoise is analysis—not audible cleanup
Reference tracks offer Auto, Off and On DeNoise modes. They affect the reference sidechain used for alignment analysis. They do not remove noise from the reference audio output or clean the sync tracks.
In Auto, Waves says the system checks whether noise reduction is needed. On applies it; Off disables it. If the reference is already clean, Waves recommends leaving it off to avoid unnecessary calculation work.
The manuals disagree about the default. Their DeNoise section calls it On, while the Settings page identifies Auto as the default. Check the selected mode in your session instead of relying on a single claimed factory setting.
For actual cleanup, Clarity Vx serves a different purpose. Analysis-side DeNoise is not a substitute for an audible restoration processor.
Navigation and display controls
The Track List button opens or hides the side panel. Its eye icons hide tracks visually; they do not bypass processing. Alt/Opt-click an eye to hide or reveal a reference group. The rectangular processing control beside a track is the bypass action.
The ARA guide describes DAW order and REF grouping. REF places sync tracks under their references. Do not expect the Insert/AudioSuite track order to mirror the DAW channel order automatically; its guide explicitly distinguishes that behavior.
Use T/R to zoom the timeline in/out, or click and drag vertically on its zoom control. The bottom scrollbar moves through time, while the right scrollbar moves through tracks. Shift with the mouse wheel moves the time view.
Drag a track in the timeline to change its order. Drag between tracks to adjust height; Alt/Opt applies the height change to all tracks. The small fader at a track's right edge changes waveform height, not audio gain.
Reference Overlay superimposes the reference outline over associated sync tracks. The marker-visibility arrow shows or hides Sync Markers without deleting them.
For Pro Tools ARA, the guide also describes a bottom Sync Vx tab: its left side switches the view; its Expand icon undocks or redocks the window. This is a specifically documented Pro Tools function, not a promise of identical window controls in every host.
Global controls and preset handling
The top bar contains Undo/Redo, the preset browser, previous/next preset buttons, Save, timeline resolution, sync status, global Time and Pitch controls, plugin bypass and Settings. The browser's menu exposes additional preset options.
Global Time and Pitch each have enable controls and tightness adjustment. The plugin's global bypass removes the whole plugin from processing. Track-level and local bypass serve narrower purposes.
A saved preset can include track count/order, regions, markers, ignored areas and bypass selections with their timeline positions. It does not preserve track IDs. Loading it into another session can therefore create inappropriate assignments or place markers where they do not belong.
My recommendation is to treat a preset as a structured starting point, not a universal vocal arrangement. Check the reference assignments, regions and markers after loading one.
Settings, capture files and finishing
| Setting or command | Documented purpose |
|---|---|
| Playhead: Page / No Scrolling | Page advances the view at its right boundary. No Scrolling keeps the view still while the playhead moves through it. The guides describe returning to the original view after stopping or looping. |
| Denoise default | Chooses the reference-analysis mode; the On/Auto default discrepancy is noted above. |
| Handling Stereo Files | Sync Vx is described as a mono processor. The menu offers Average, Left Only and Right Only. The manuals' printed equation for Average is not used here as a verified signal-flow formula. |
| Solo Mode | Selects Exclusive or Latch behavior. |
| Tooltips | Enables control explanations on hover; documented as On by default. |
| Delete Caches on exit | Removes cache data intended to speed later processing. This is not an instruction to remove audio or system files manually. |
| Overlapping-regions warning | Controls the warning. The guides state that overlapping regions are not supported. |
| Error notifications | Re-enables notifications previously dismissed with “Don't Show Again.” |
| Keyboard Shortcuts / Show Wizard | Edits shortcuts or reopens the getting-started wizard. |
| User Guide / WaveSystem Guide / More Info | Opens documentation or the product page. |
| Update Available | Opens Waves Central to check updates. It is not a processing control. |
The Insert/AudioSuite guide additionally documents Export Session Captured Audio for transferring captured audio with a project, and Clear All Captured Audio, after which older sessions may need recapturing.
A Missing Audio warning can result from missing capture files, cleared captures or an improperly saved session. Follow the supplied wizard to import or recapture the required material. Do not assume an ordinary plugin preset carries all captured audio.
For ARA, the guide says to commit or render through the DAW when finished. The exact host operation is DAW-specific. This article has not performed or verified that operation in a session.
A conservative vocal-alignment workflow
- Choose Insert, AudioSuite or ARA for the actual host, and bring in the correct audio using that workflow.
- Assign references by musical role. Confirm that every intended sync track belongs to the right group.
- Decide whether a track needs timing, pitch or both. Relax tightness rather than treating maximum correction as the goal.
- Address short reference noises with Ignore; leave intentional sync-track phrases alone with Bypass.
- Use regions and Sync Markers for local issues after the initial alignment completes.
- Check group playback and individual takes, then commit using the host's documented procedure while preserving the original recordings.
These are editorial working recommendations based on the documented controls. They are not a report of a performed session or a promise about the quality of any particular vocal.
Related Waves tools
Waves Tune Real-Time is aimed at real-time pitch correction rather than reference-based multitrack alignment. Doubler creates doubling effects; it is not the same as aligning separately recorded takes. Clarity Vx addresses audible background-noise cleanup, unlike Sync Vx's reference-analysis DeNoise.
Choose by the problem: align recorded performances, correct pitch in real time, create an effect, or clean noise. These jobs may coexist, but the tools are not interchangeable.
Sources
Official Sync Vx product information, Insert/AudioSuite user guide and ARA user guide, checked October 18, 2026.
The two manuals supply the control and workflow descriptions. Their default-setting inconsistency is retained above. No exact installed build, host support matrix, processing speed, listening result or successful render is inferred from a vendor screenshot.
FAQ
What does Waves Sync Vx do?
Sync Vx aligns timing and pitch on recorded tracks to reference performances. It supports up to 16 total tracks with as many as four references, with global, track and region-level control.
Does Sync Vx require ARA?
No. Waves documents Insert, AudioSuite and ARA workflows. AudioSuite is the documented Pro Tools option, while exact host and version support should be checked on the current product page. The three formats operate independently and do not share audio or information.
Can I align timing without changing pitch?
Yes. Time and Pitch have separate enable controls. Turn off Pitch for the track when you want timing alignment without pitch matching, and use local Bypass where a passage should retain both its original timing and pitch.
Does DeNoise clean the audio I hear?
No. Sync Vx DeNoise affects the reference sidechain used for alignment analysis, not audible cleanup of the reference or sync tracks. The manuals disagree about whether its default is On or Auto, so check the selected mode in the session.
What is the difference between Ignore and Bypass?
Ignore excludes a selected reference area from alignment calculations without deleting the source recording. Bypass leaves a selected sync-track area unprocessed for both timing and pitch. They operate on different roles in the alignment.
Why does moving a Sync Marker change its borders?
The guides state that moving a marker resets its transition borders. Position the marker first, then adjust its borders. Markers work on aligned sync tracks when the status is In Sync, not on reference tracks.
Does Fine increase the Transpose or Formant range?
No. The guides describe plus or minus 12 semitones and, in Fine view, plus or minus 1200 cents. These cover the same interval; Fine changes the adjustment resolution rather than adding range.
Can a preset safely recreate another vocal session?
Not automatically. Presets can store track count and order, regions, markers, ignored areas and bypass selections, but not track IDs. Loading one into a different session requires checking its reference assignments and timeline edits.

About the Author
Joseph Nilo has been working professionally in all aspects of audio and video production for over twenty years. His day-to-day work finds him working as a video editor, 2D and 3D motion graphics designer, voiceover artist and audio engineer, and colorist for corporate projects and feature films.